How to upload a batch of Pointclouds
Learn how to efficiently upload a batch of Pointcloud data to your project
1. Click here
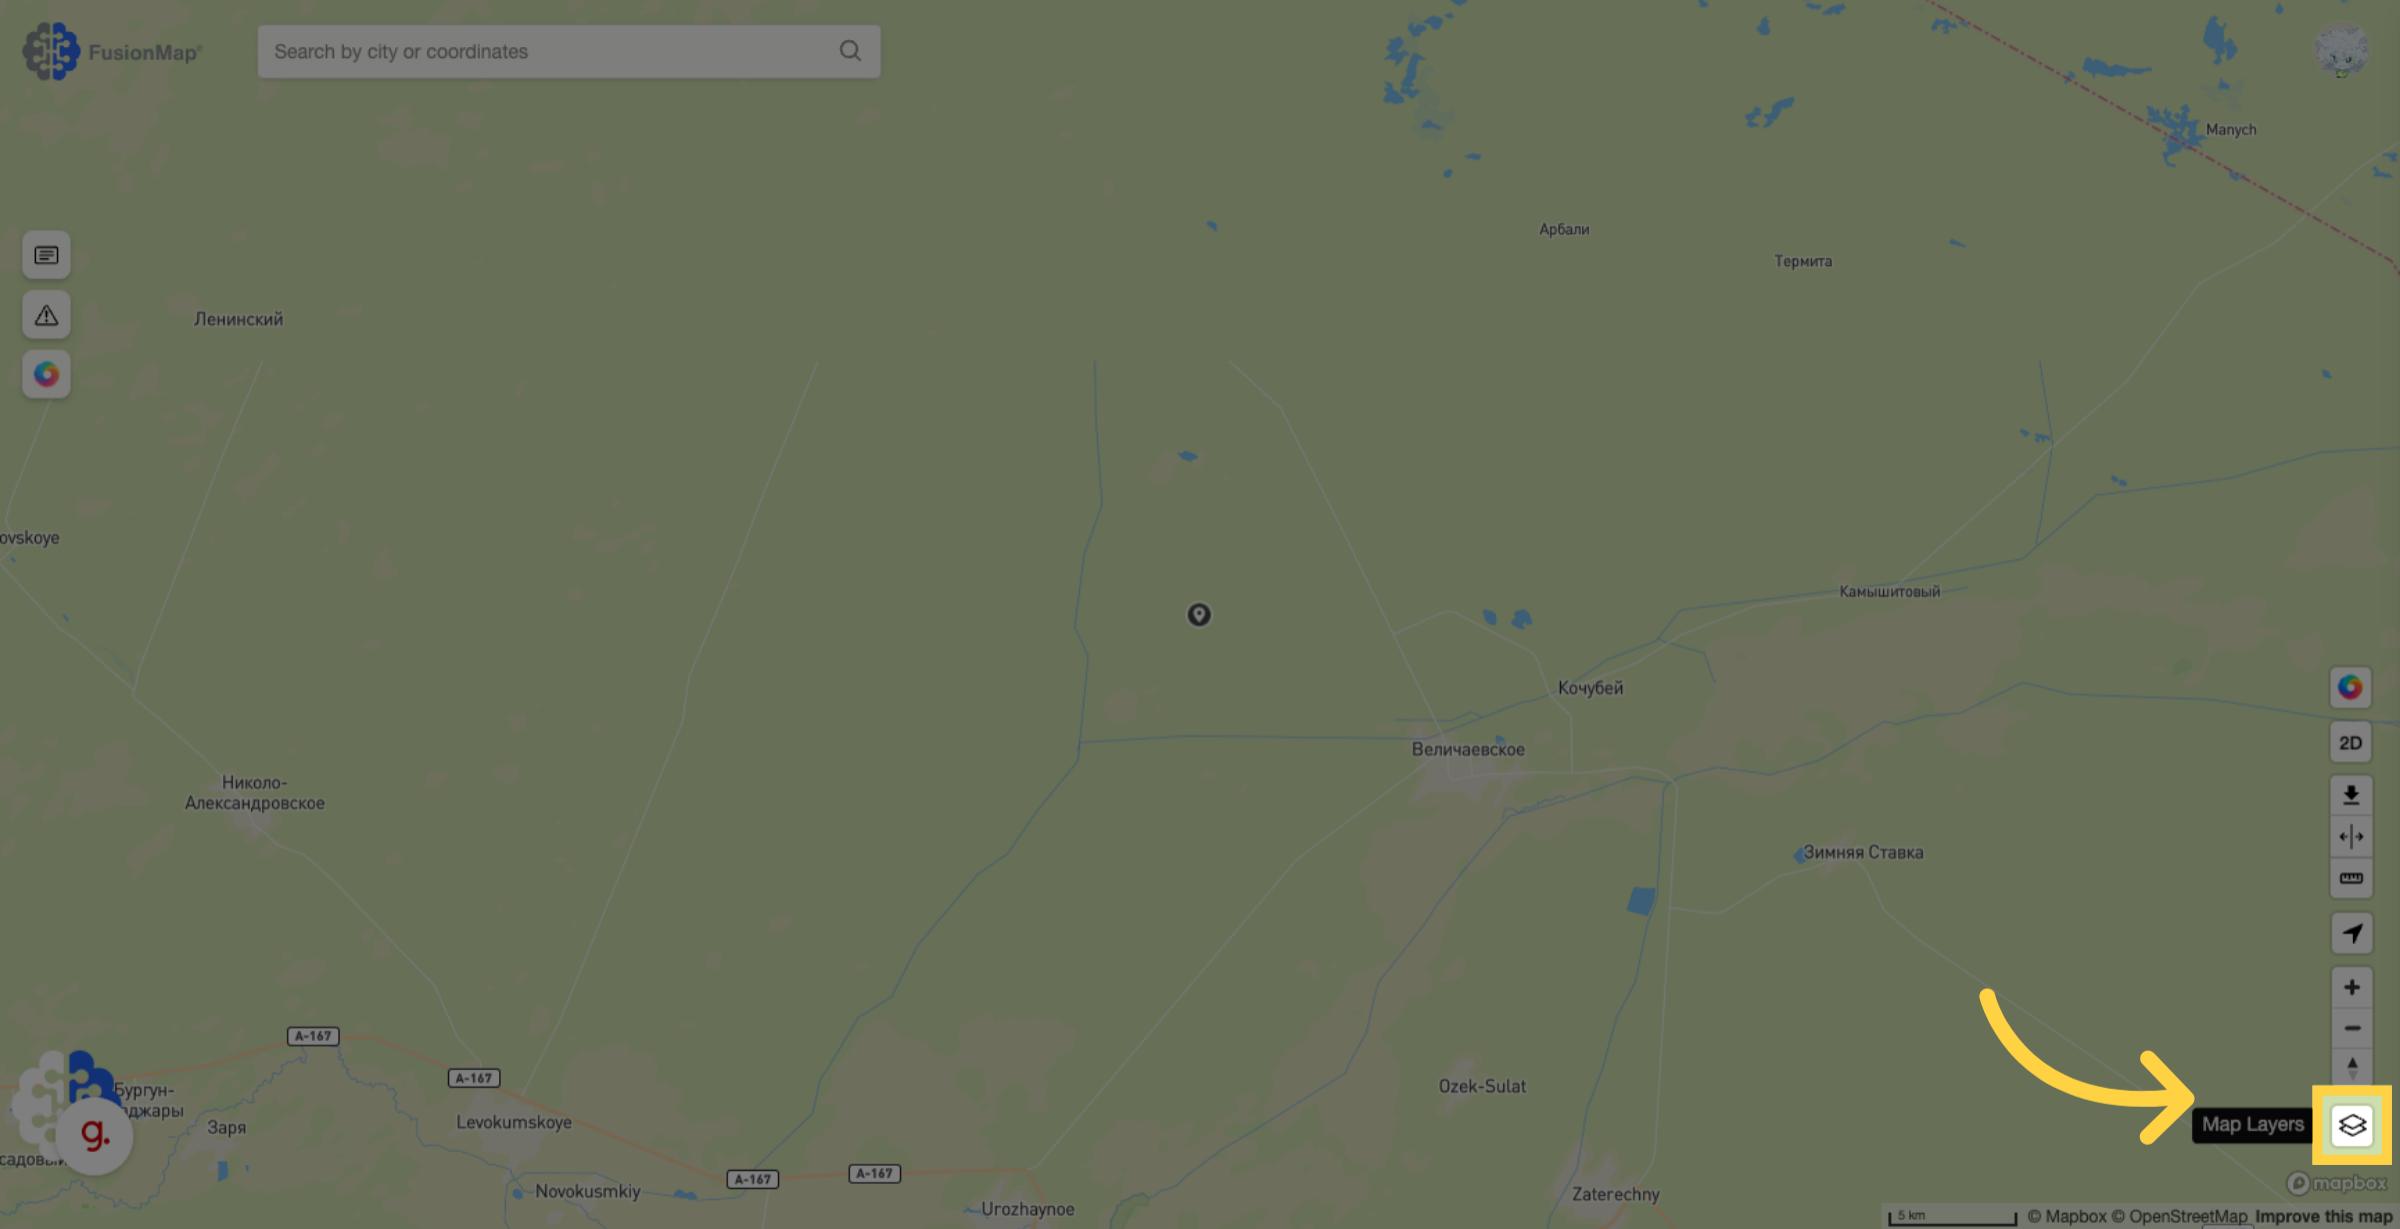
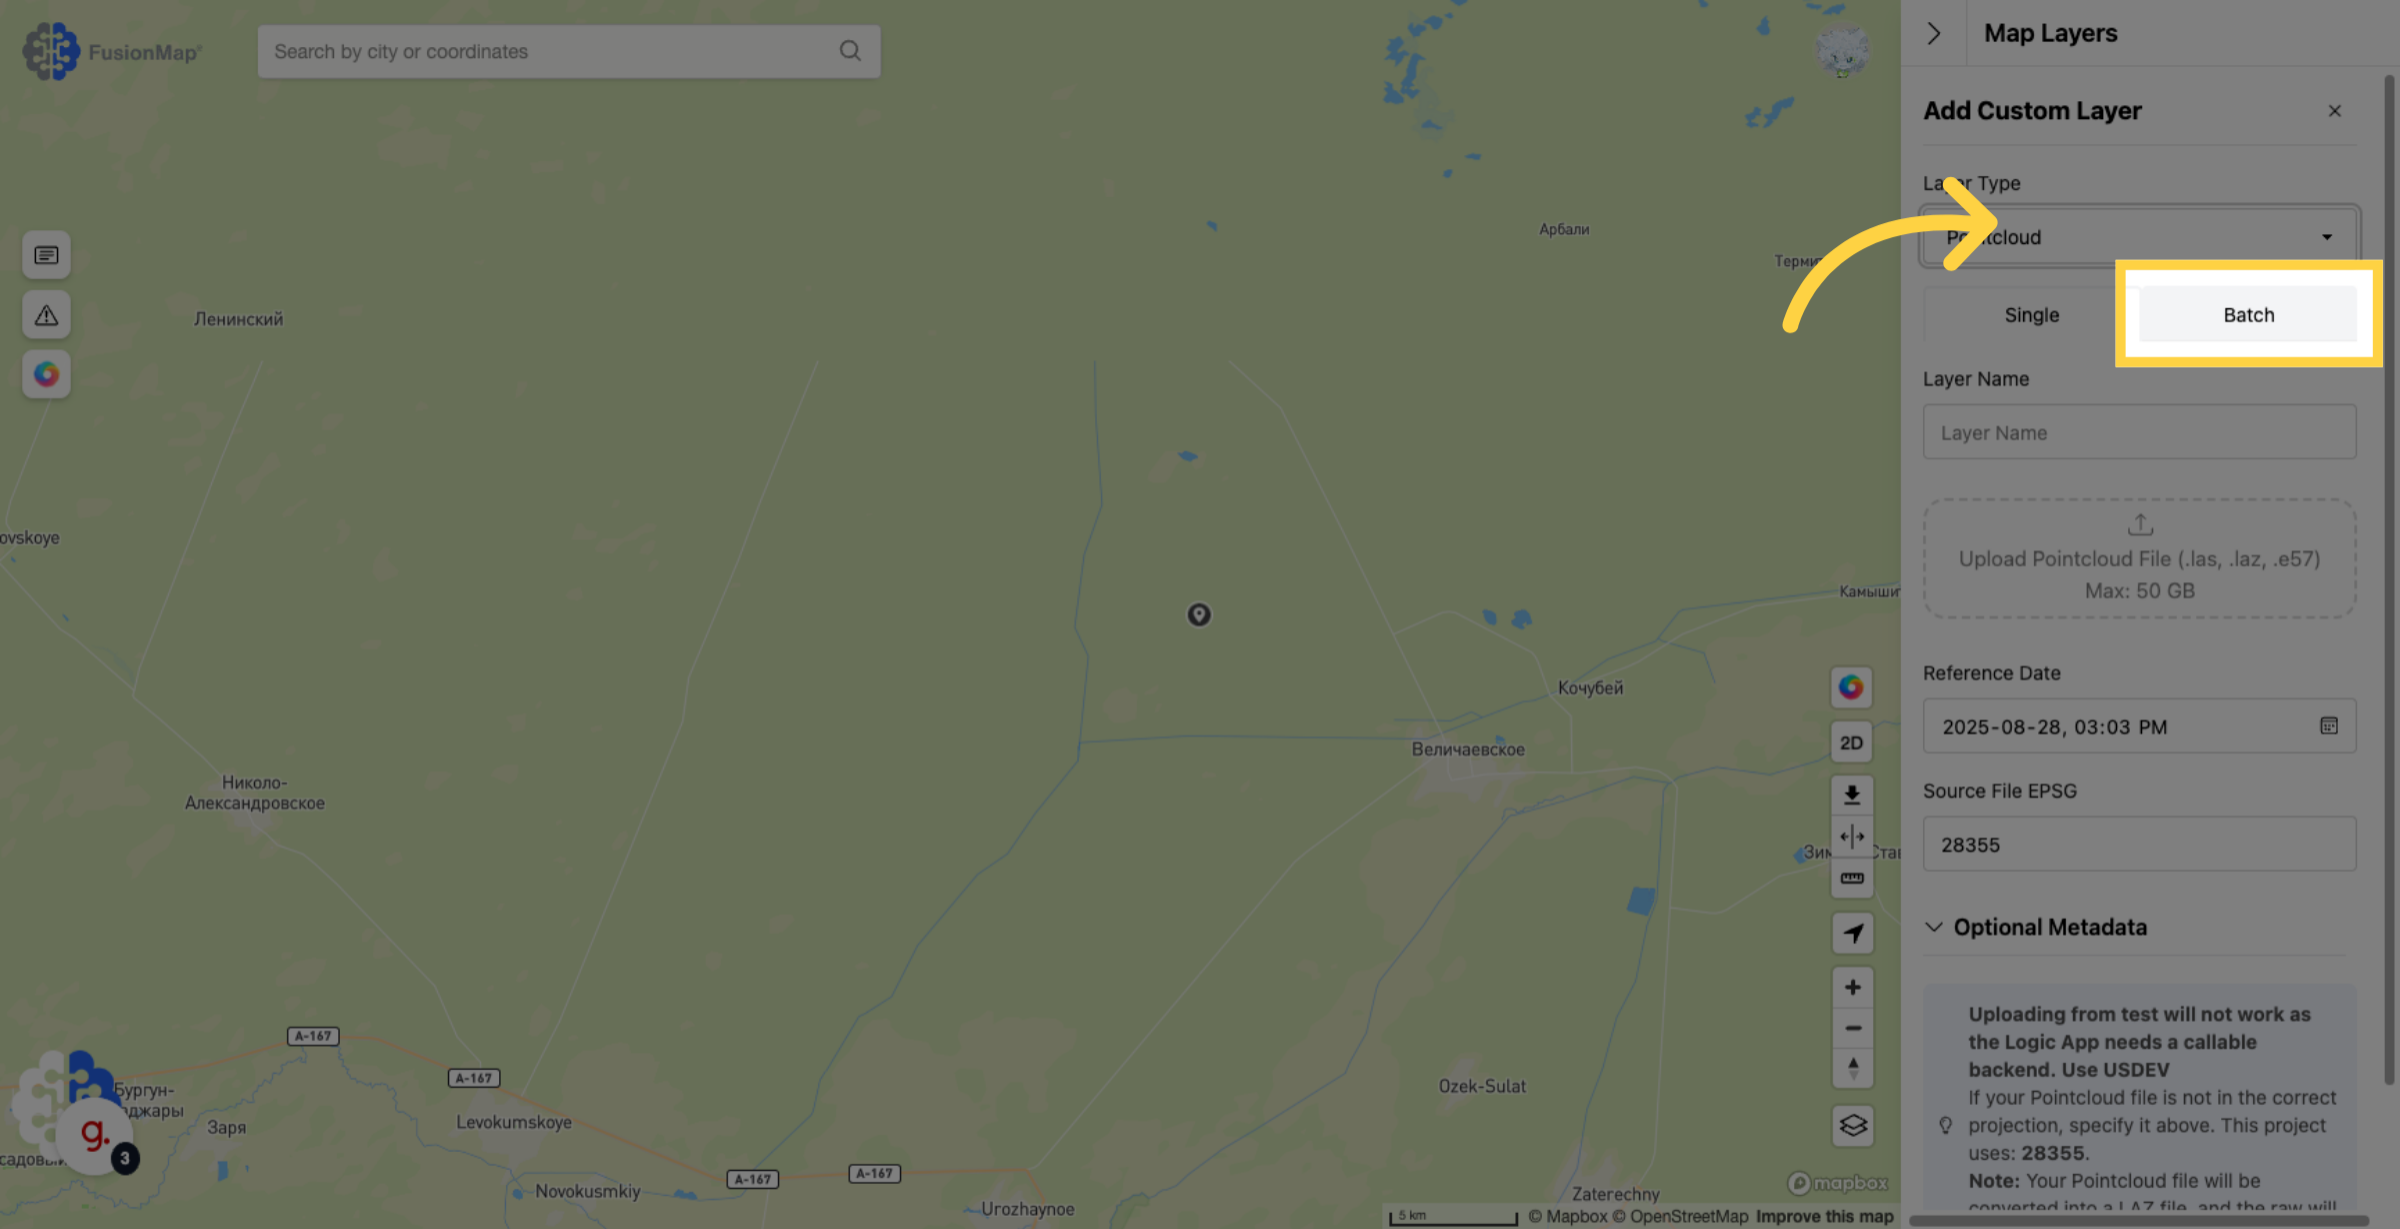
2. Click "Add Layer"
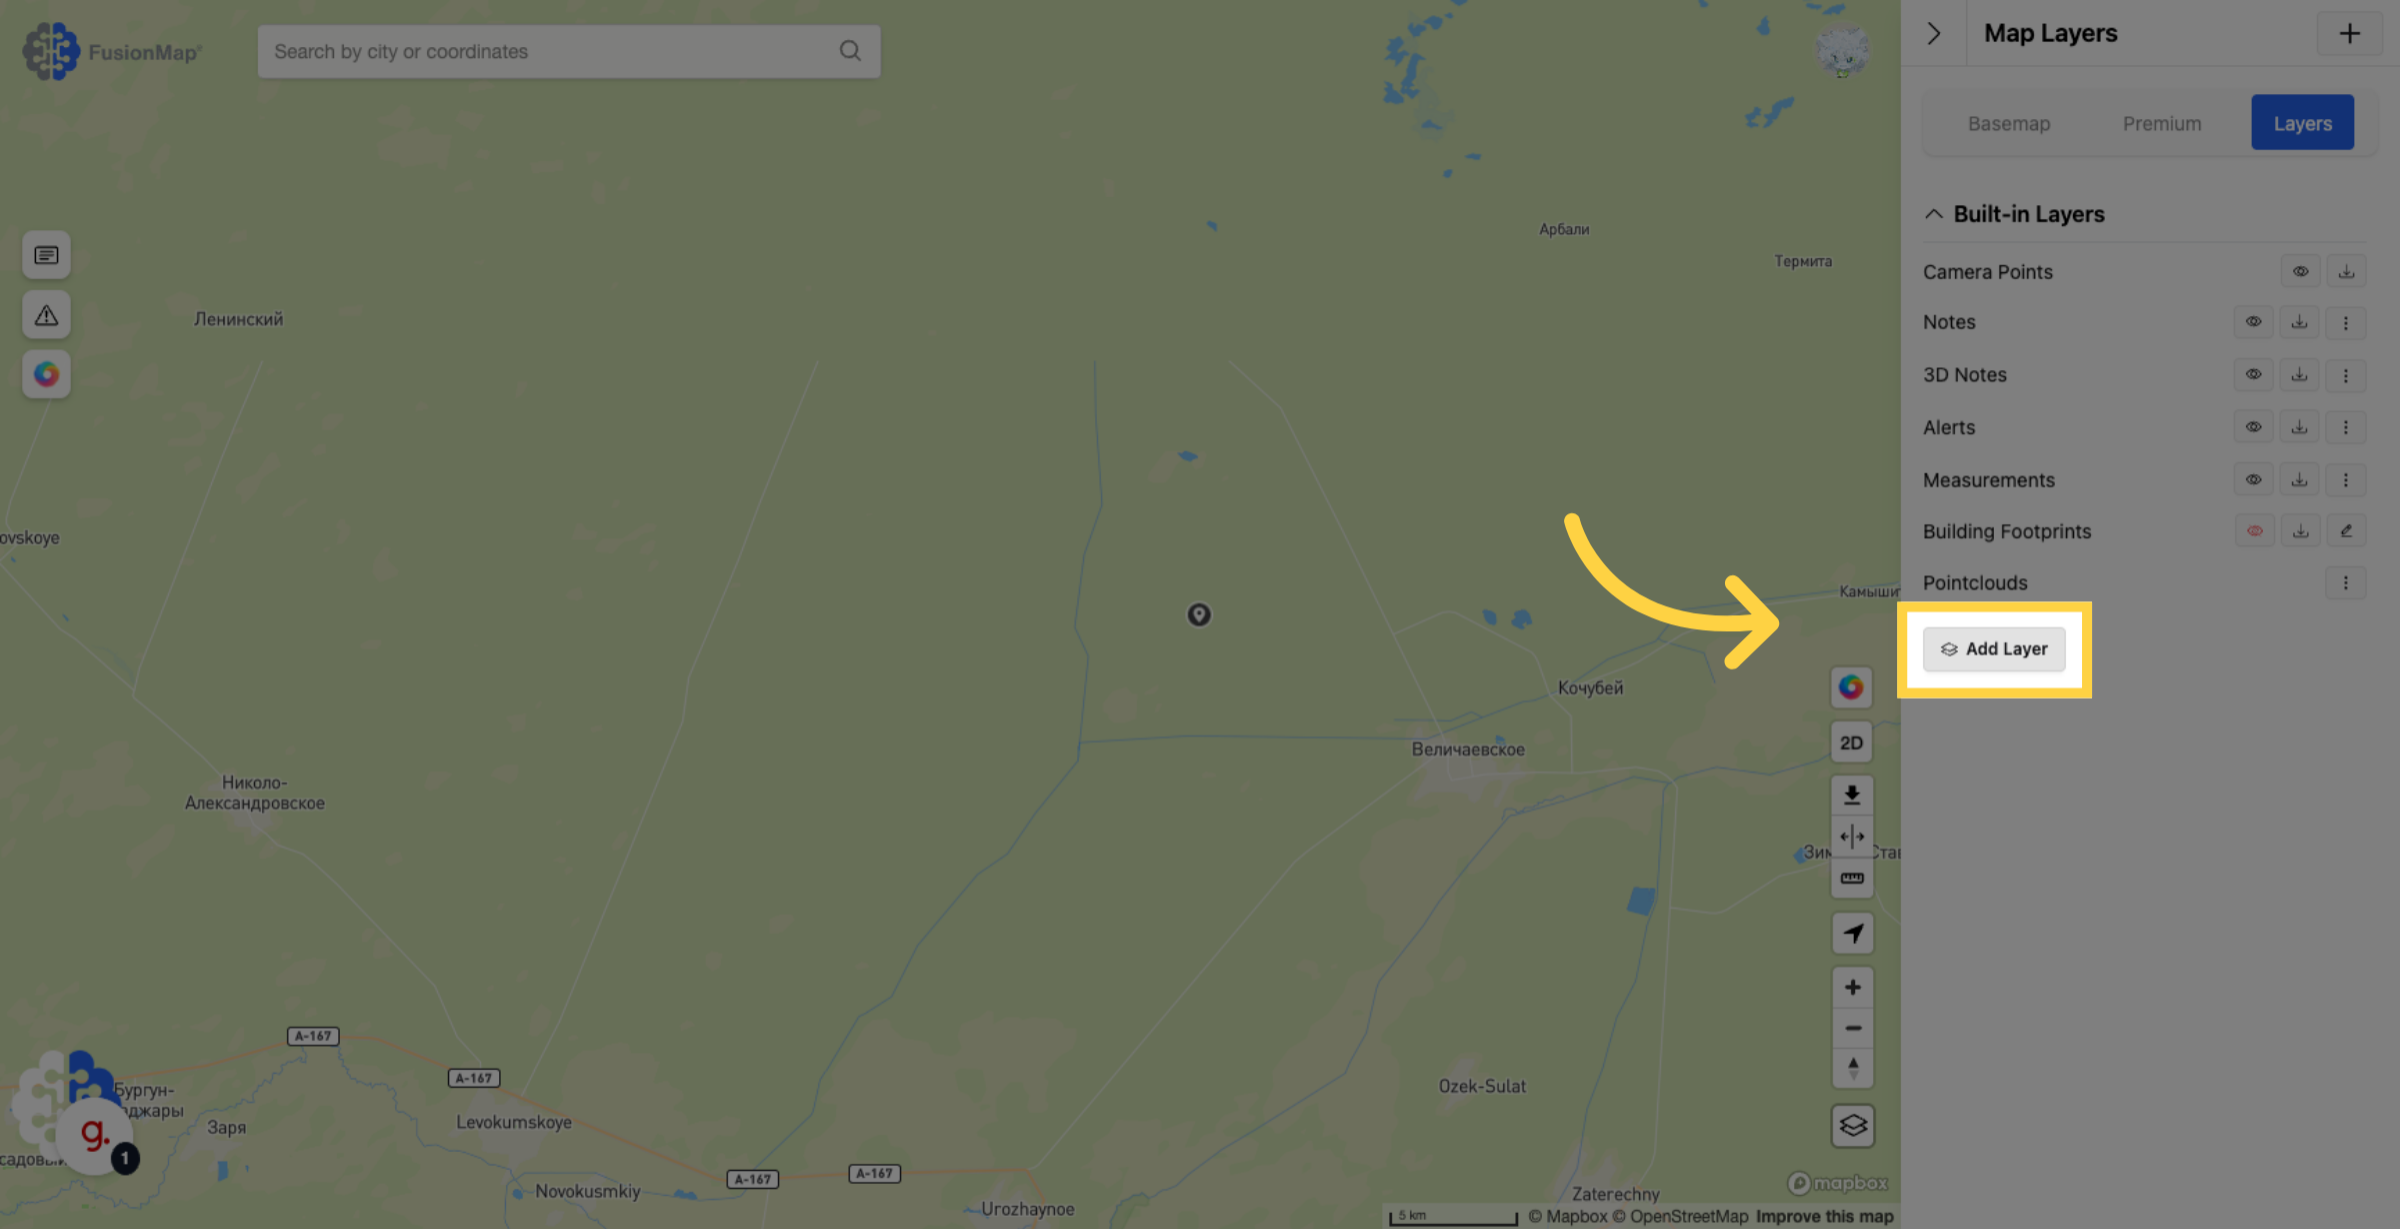
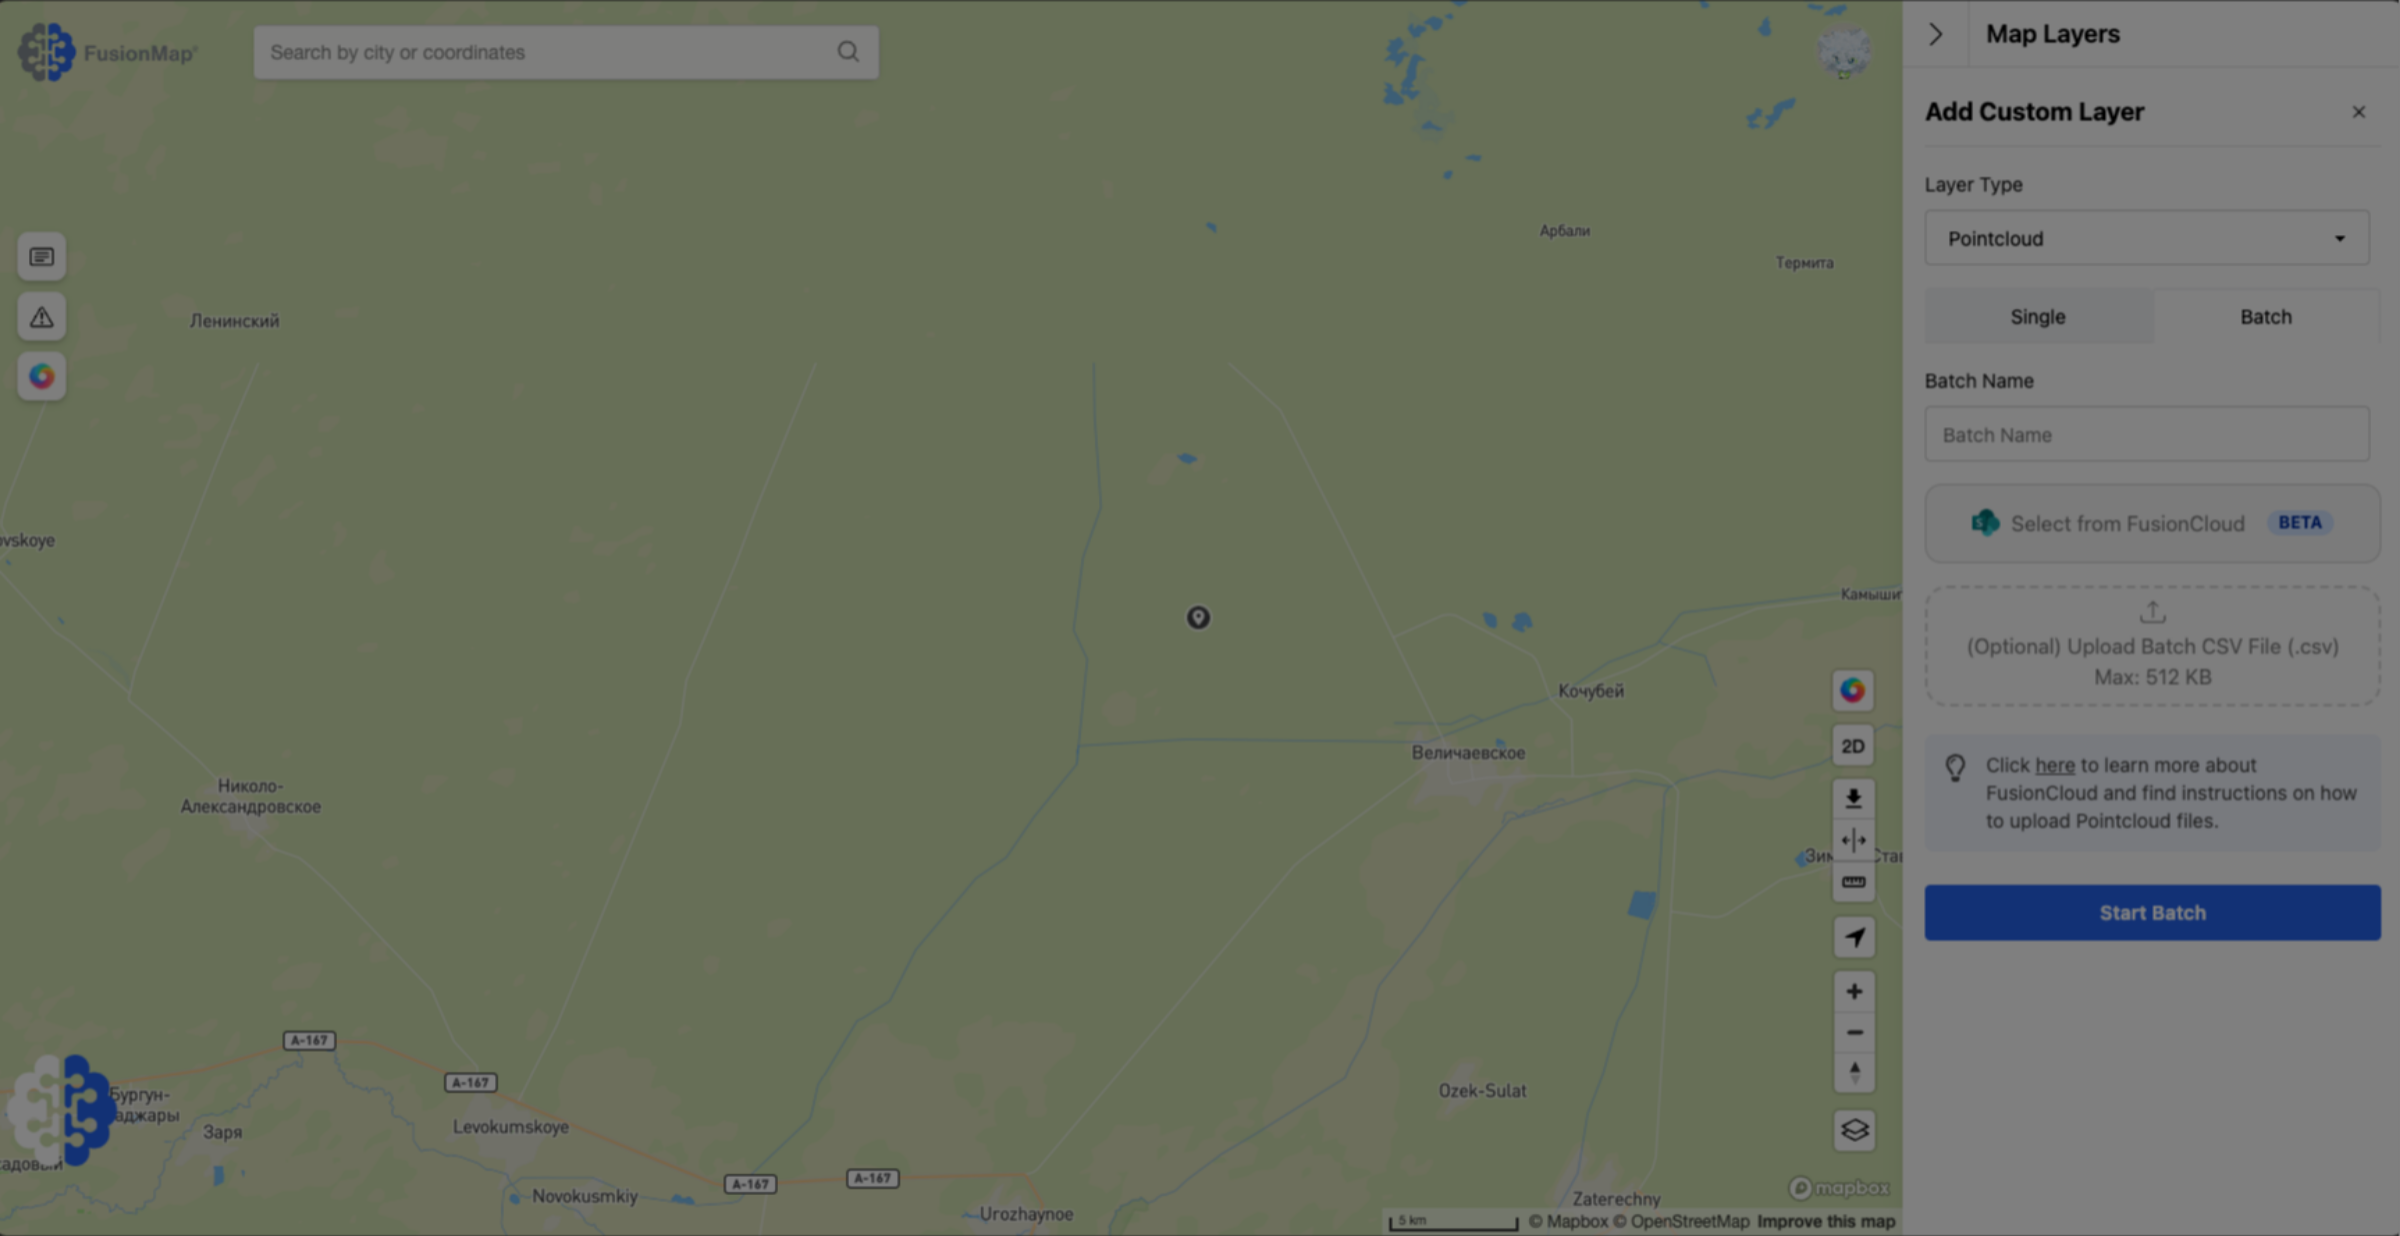
3. Change the layer type
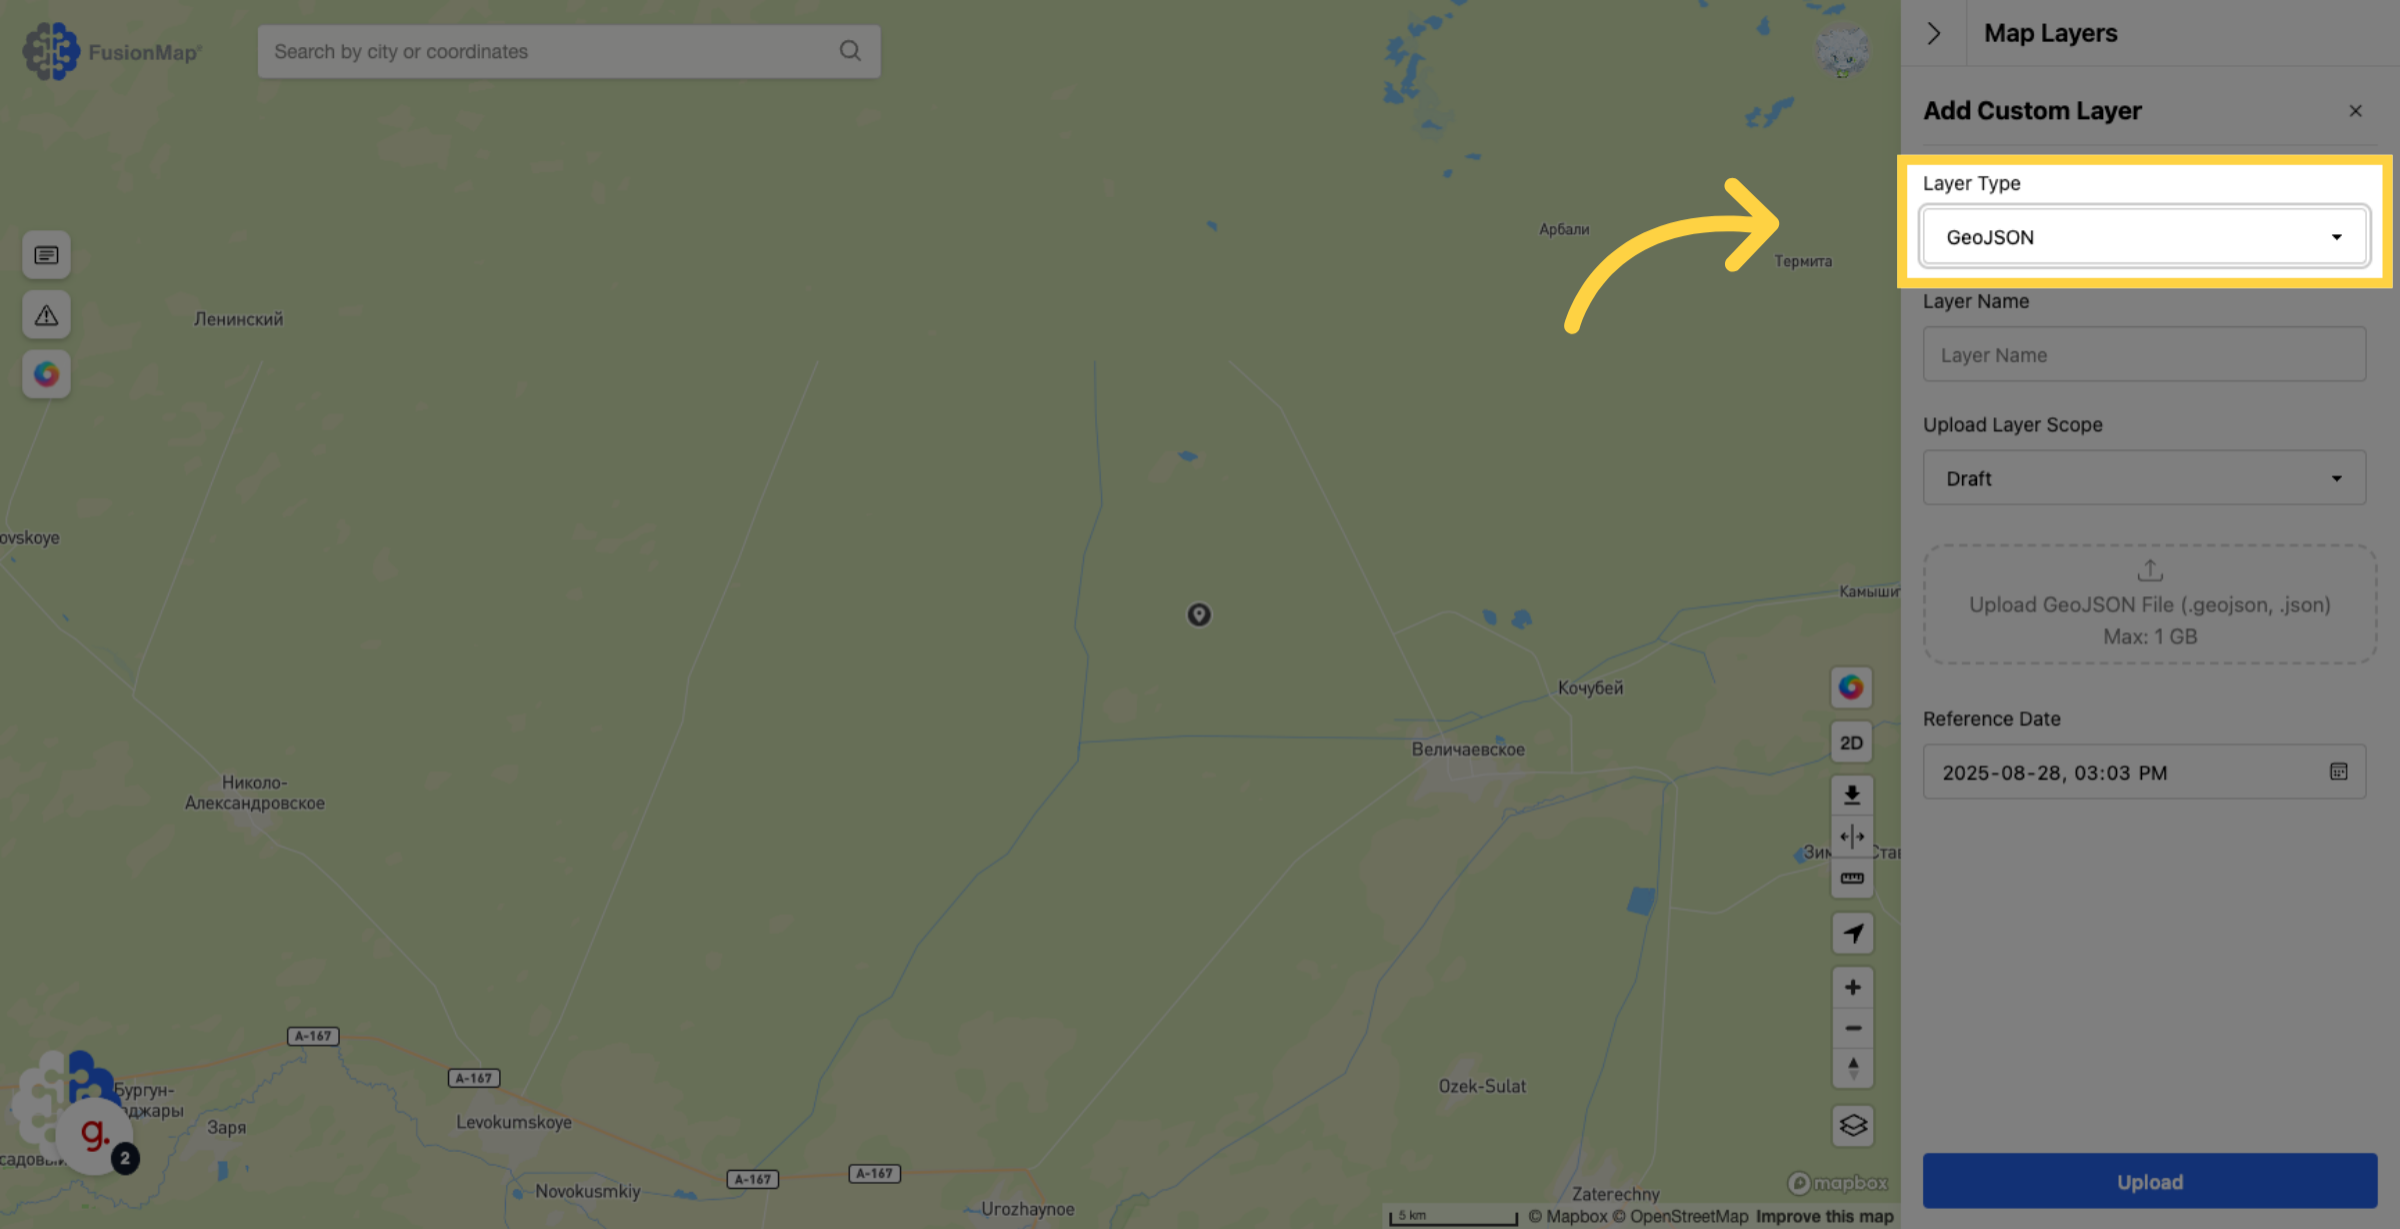
4. Change Layer Type to Pointcloud
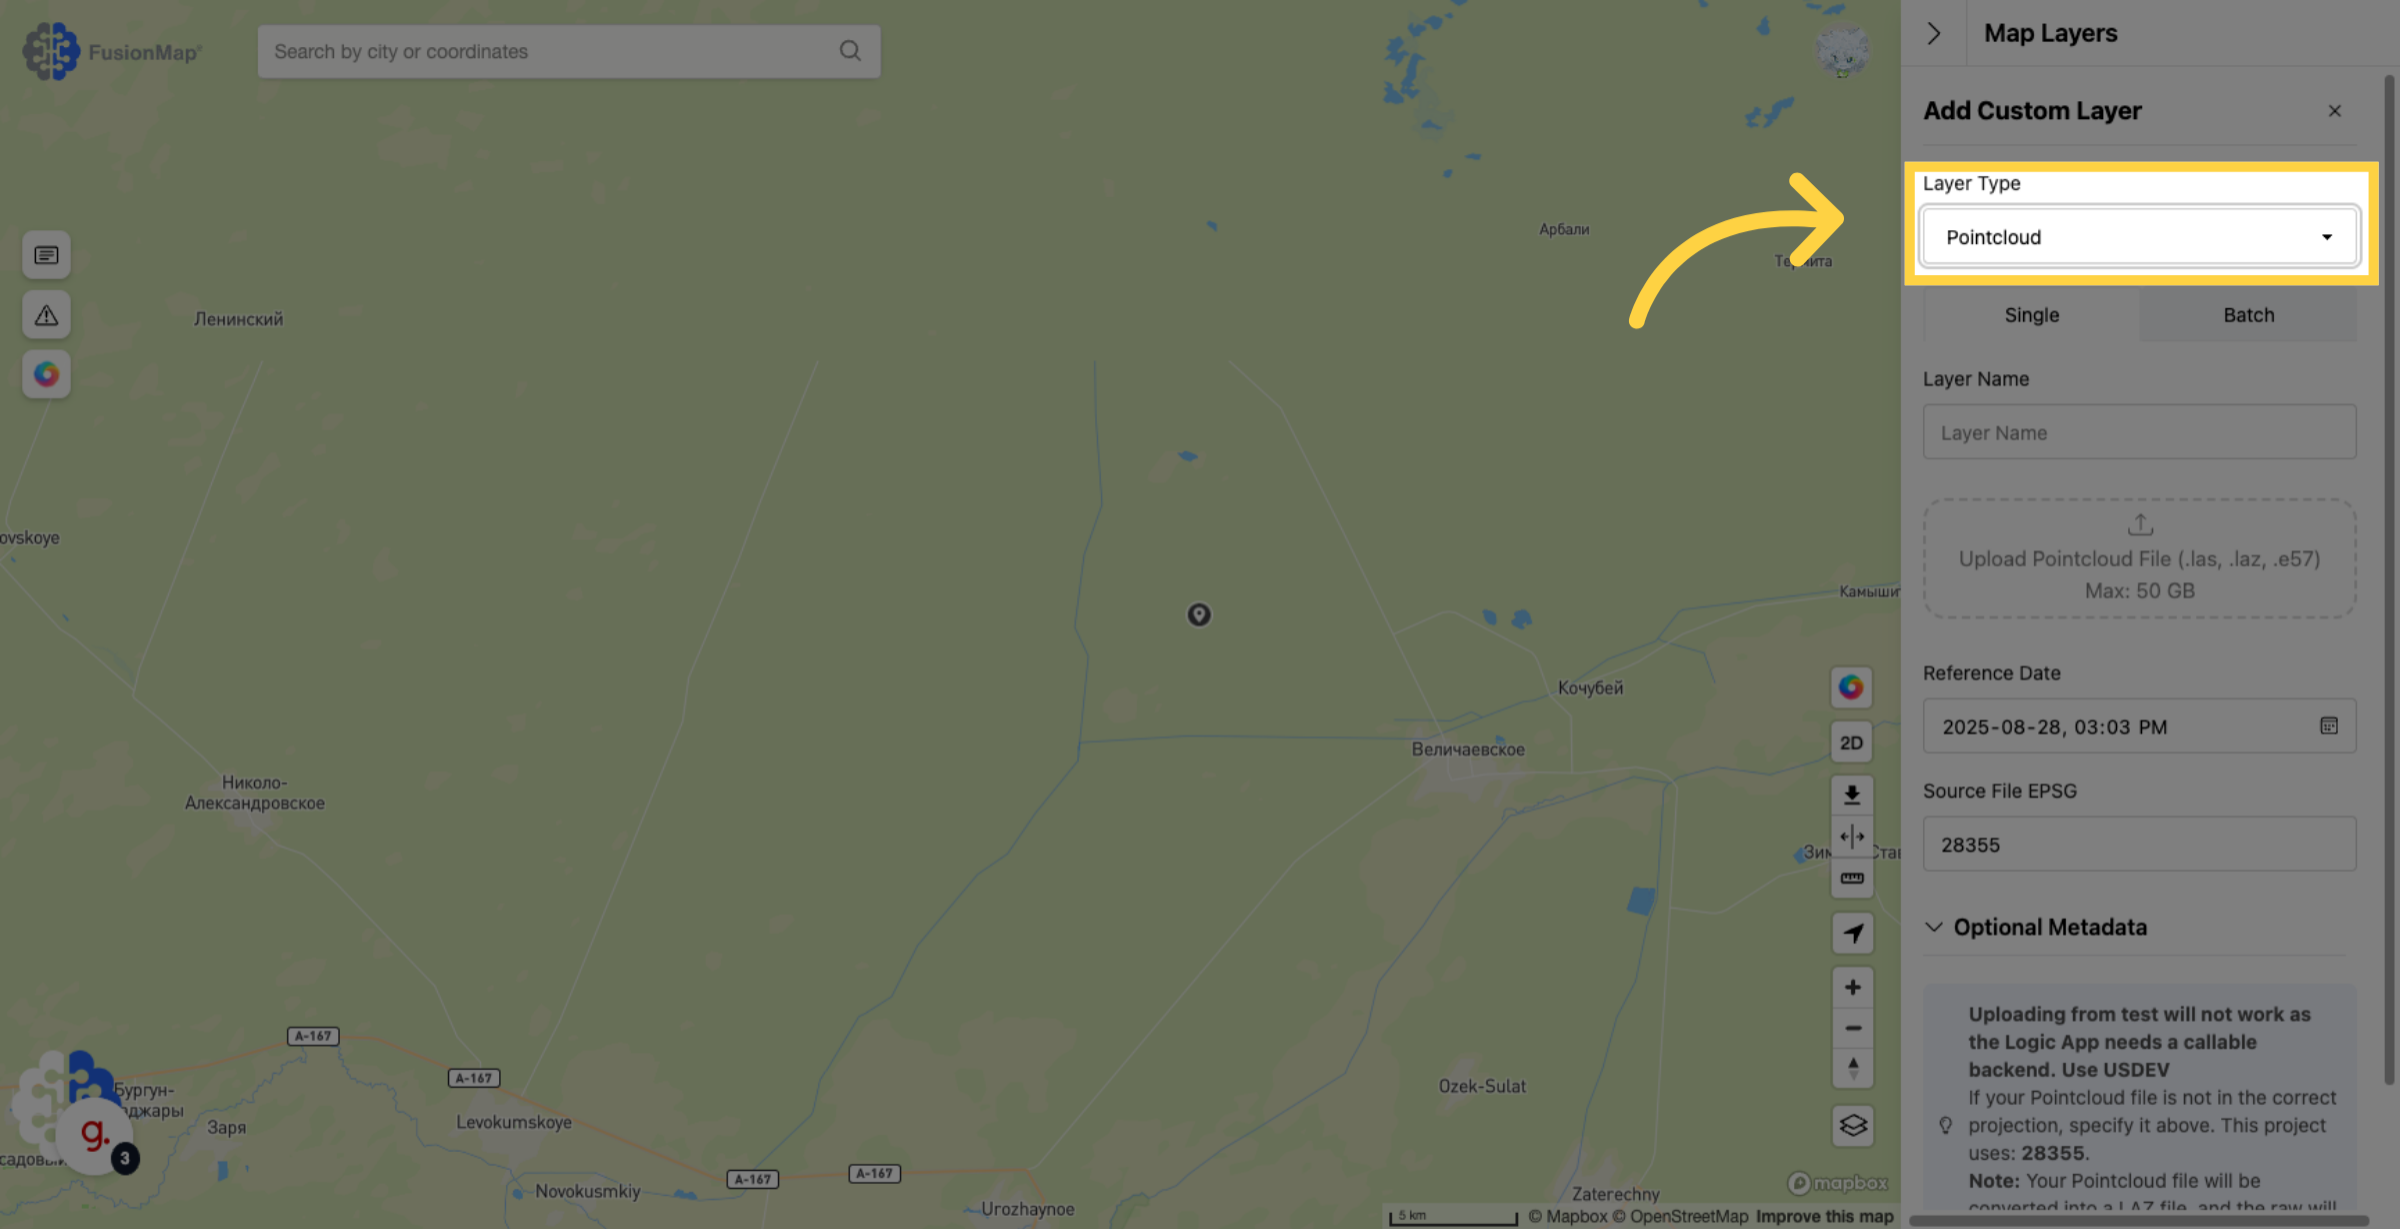
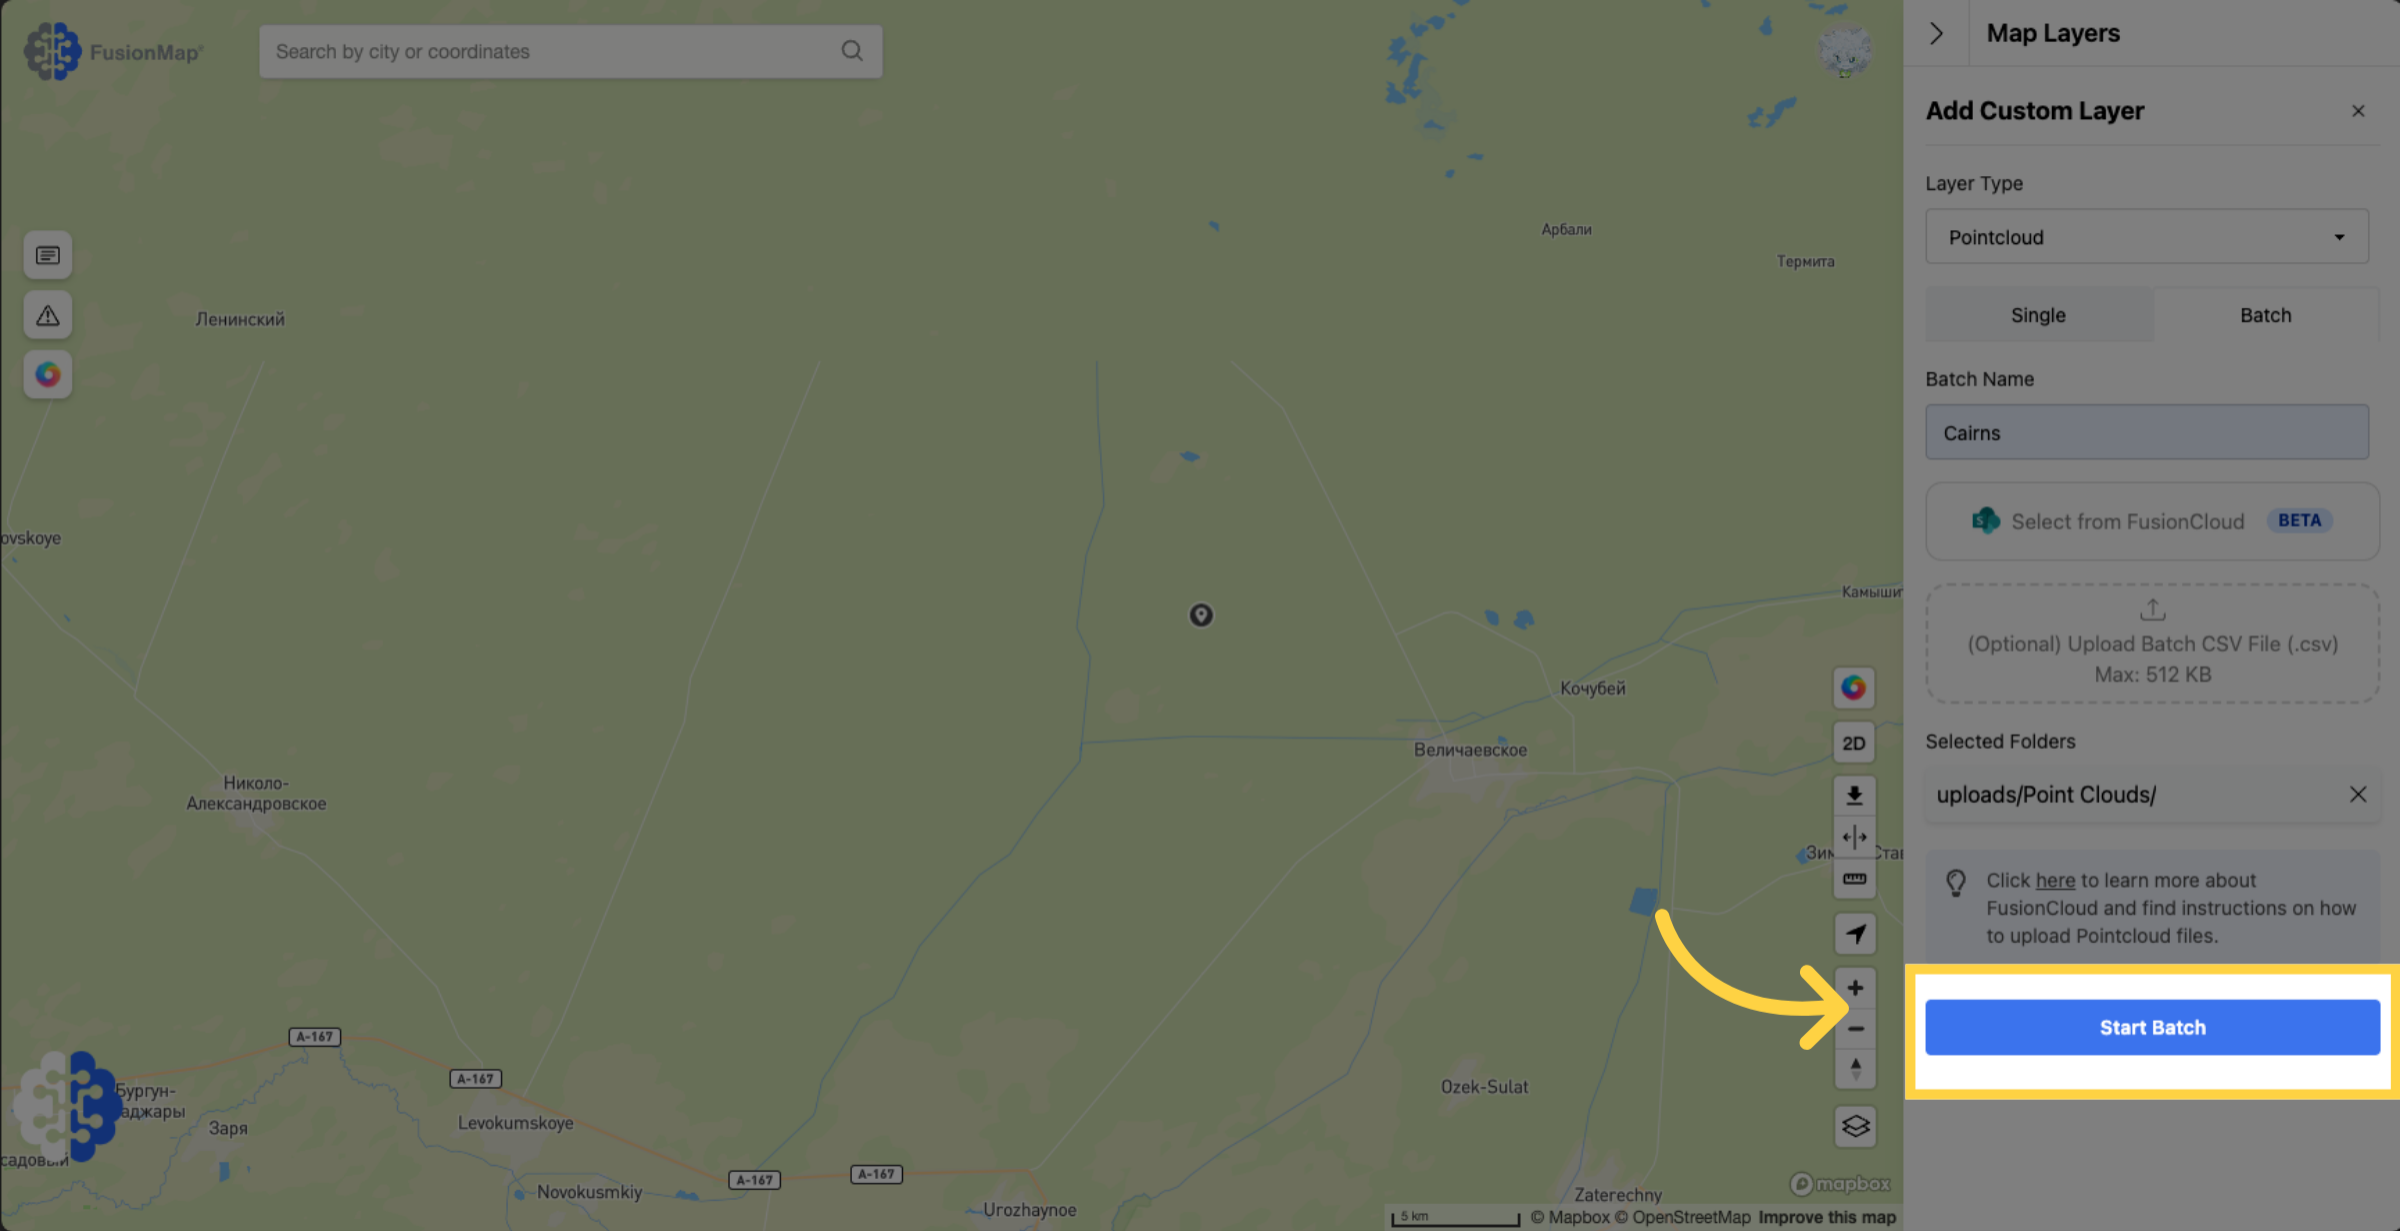
5. Switch to the batch tab
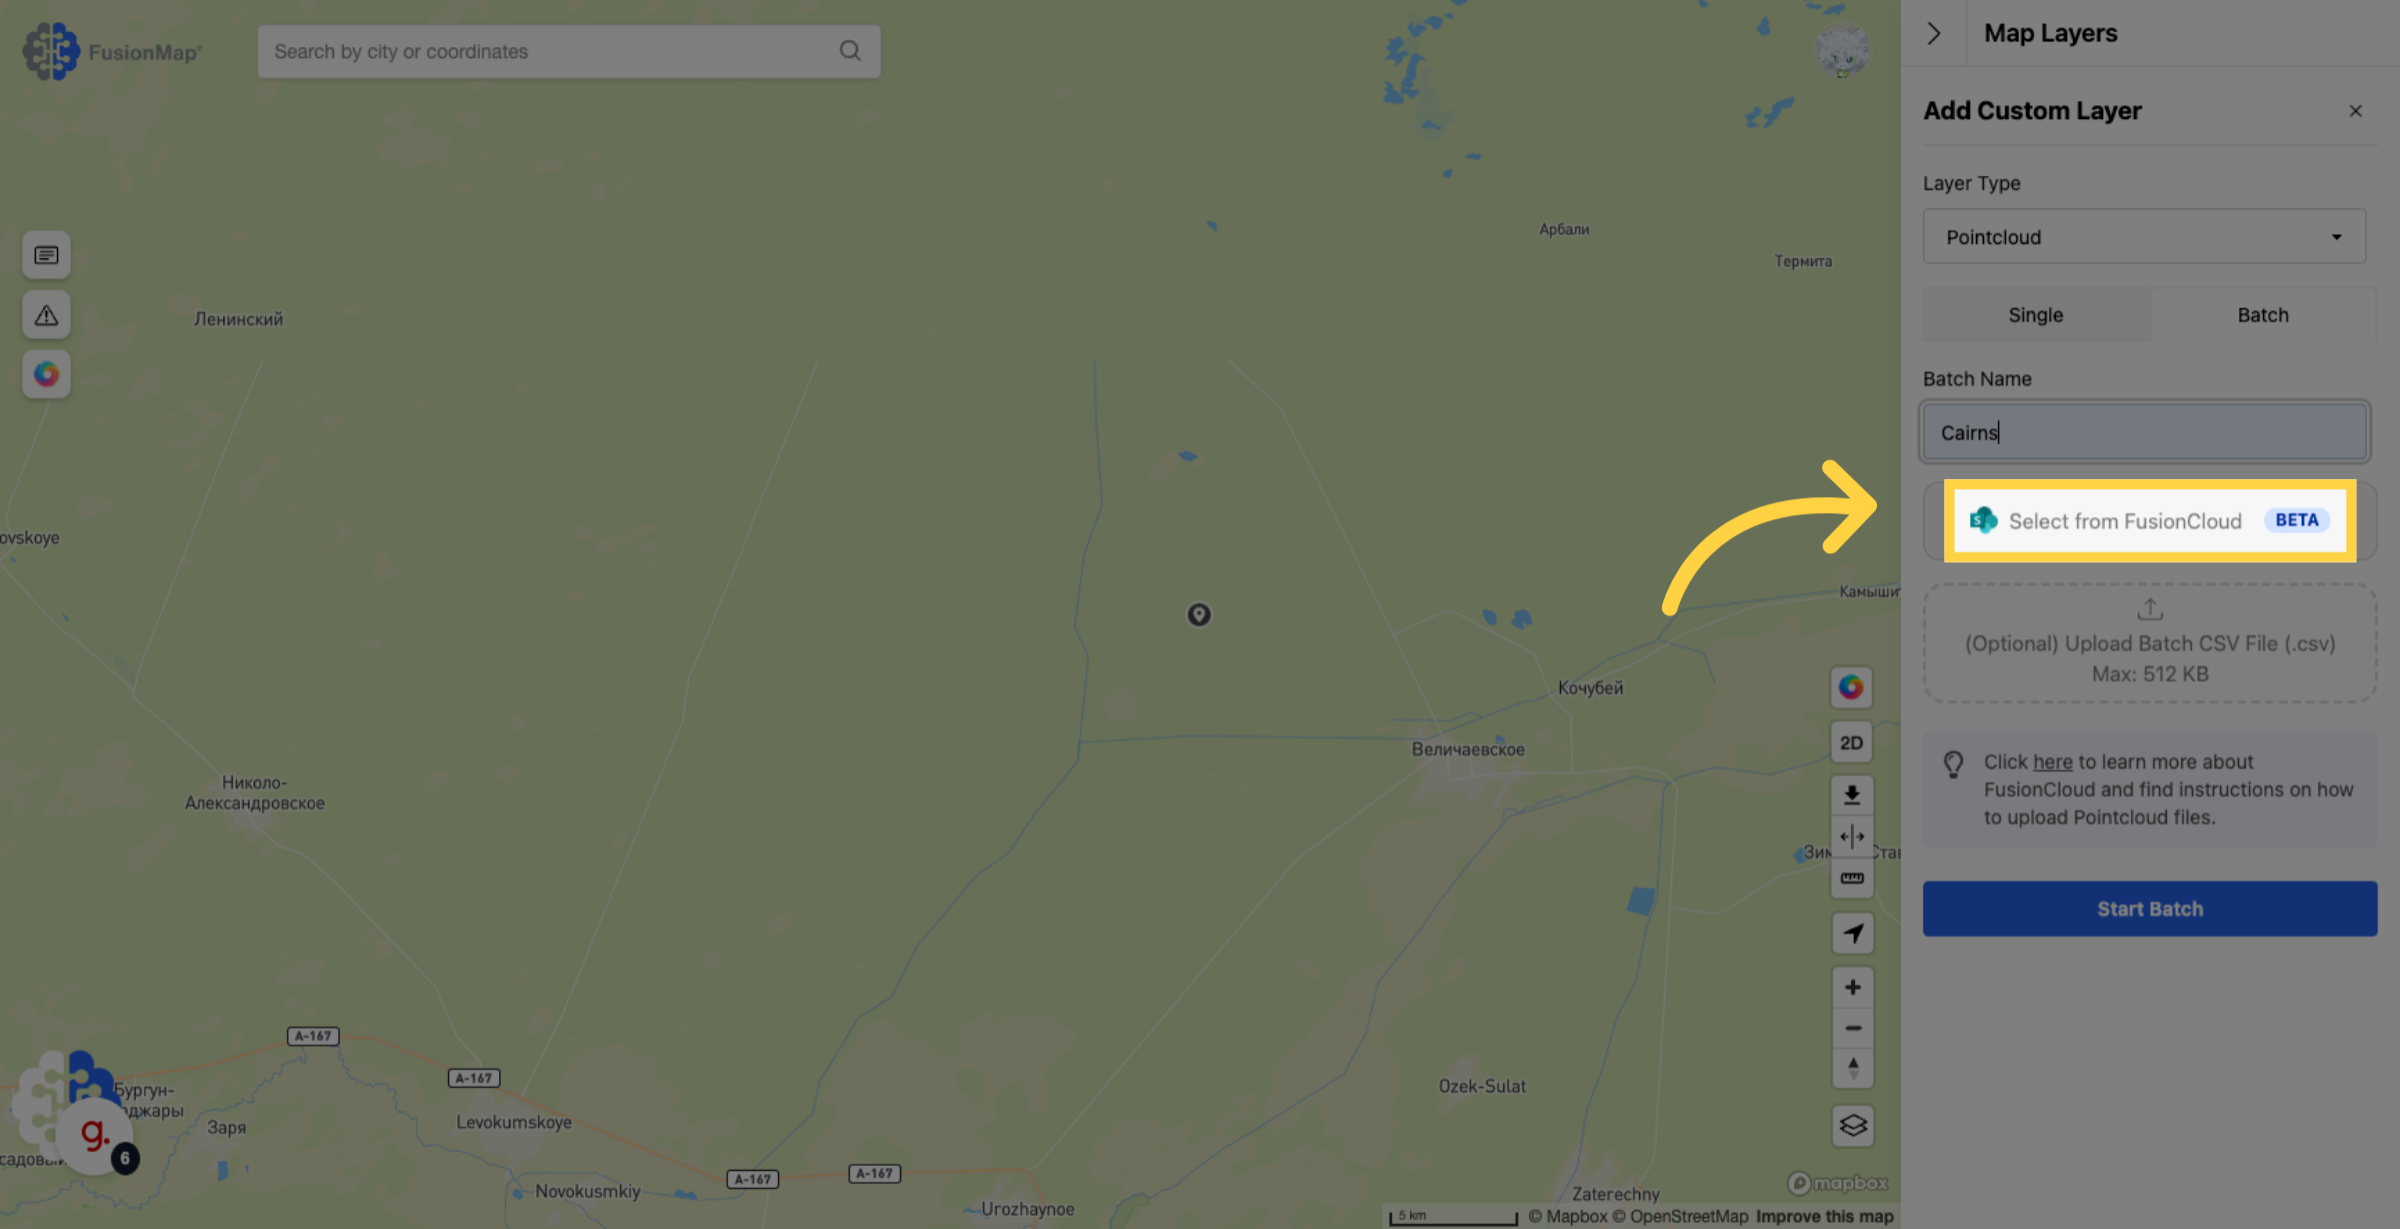
6. Input a batch name
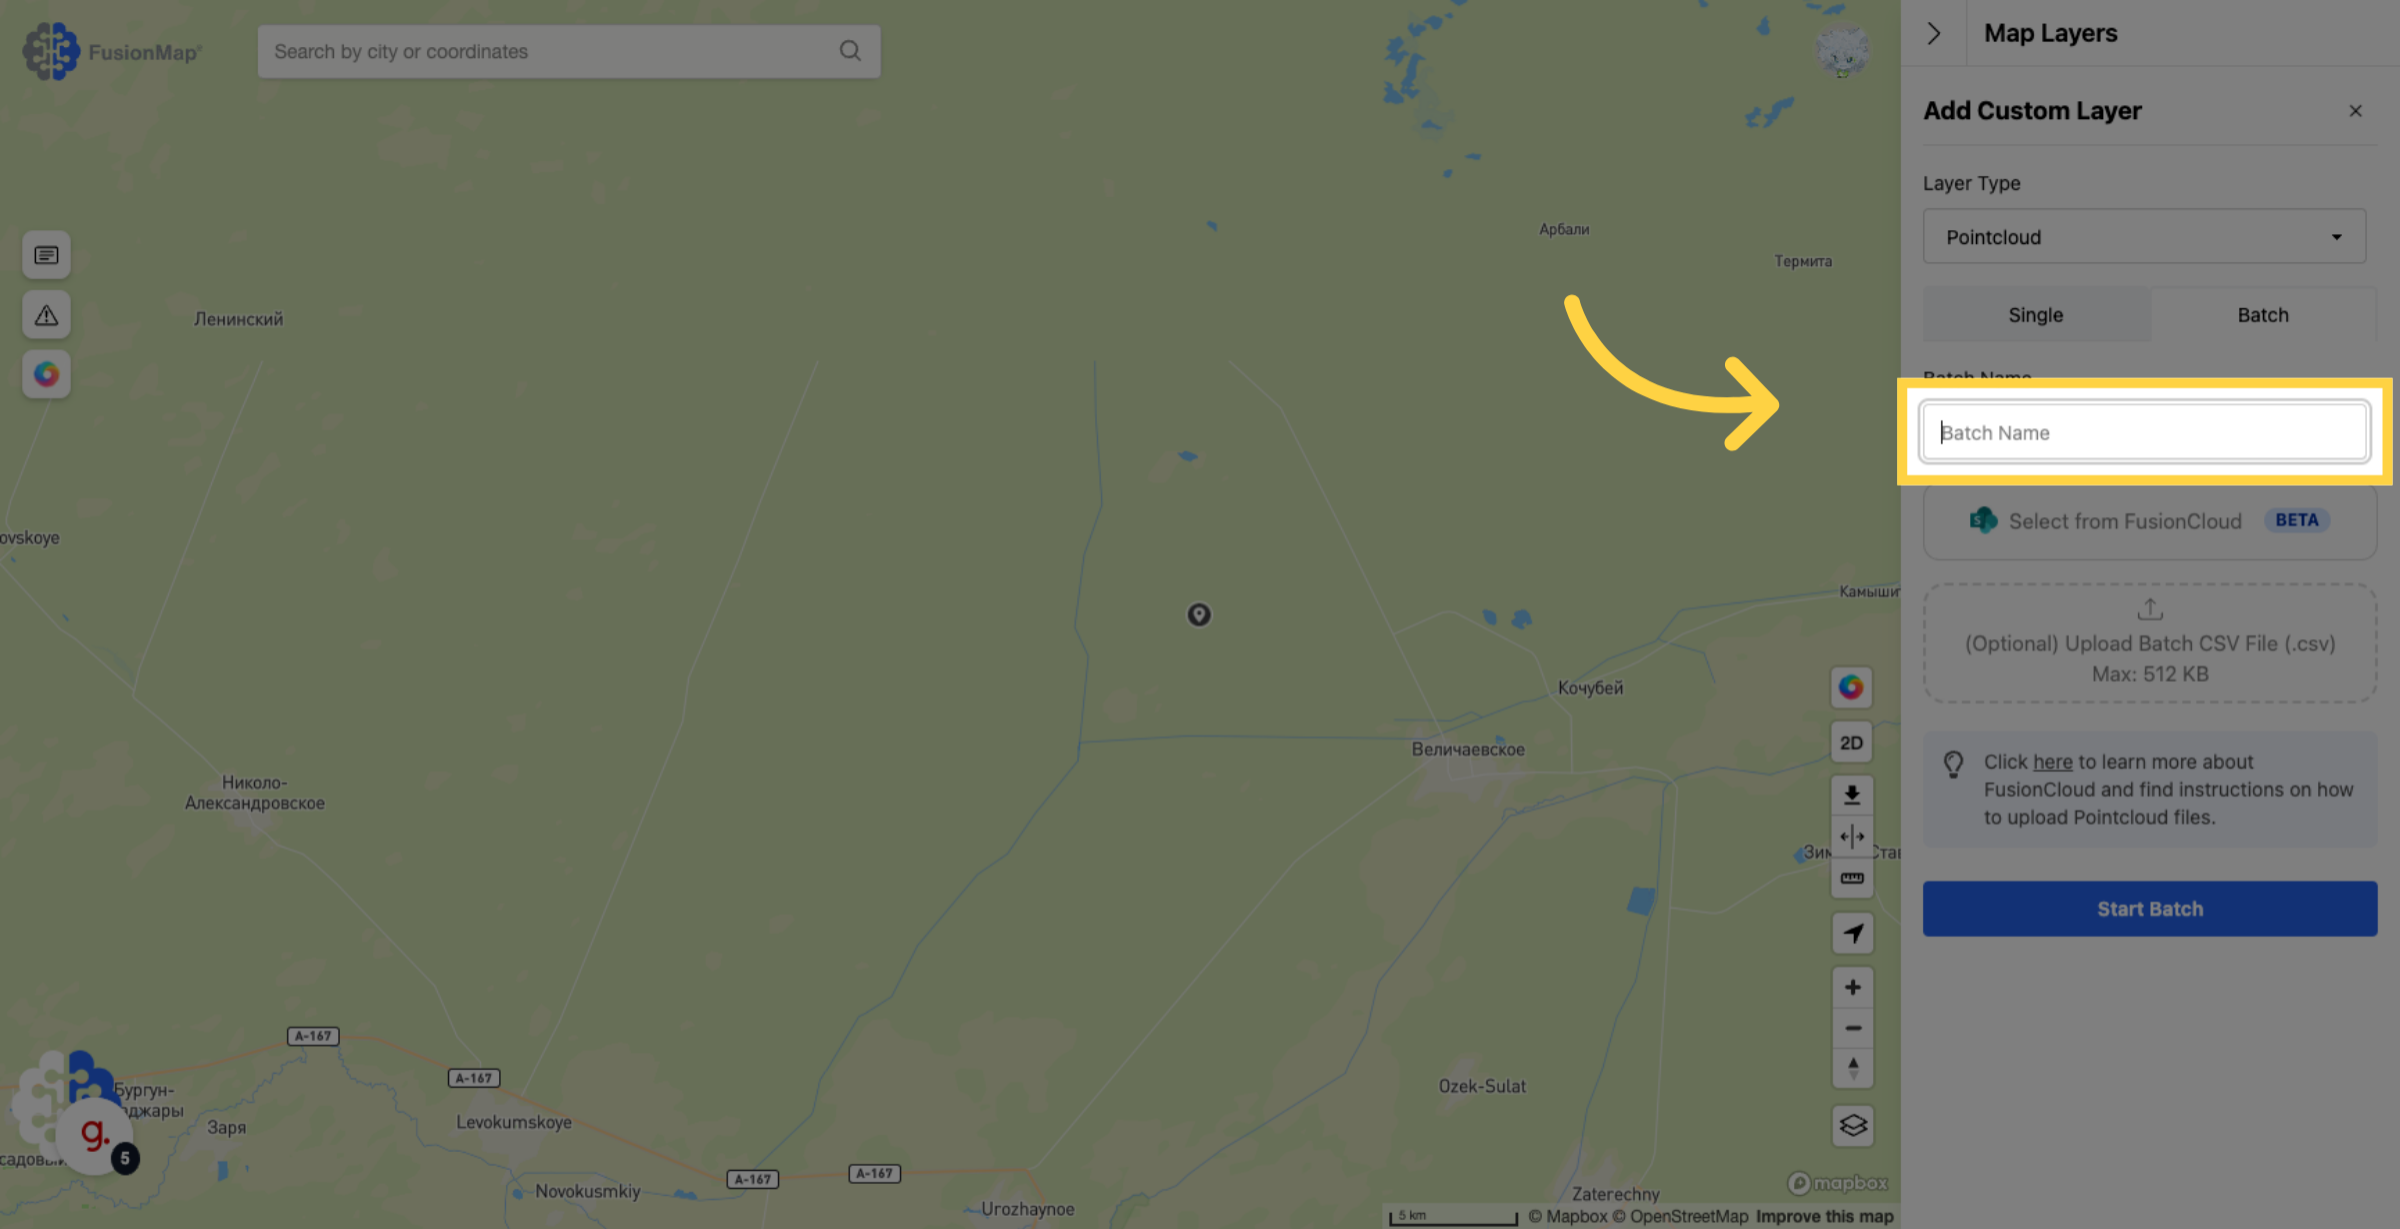
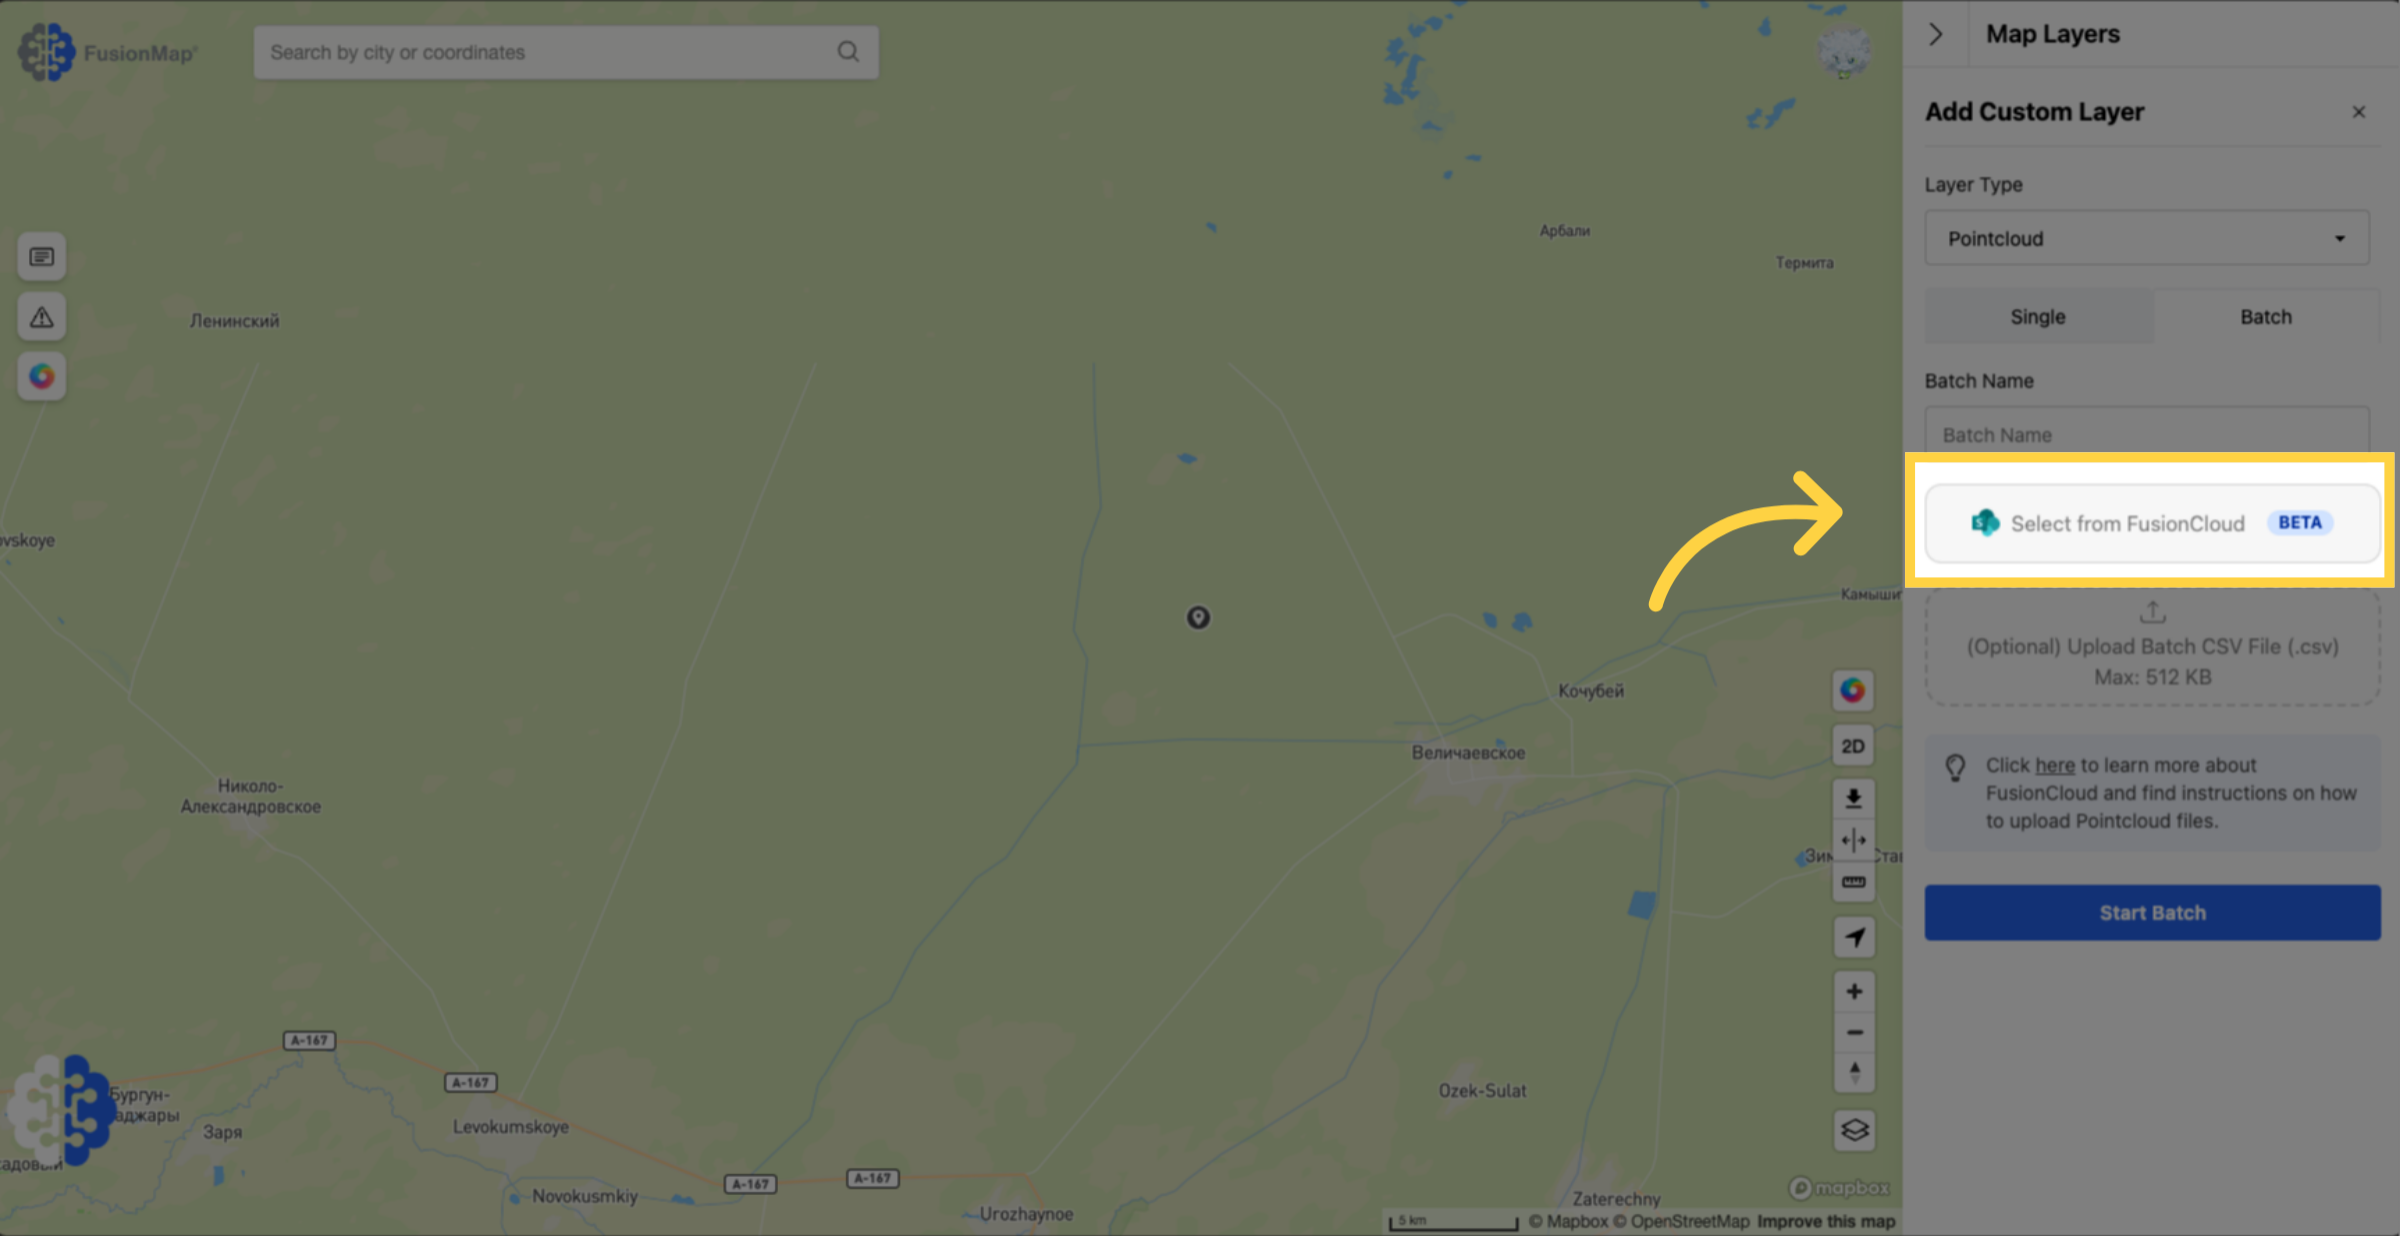
7. Click the "Select From FusionCloud" button
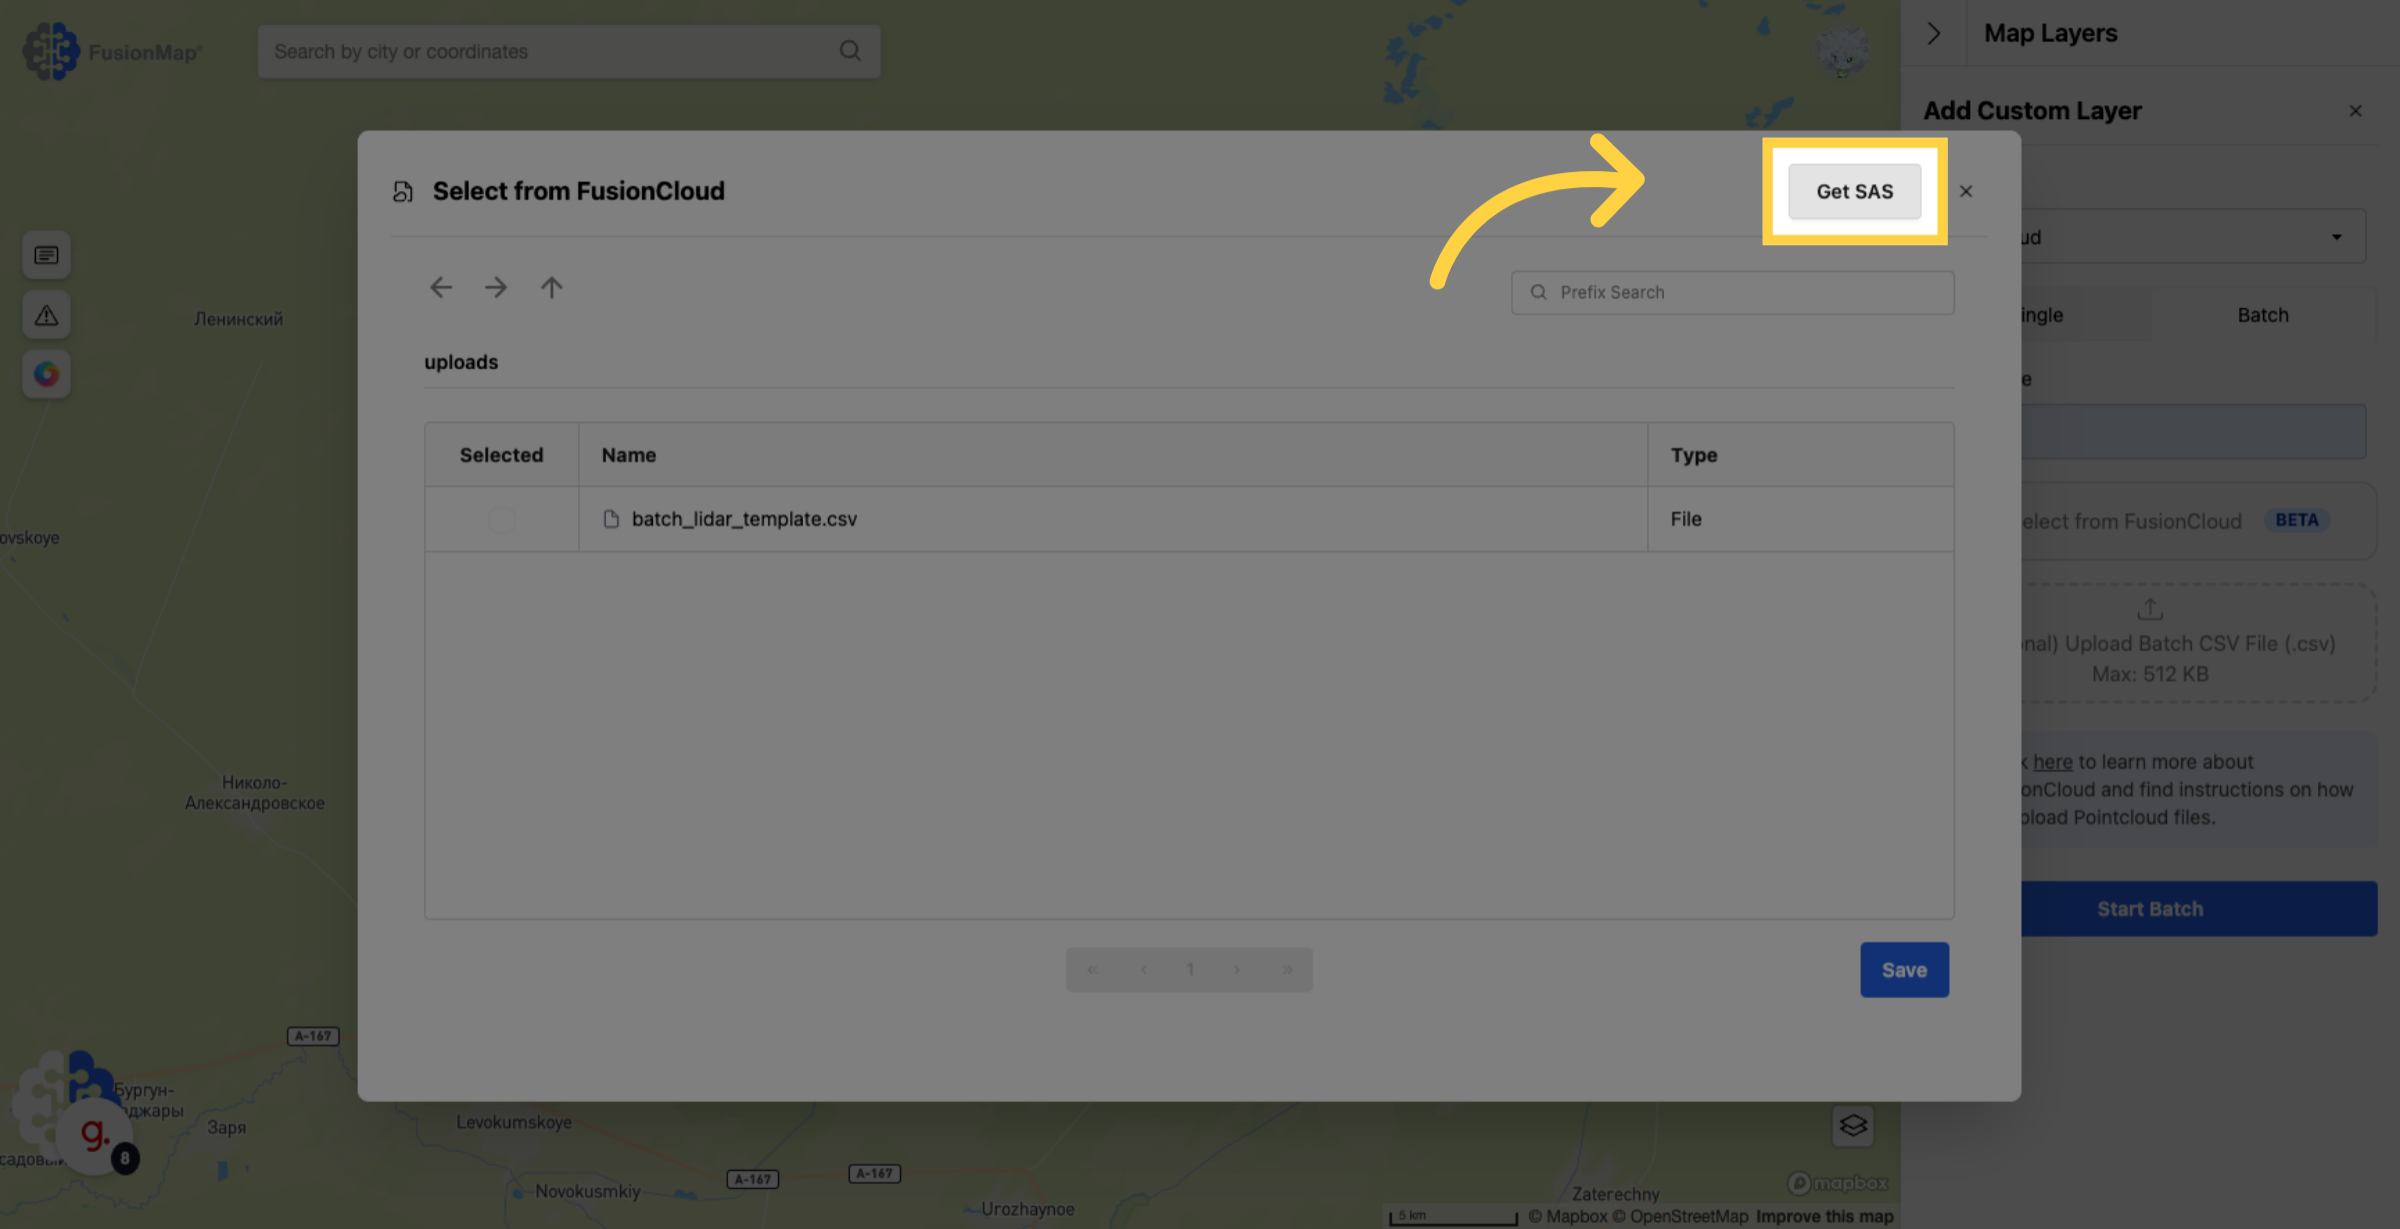
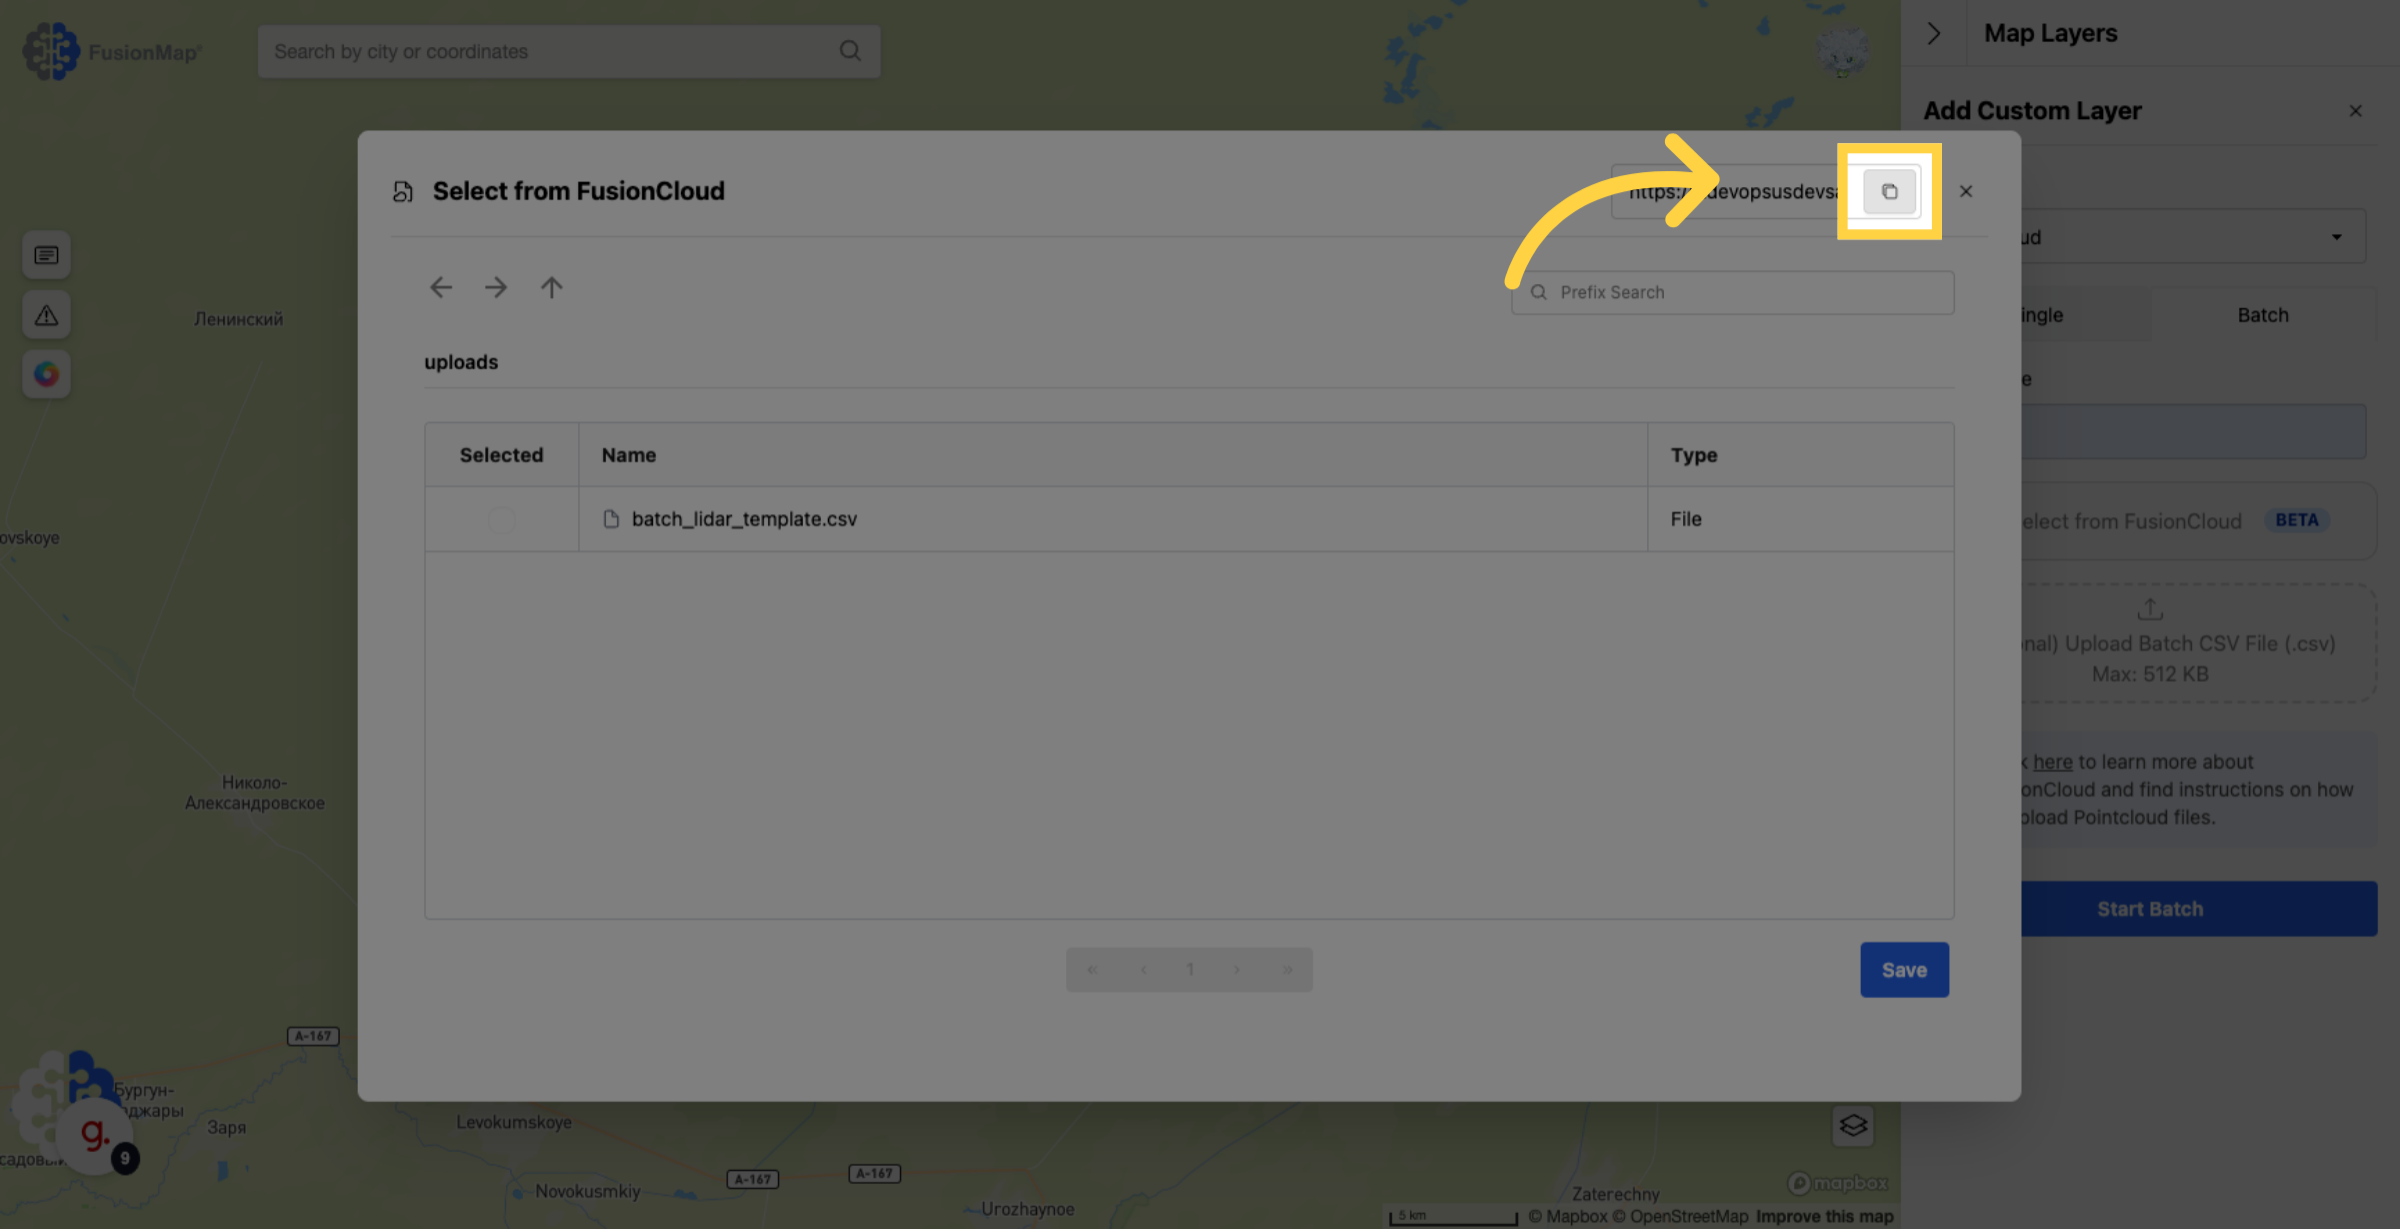
8. Click "Get SAS"
9. Copy your SAS token
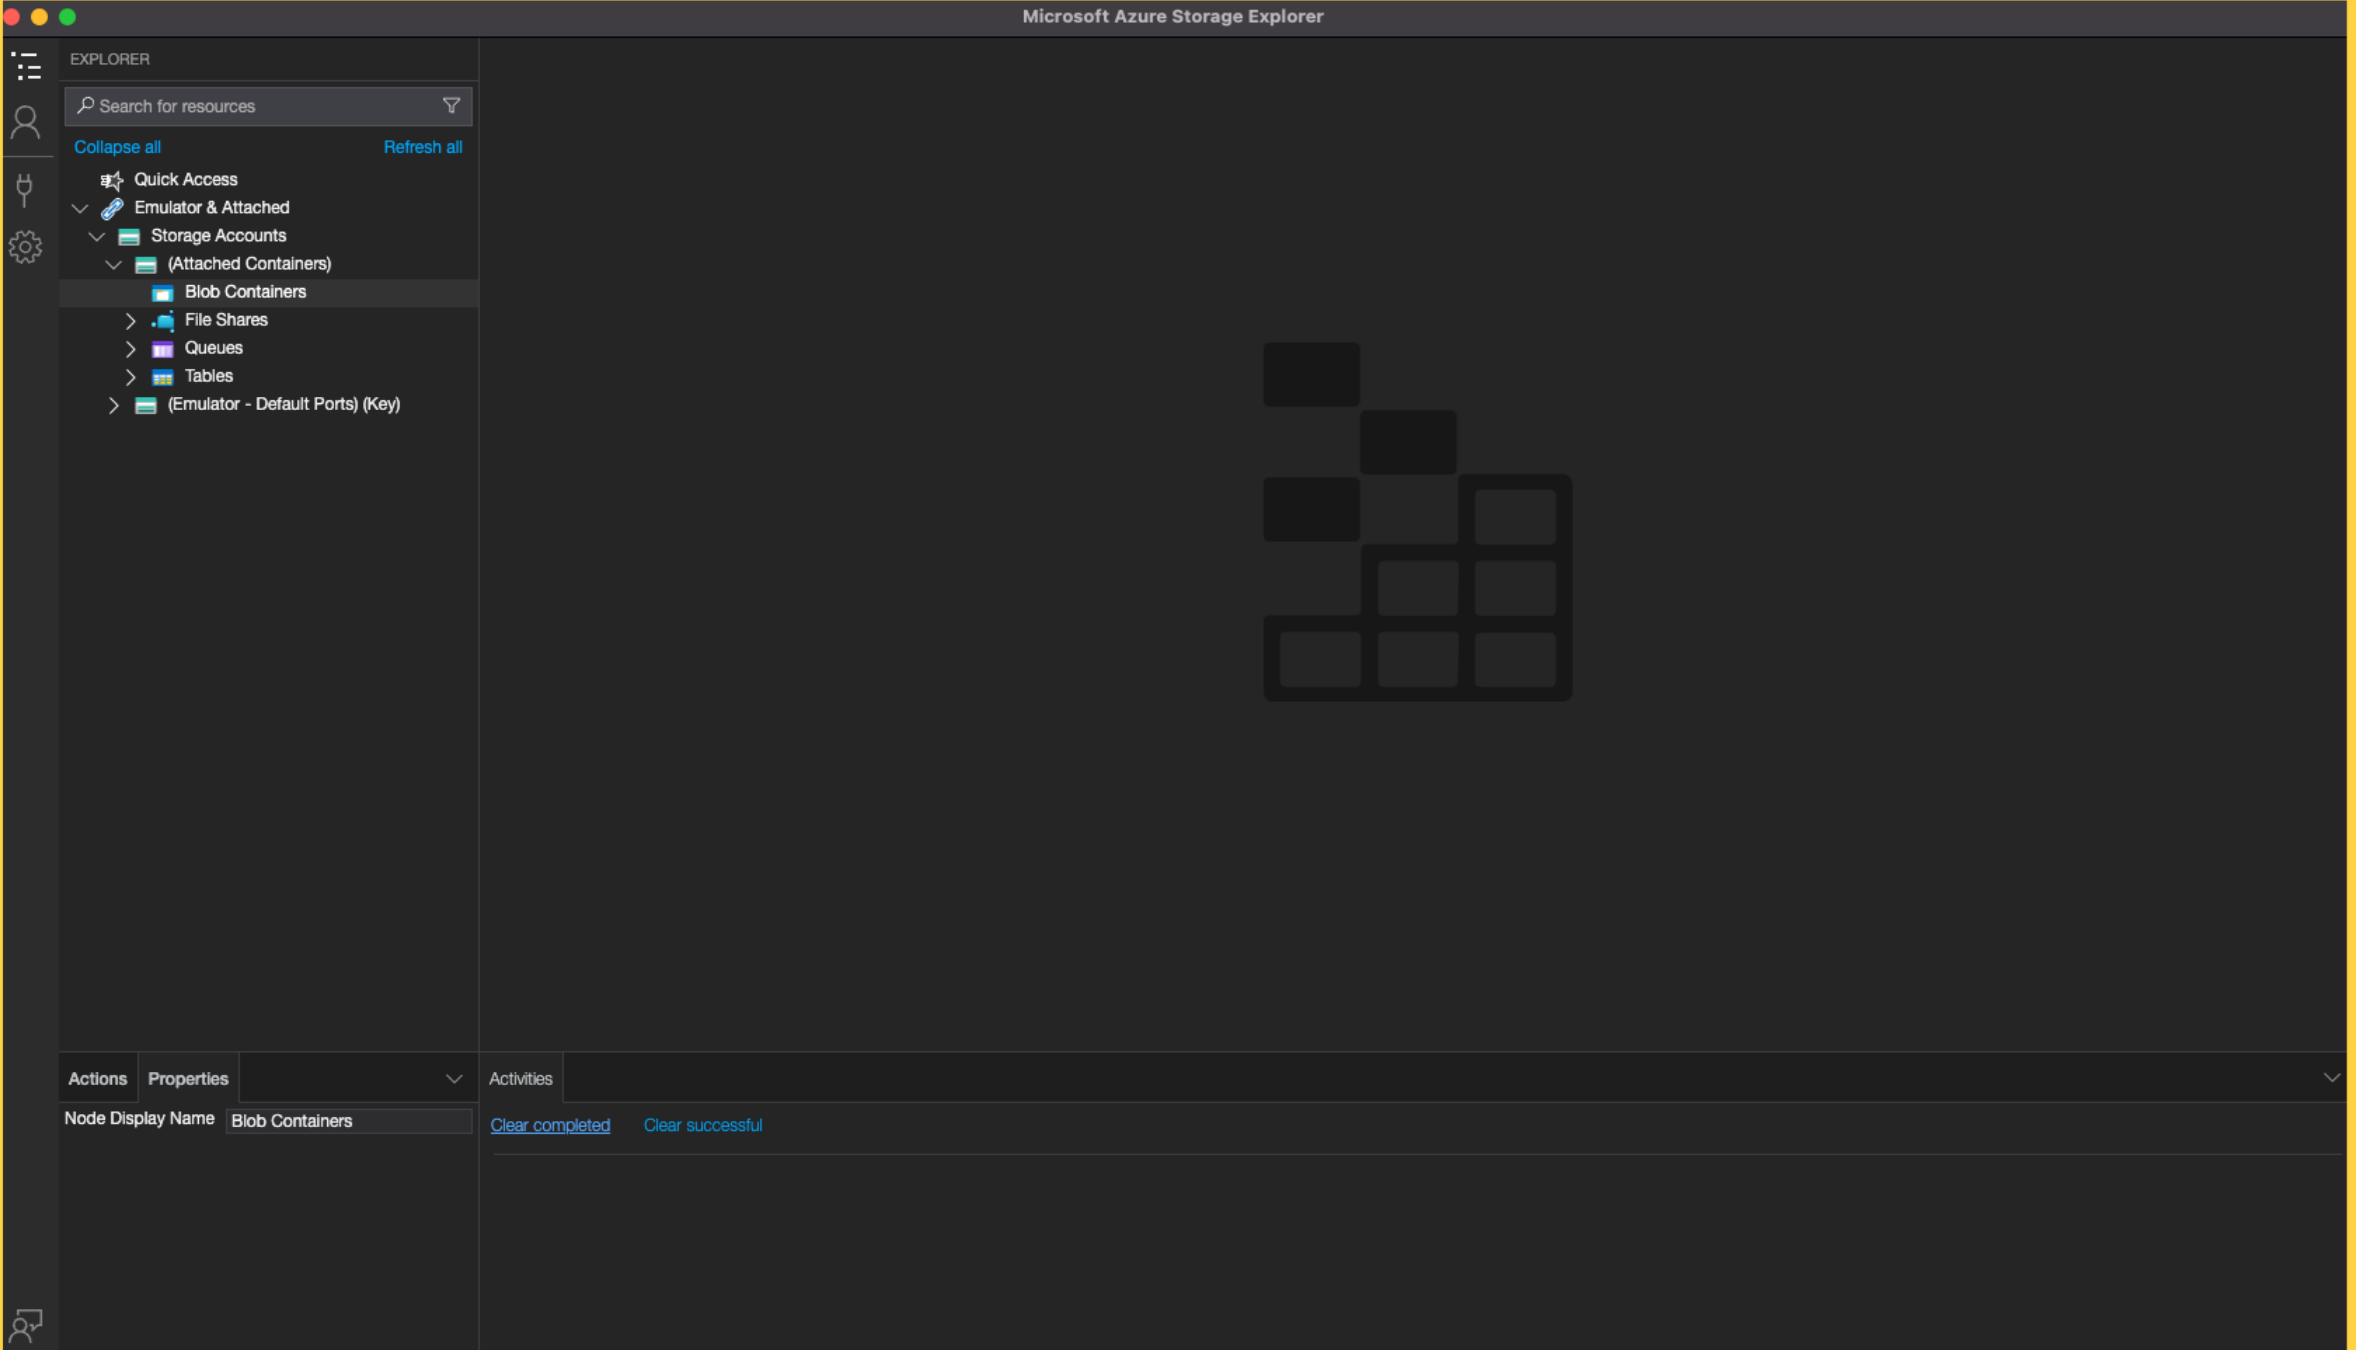
10. Open Microsoft Azure Storage Explorer
11. Open the Connect Dialog box
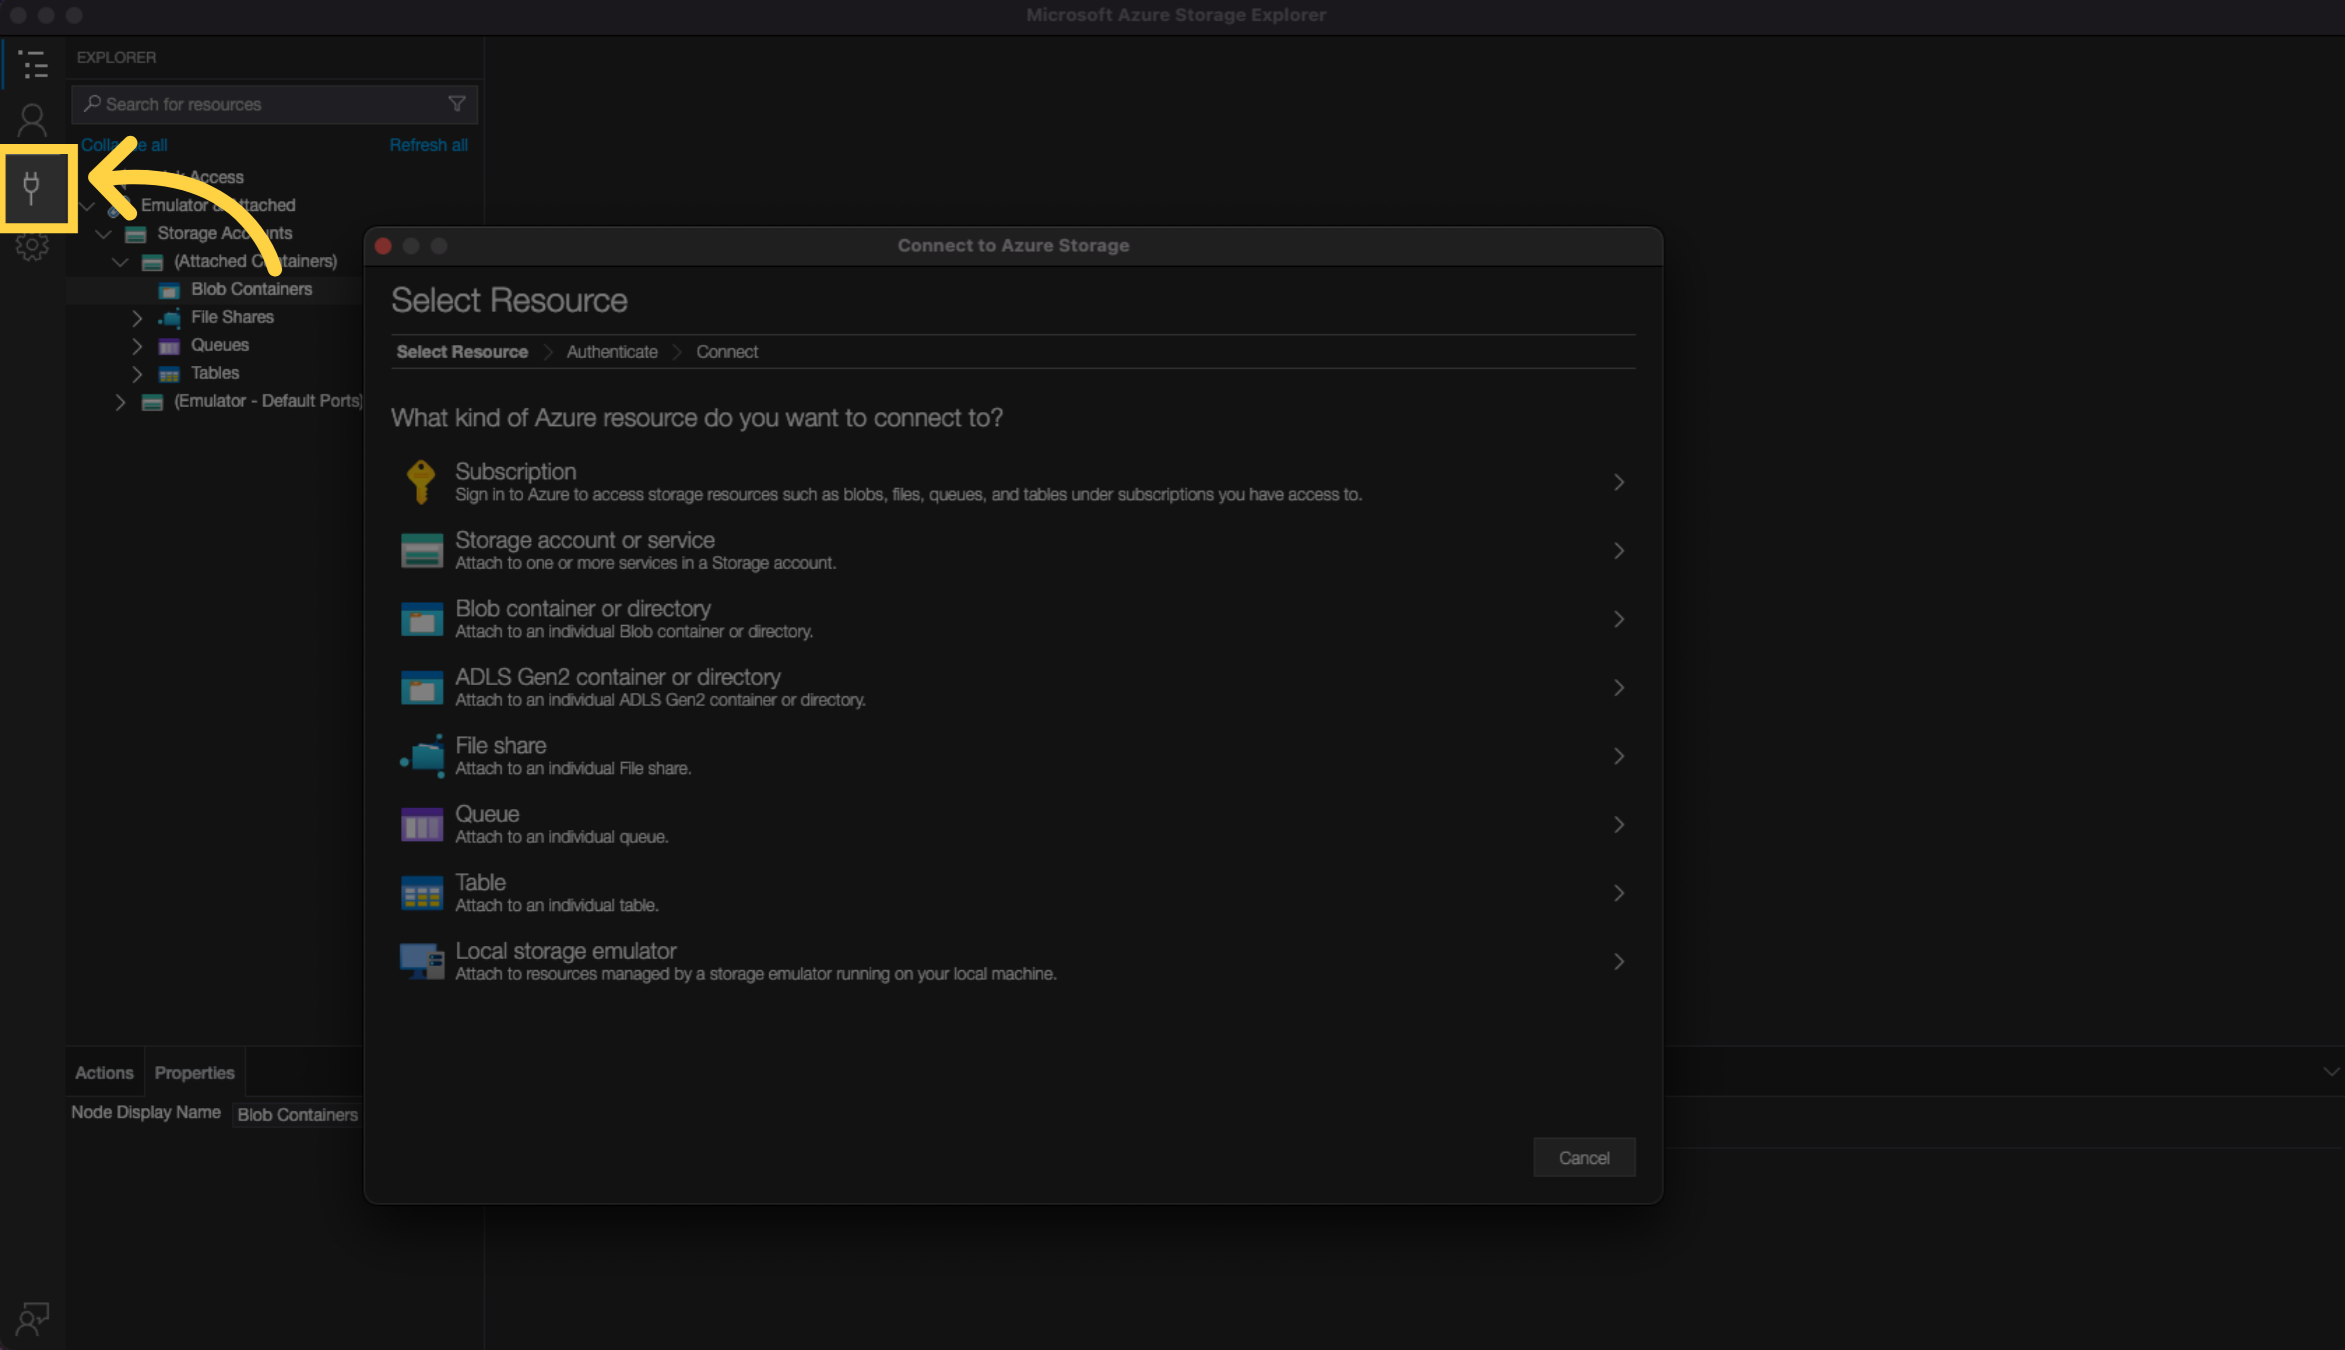
12. The dialog box opens up
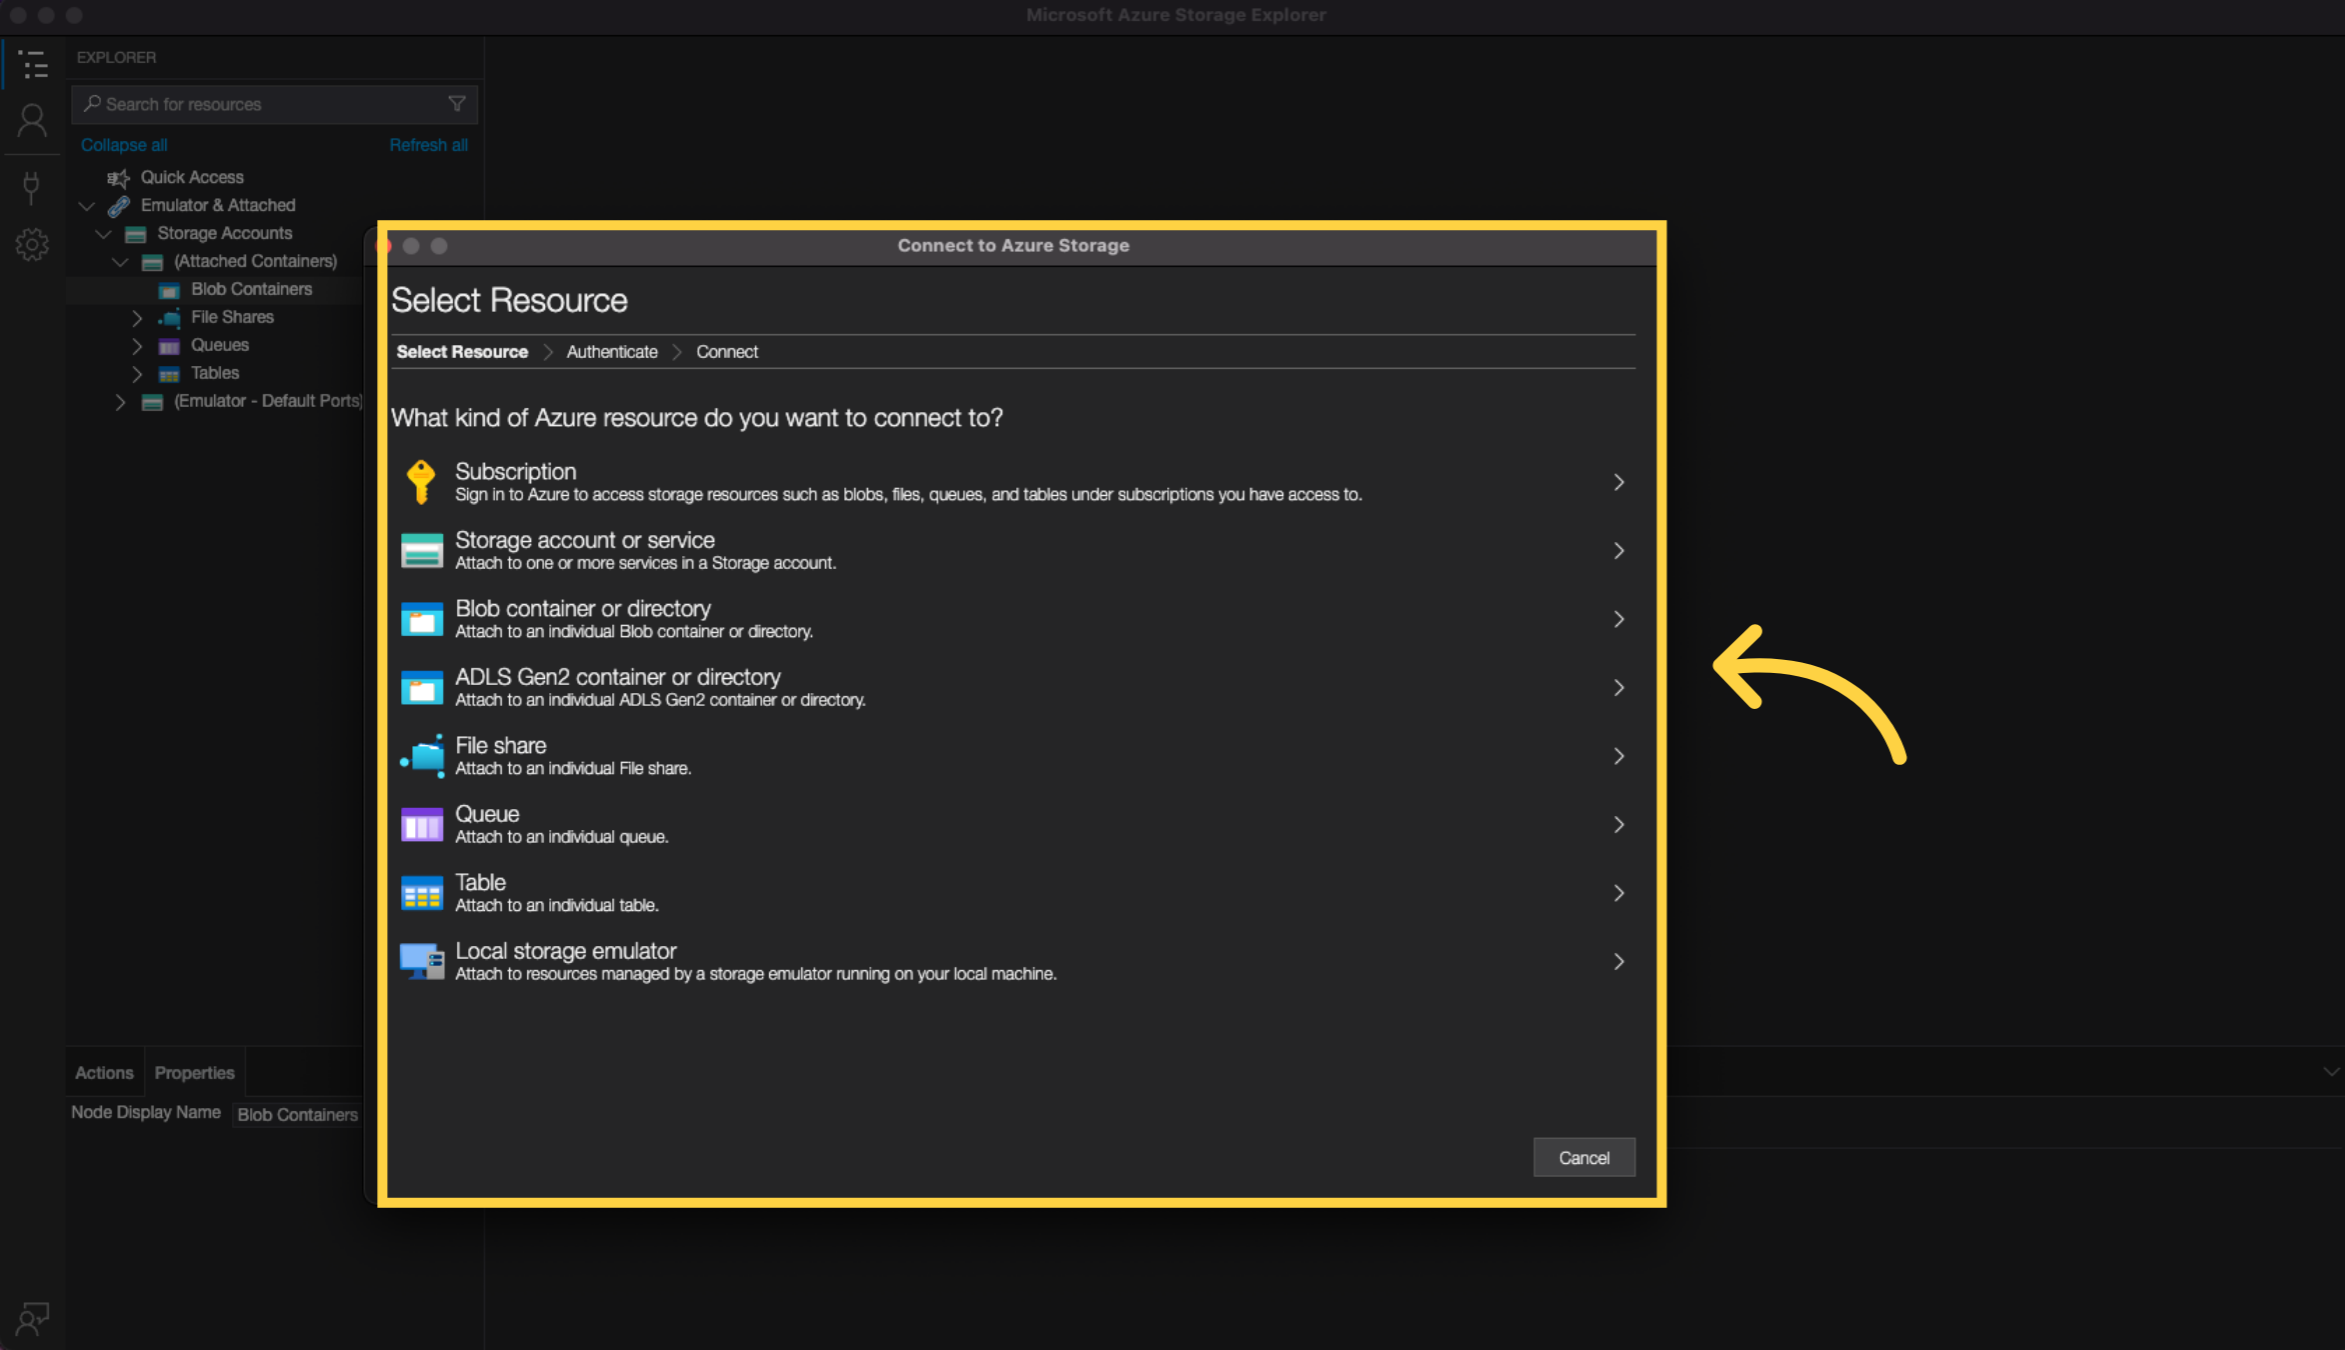
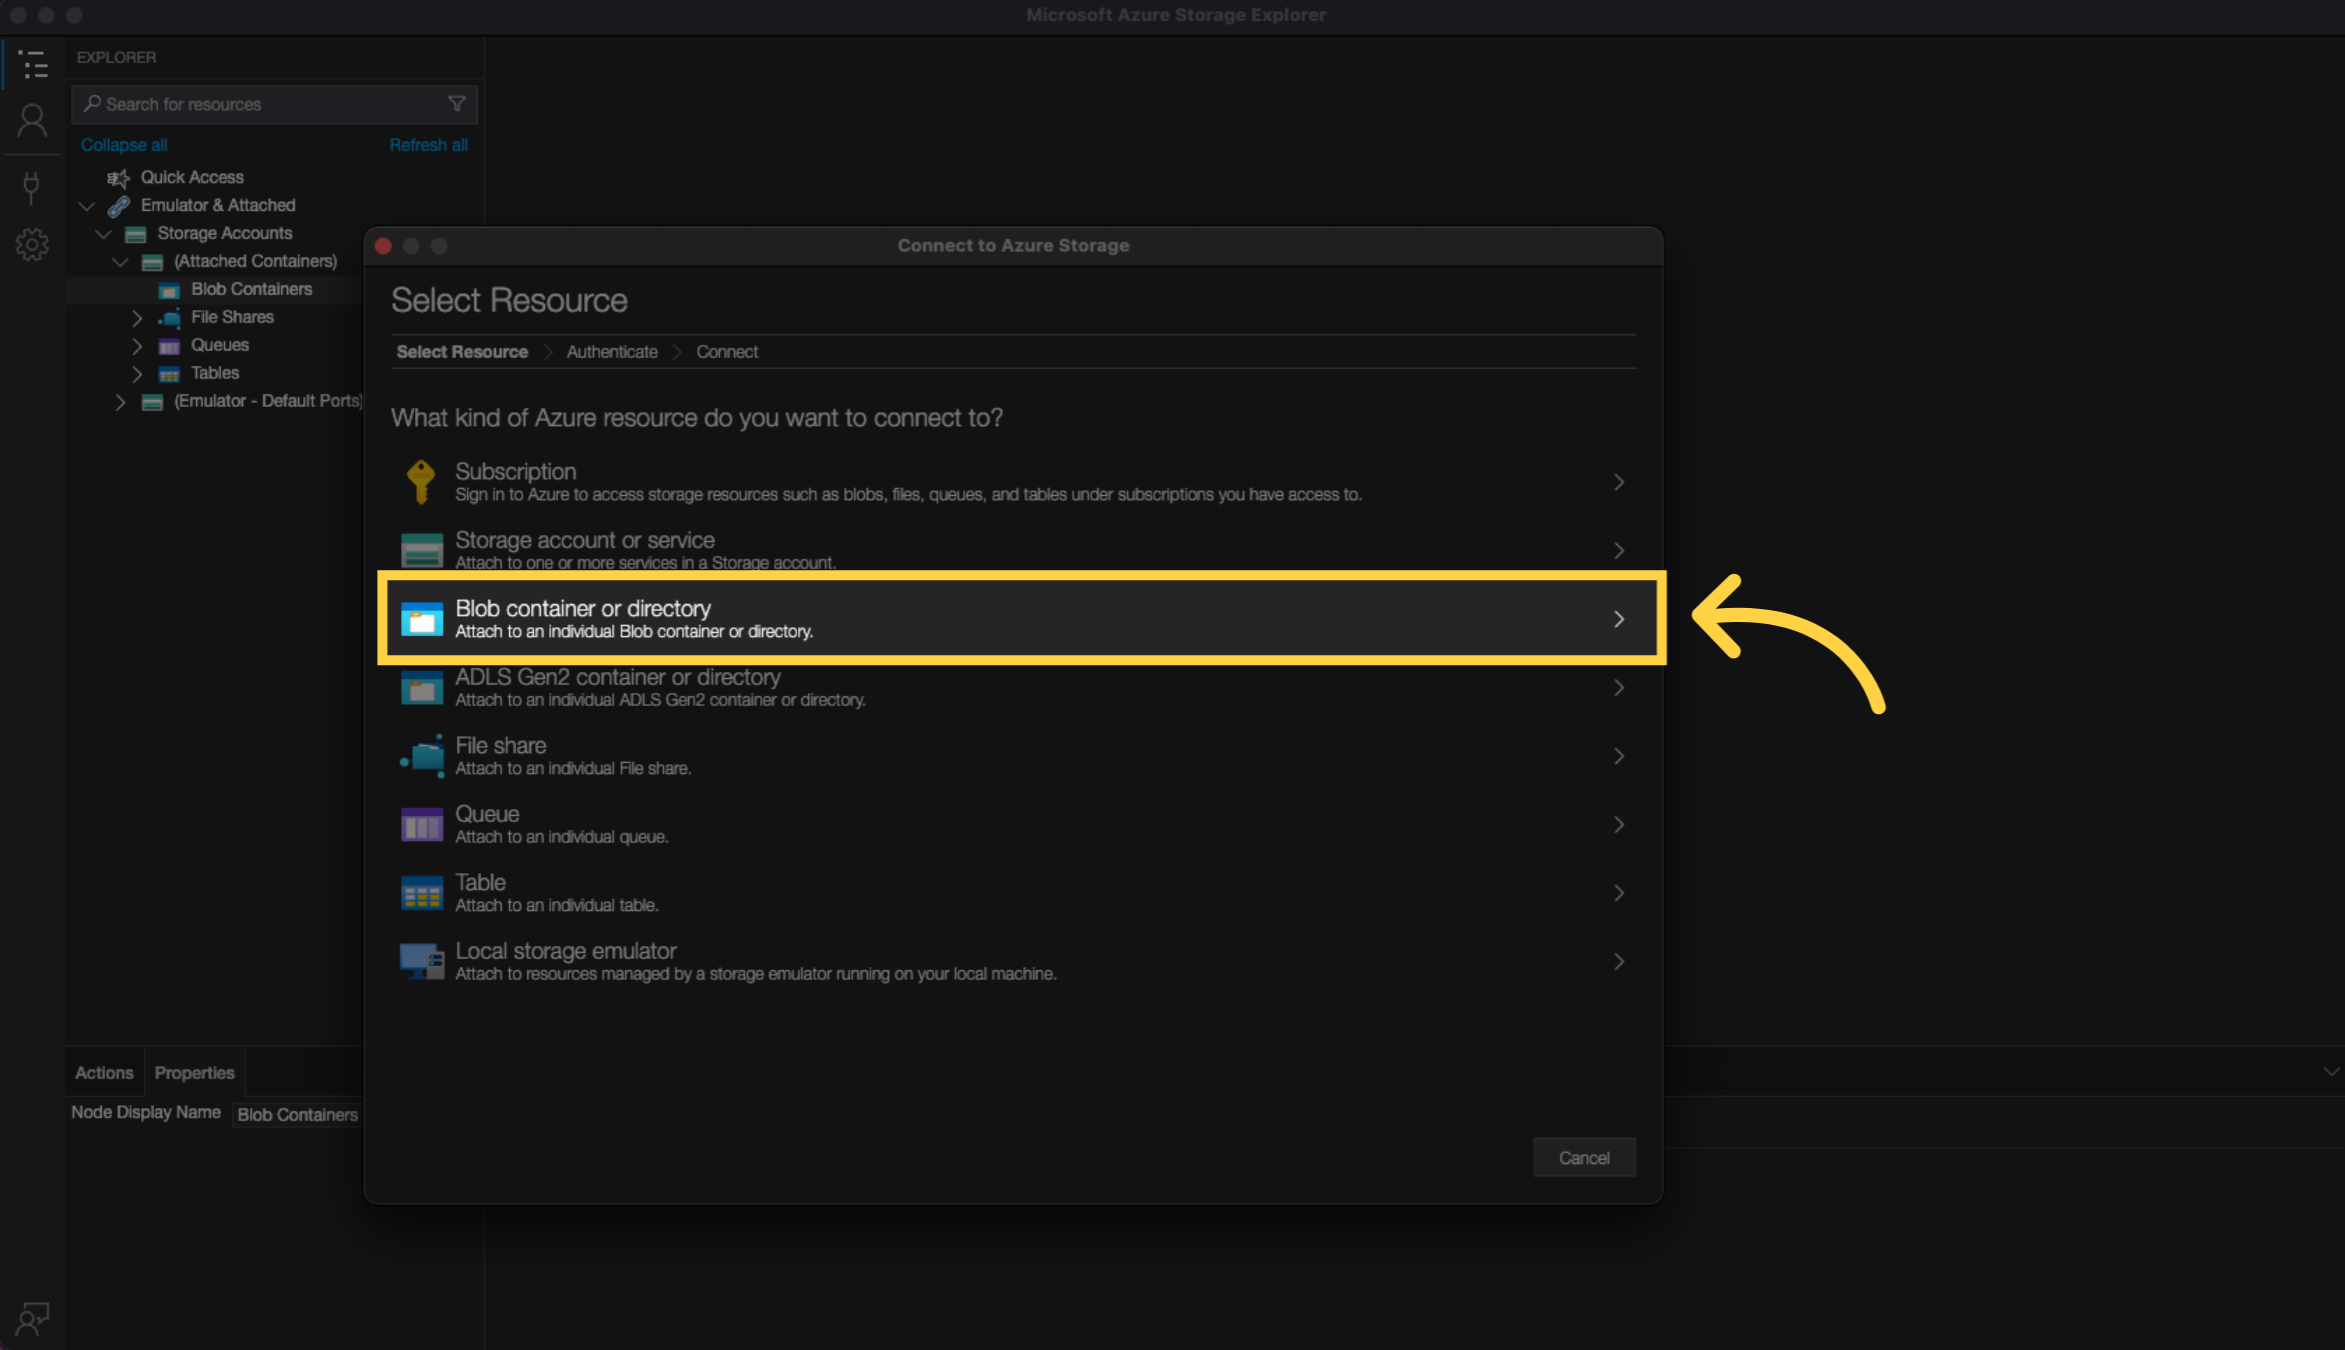
13. Click blob container or directory
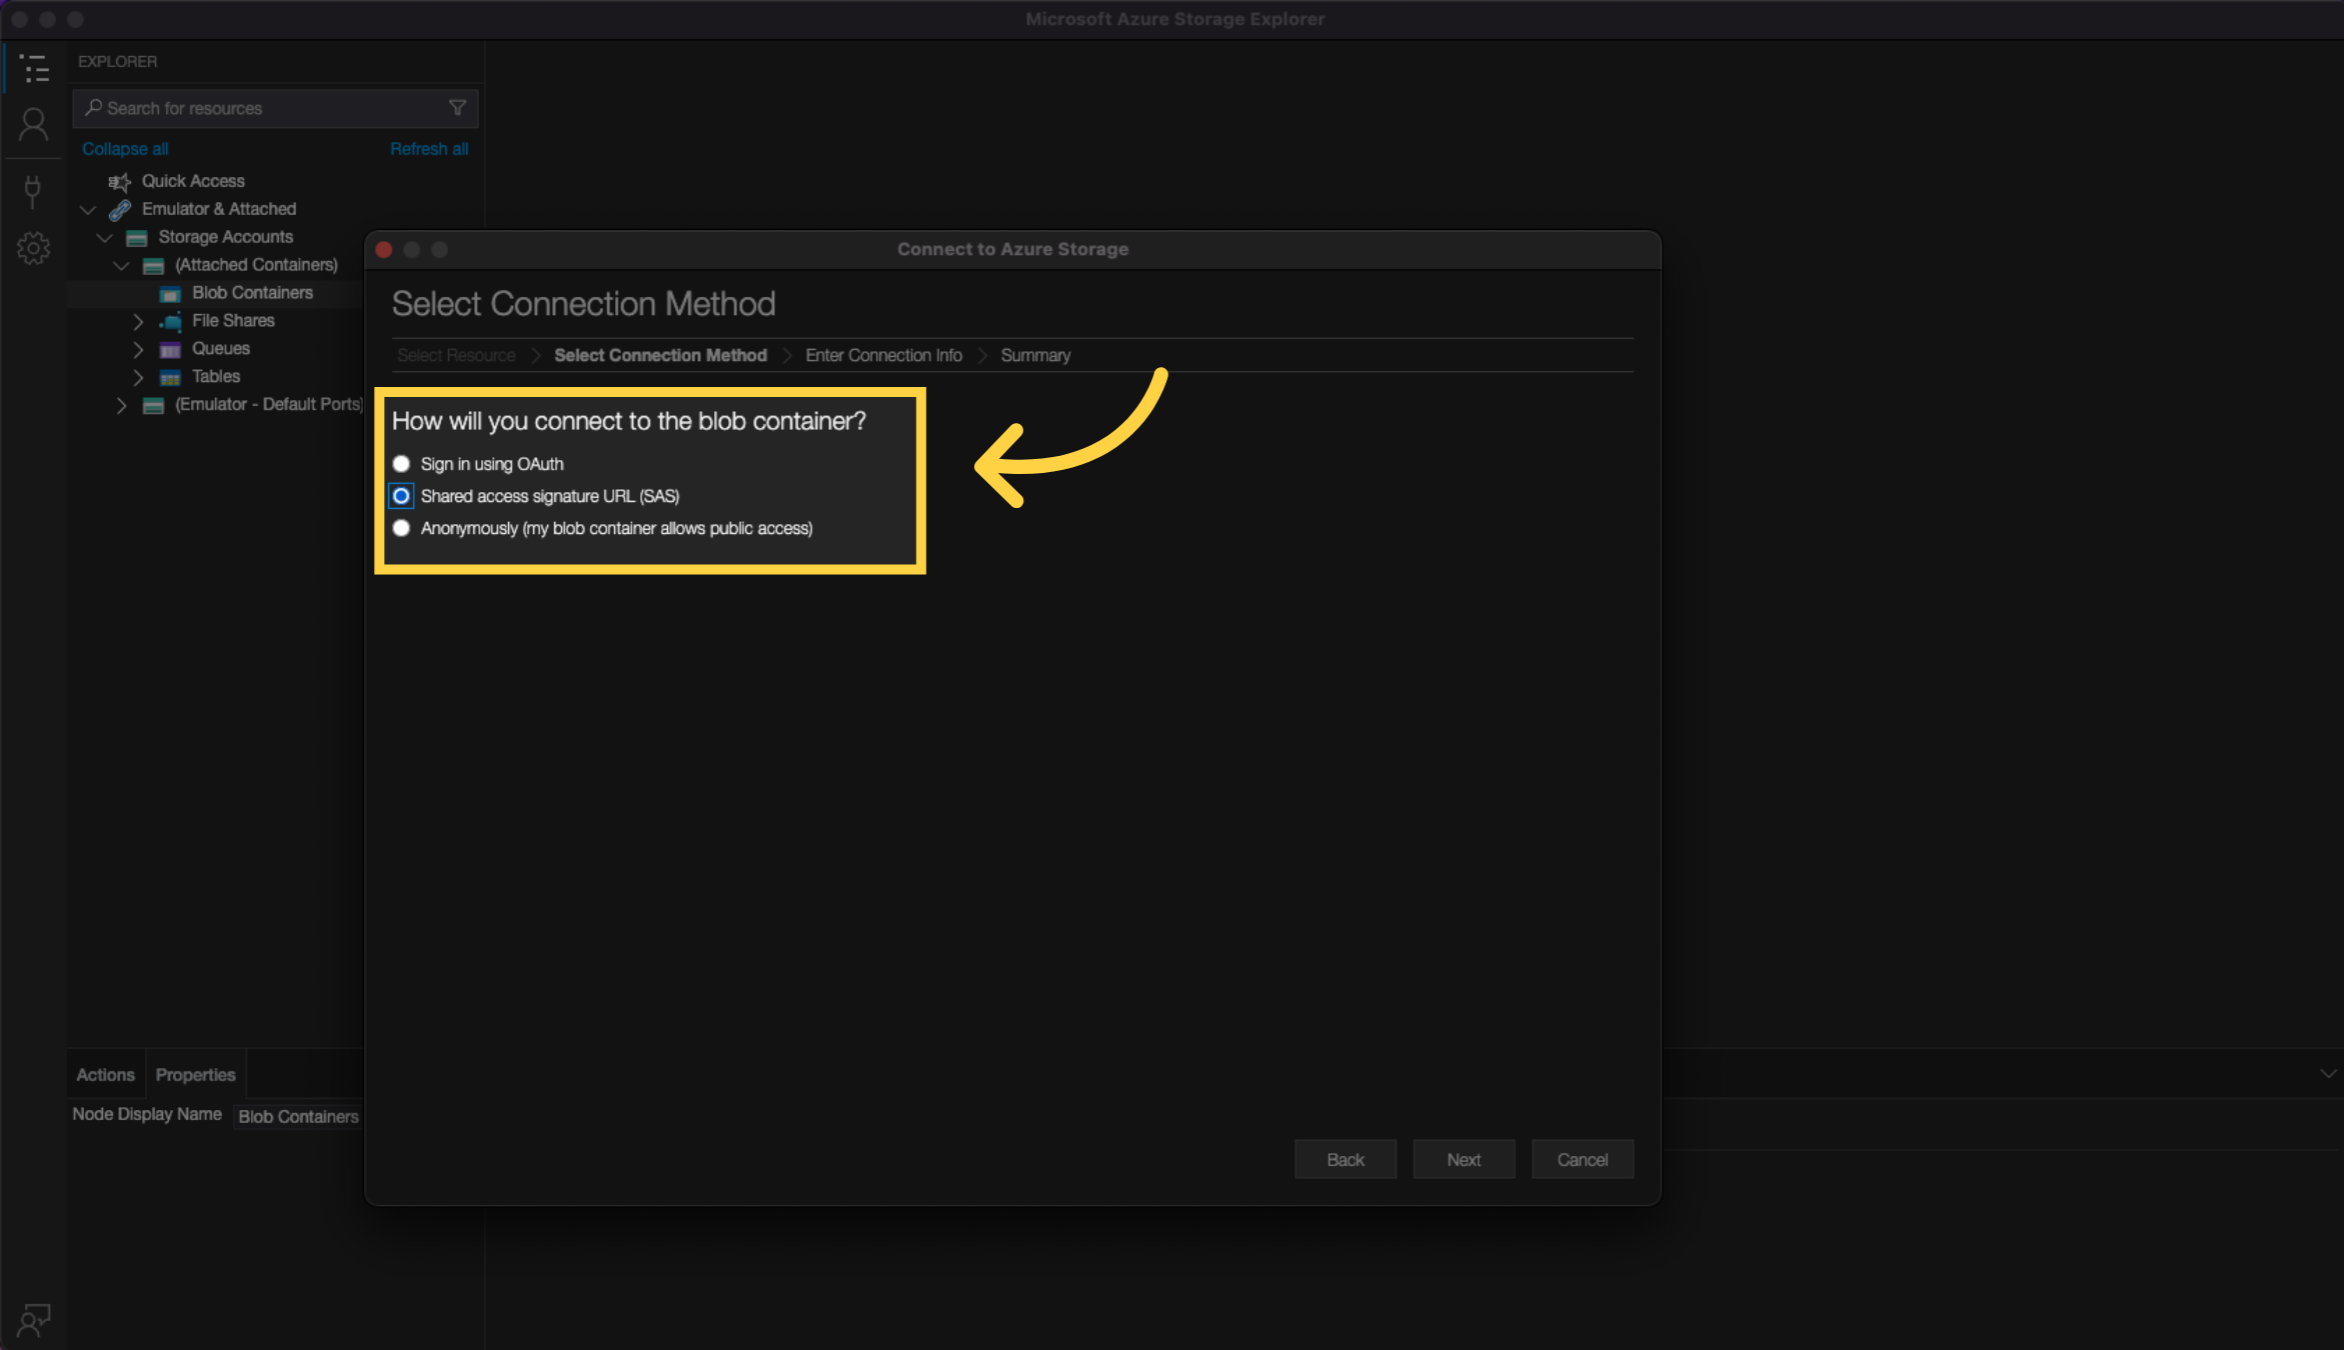
14. Choose Shared access signature URL (SAS)
15. Paste your SAS Token

16. Click Next

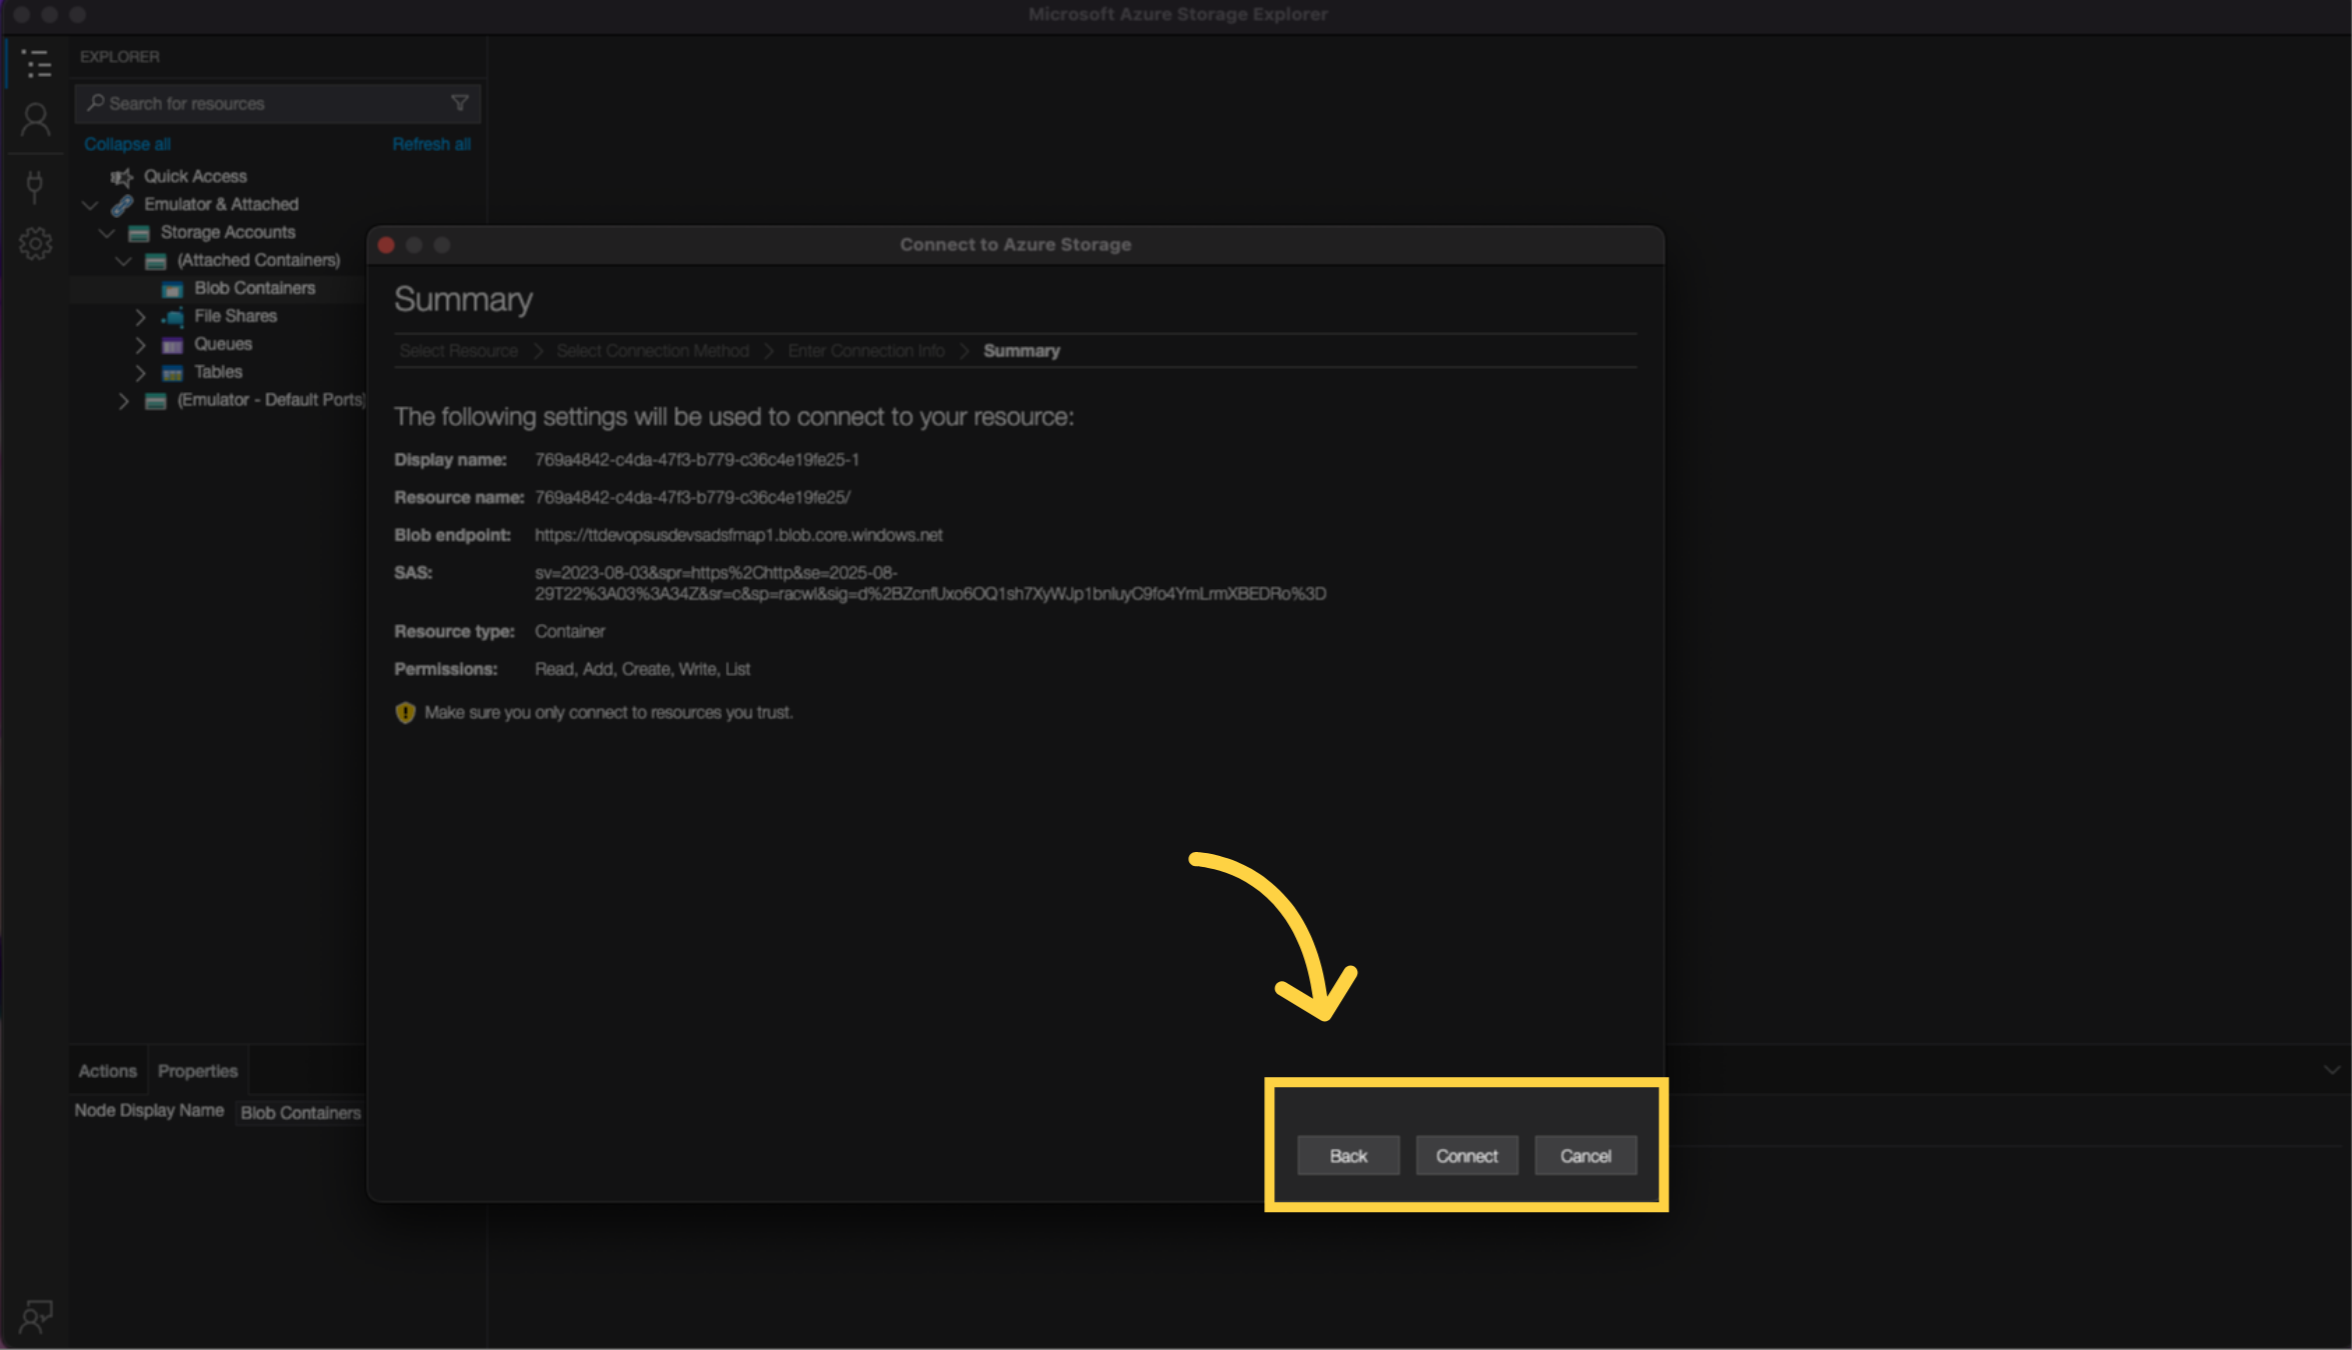
17. Click Connect
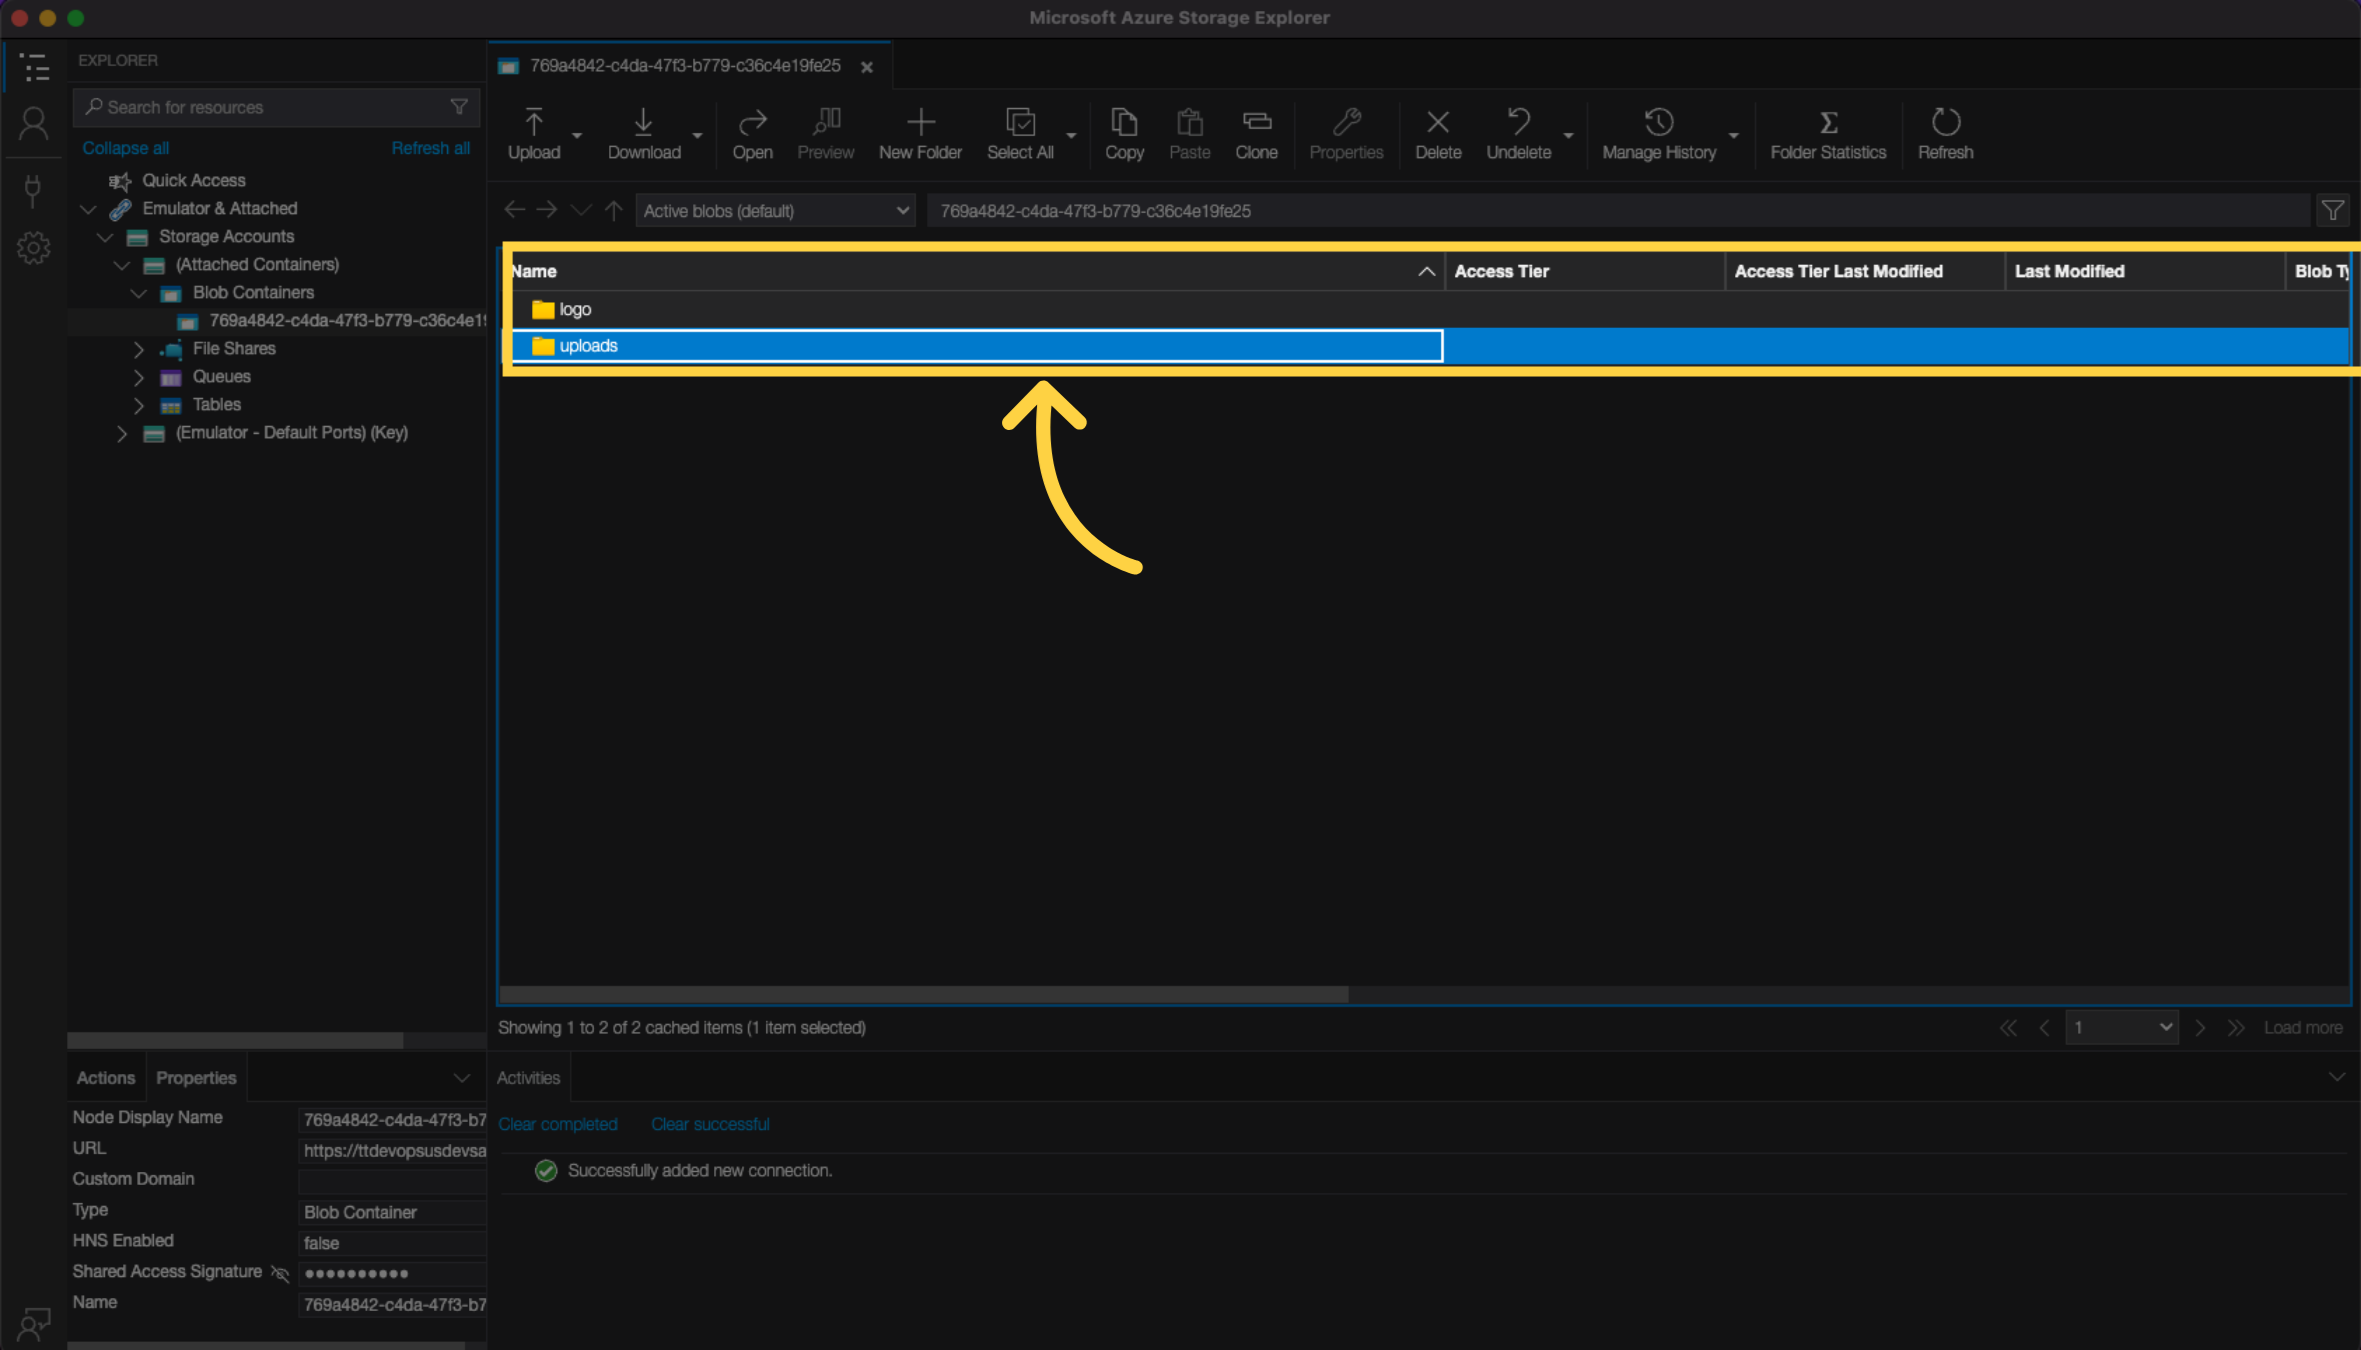
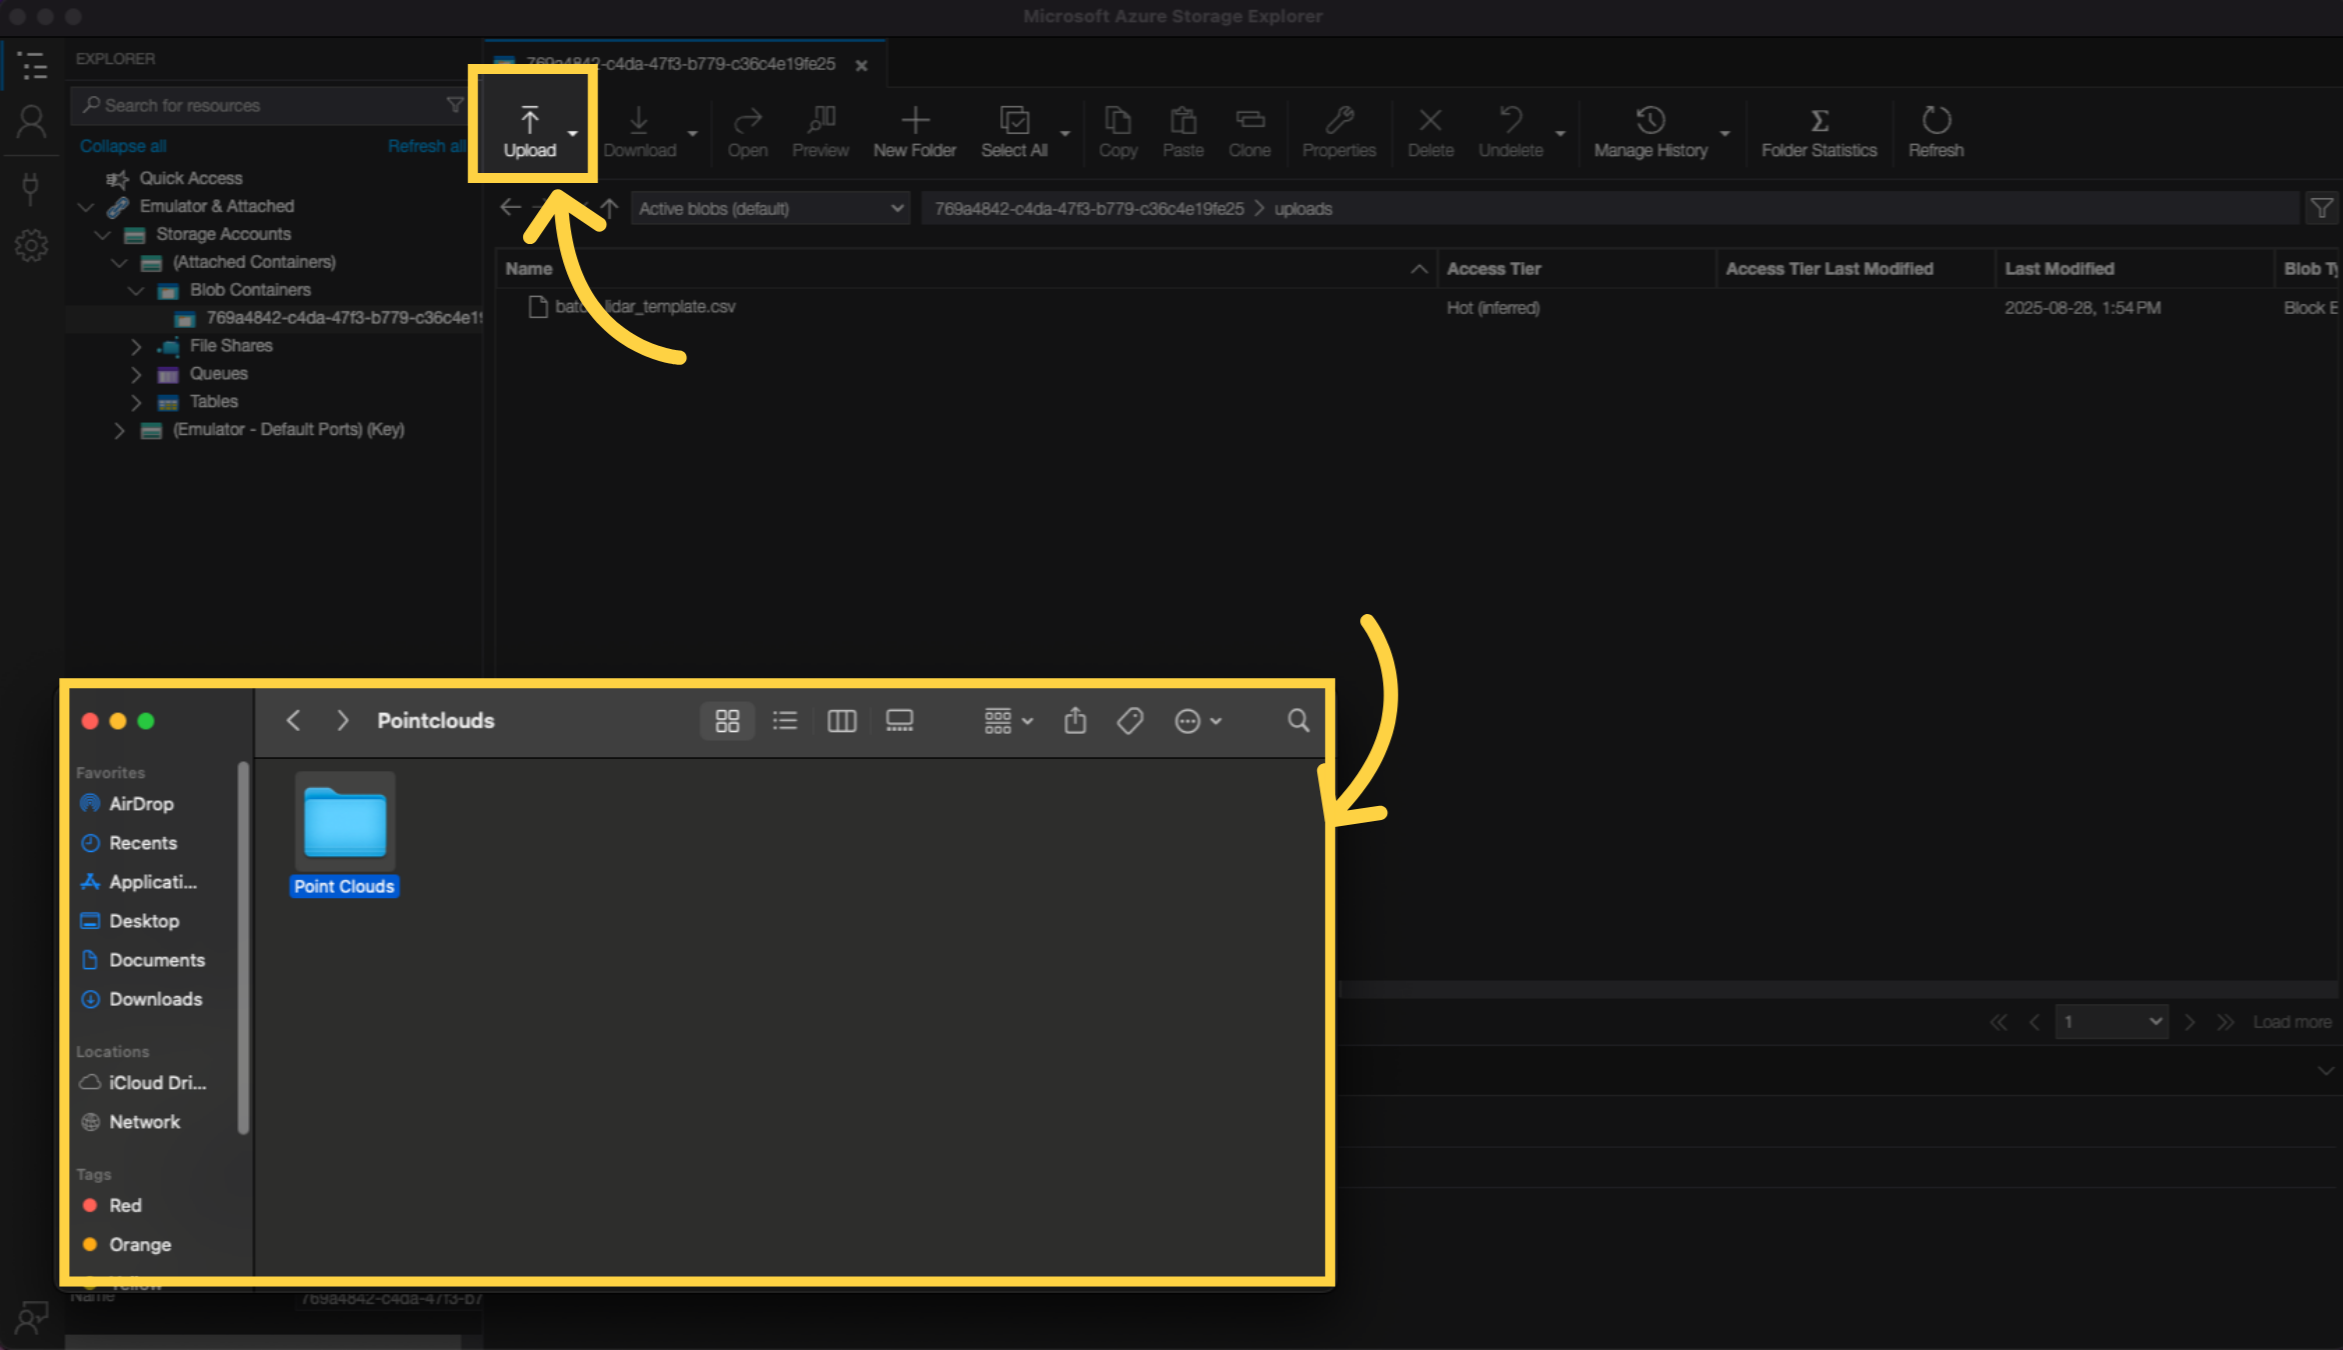
18. Double click to open the uploads folder in your blob container
19. Drag and drop or use the upload button to upload your pointclouds
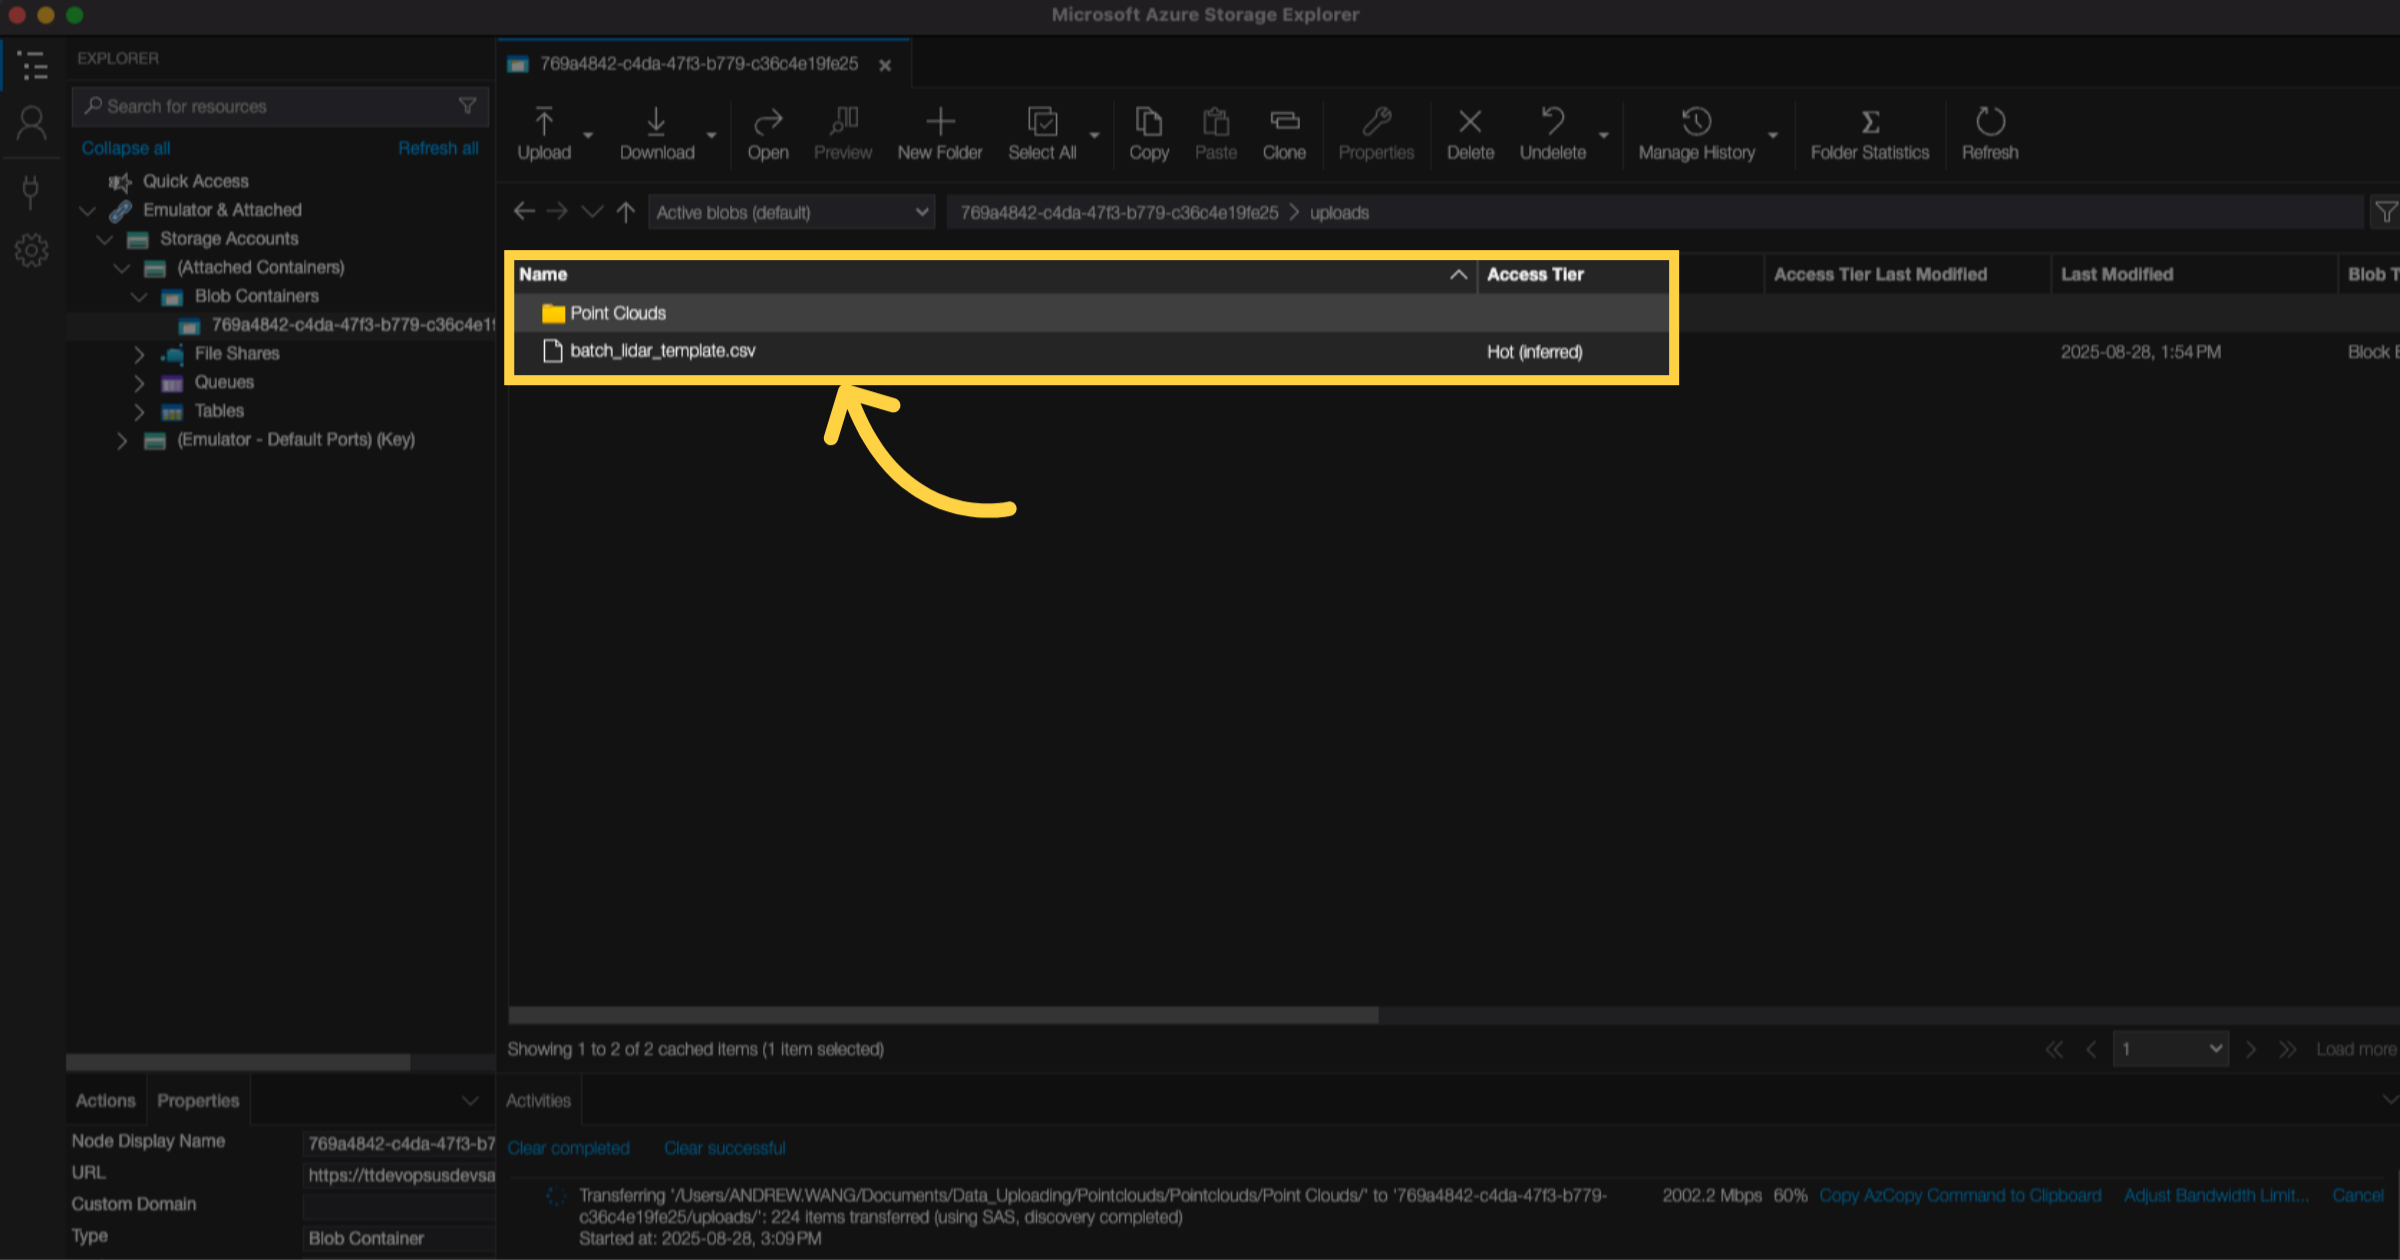
20. Your Point Clouds Folder appears here
21. Go back to the FusionMap
22. Click "Select From FusionCloud" button
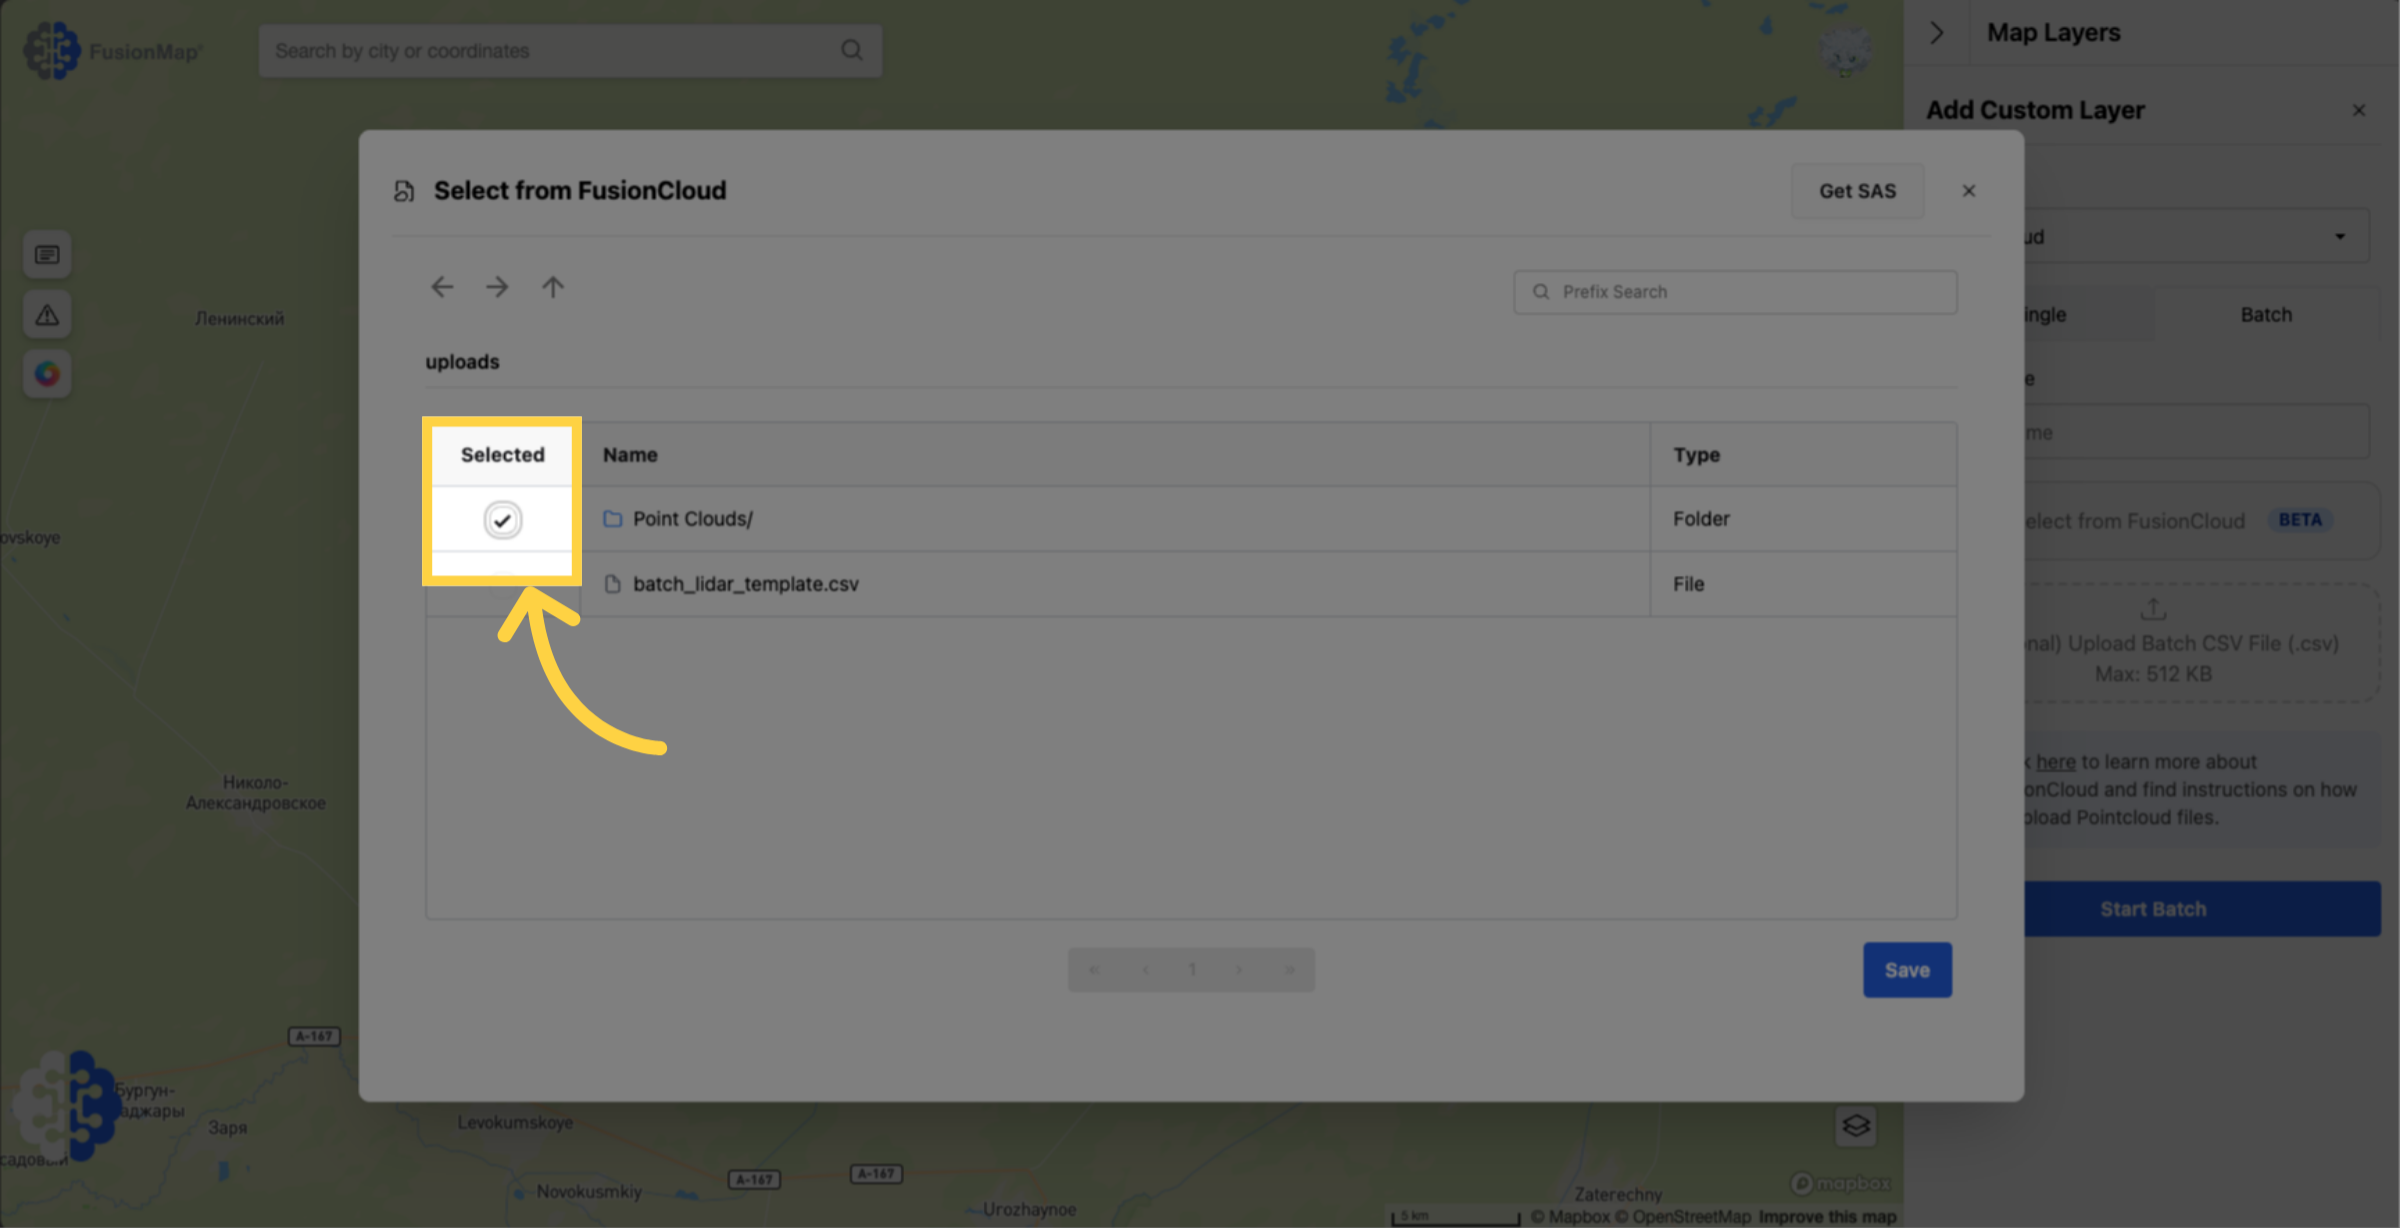
23. The dialog box opens up with your uploaded pointclouds
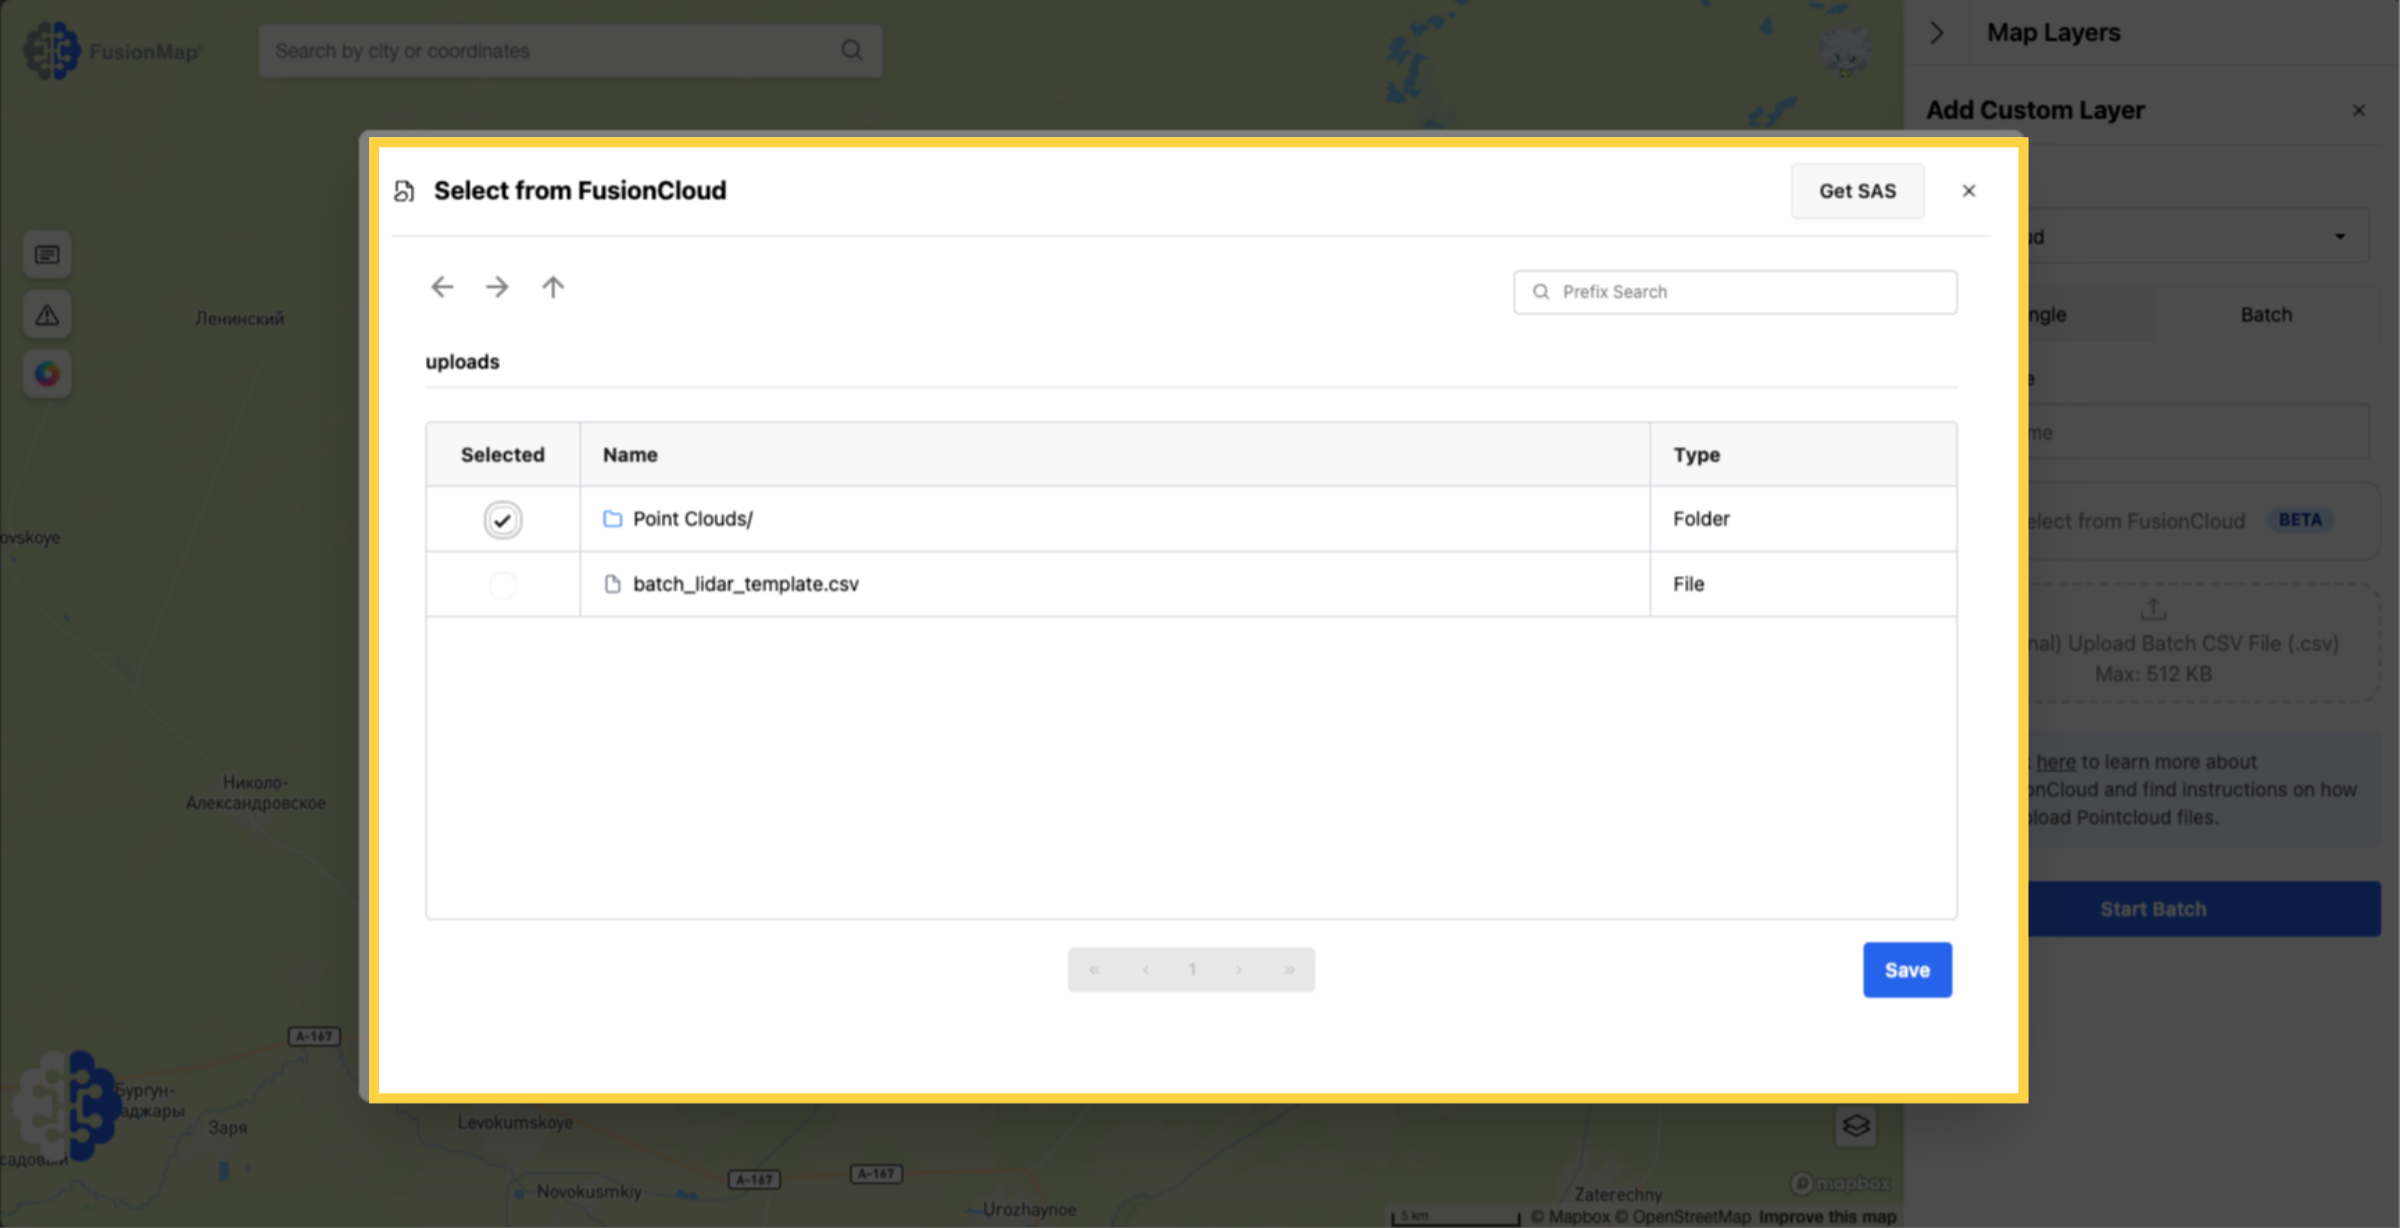
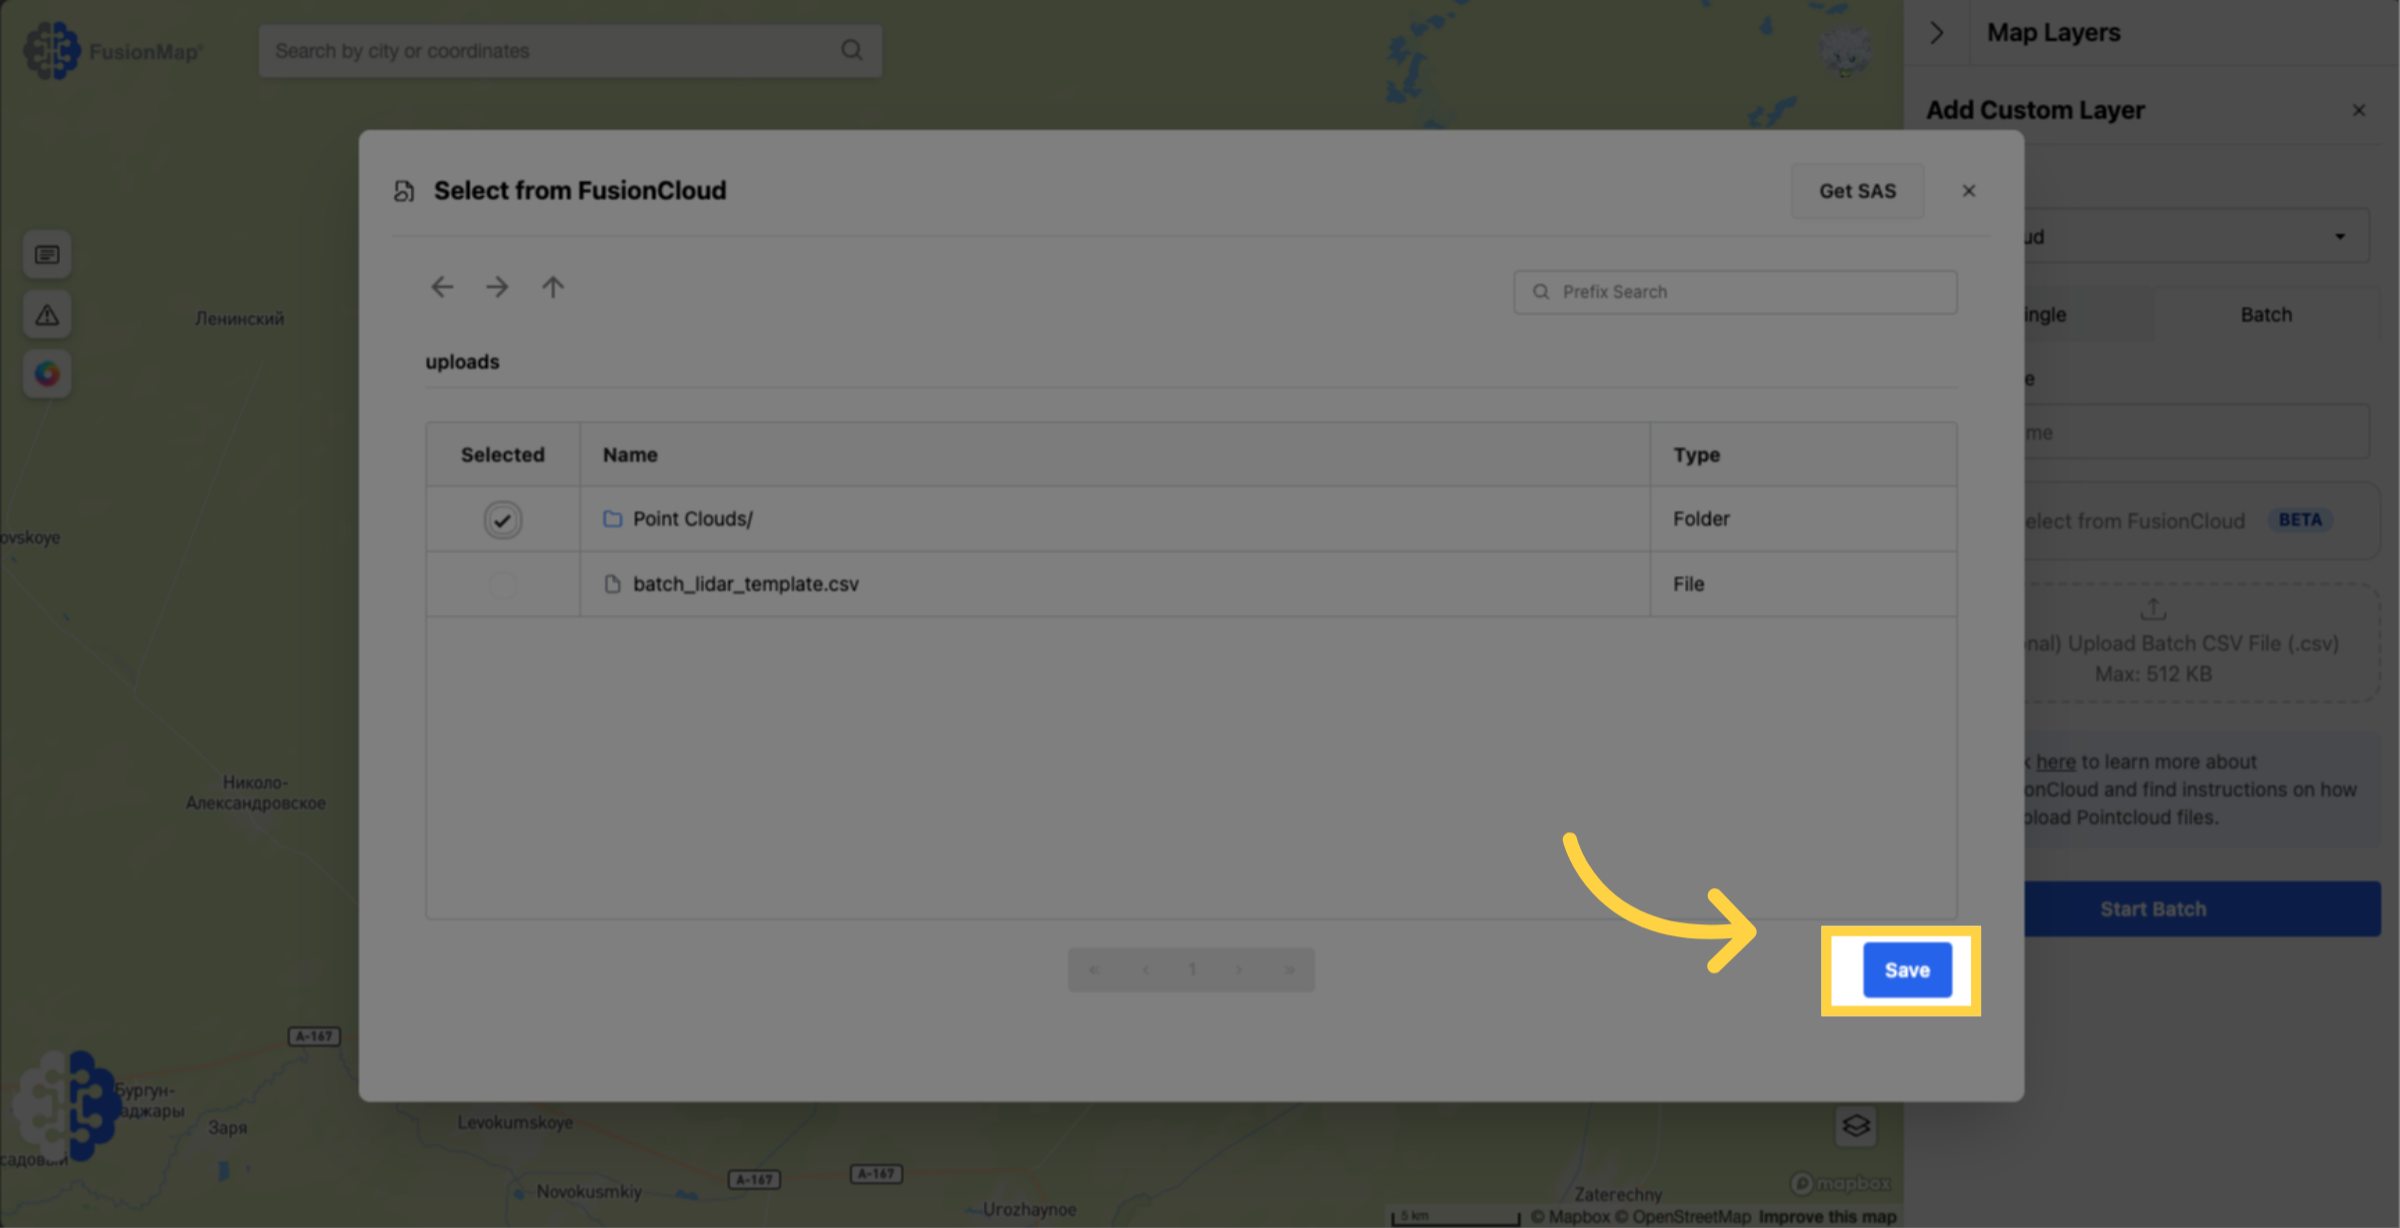
24. Select your pointclouds
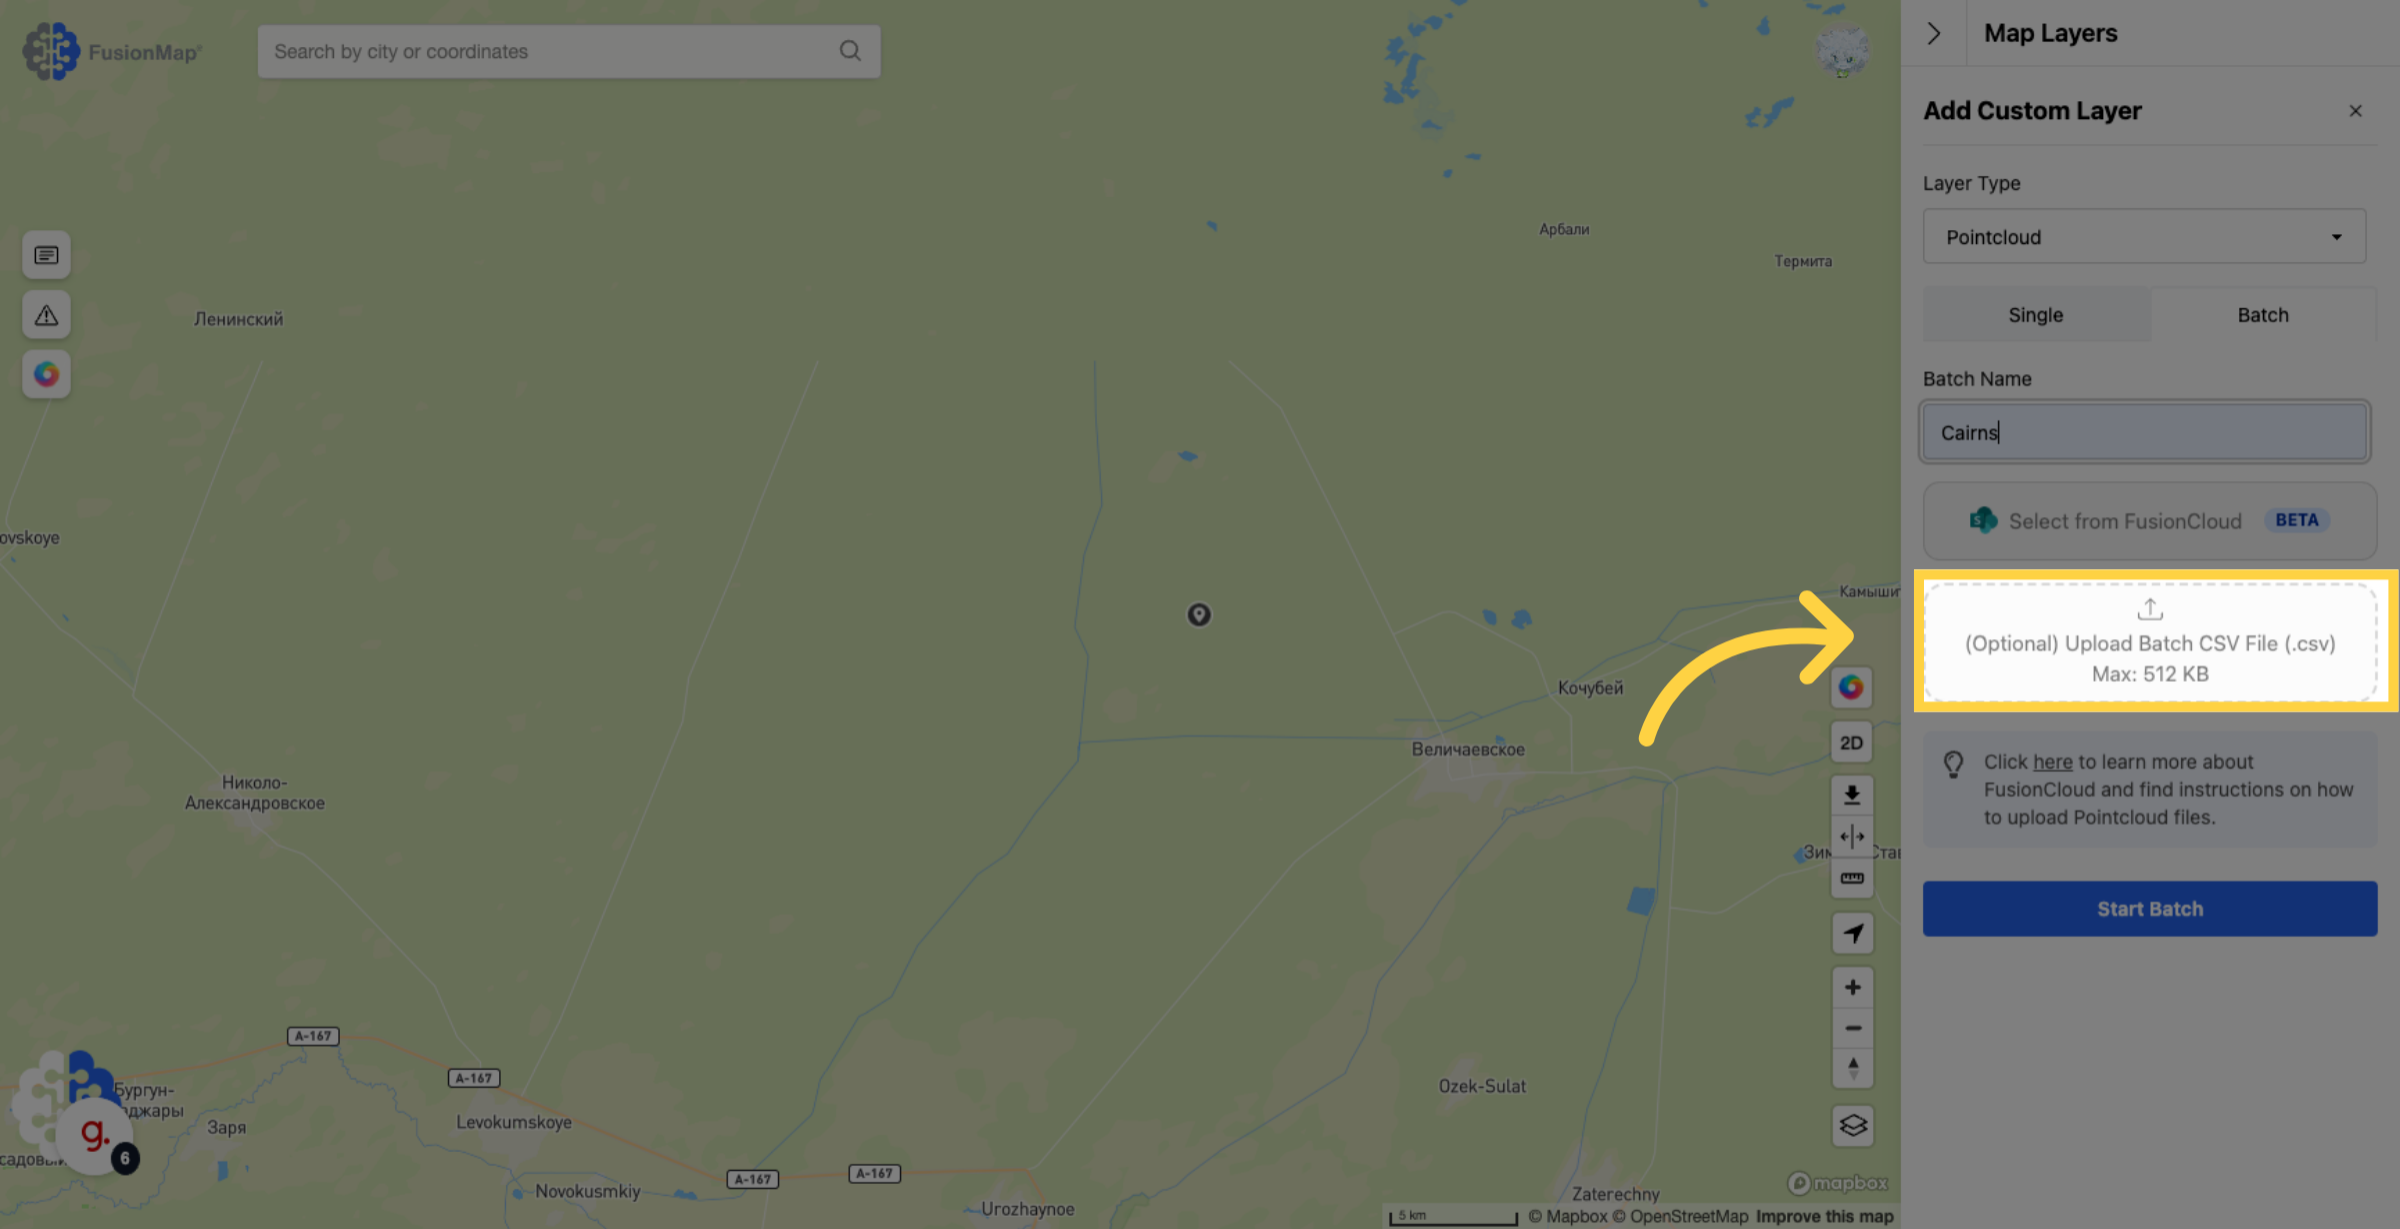
25. Hit Save
26. Optionally, you may upload a batch CSV file to add metadata to your pointclouds
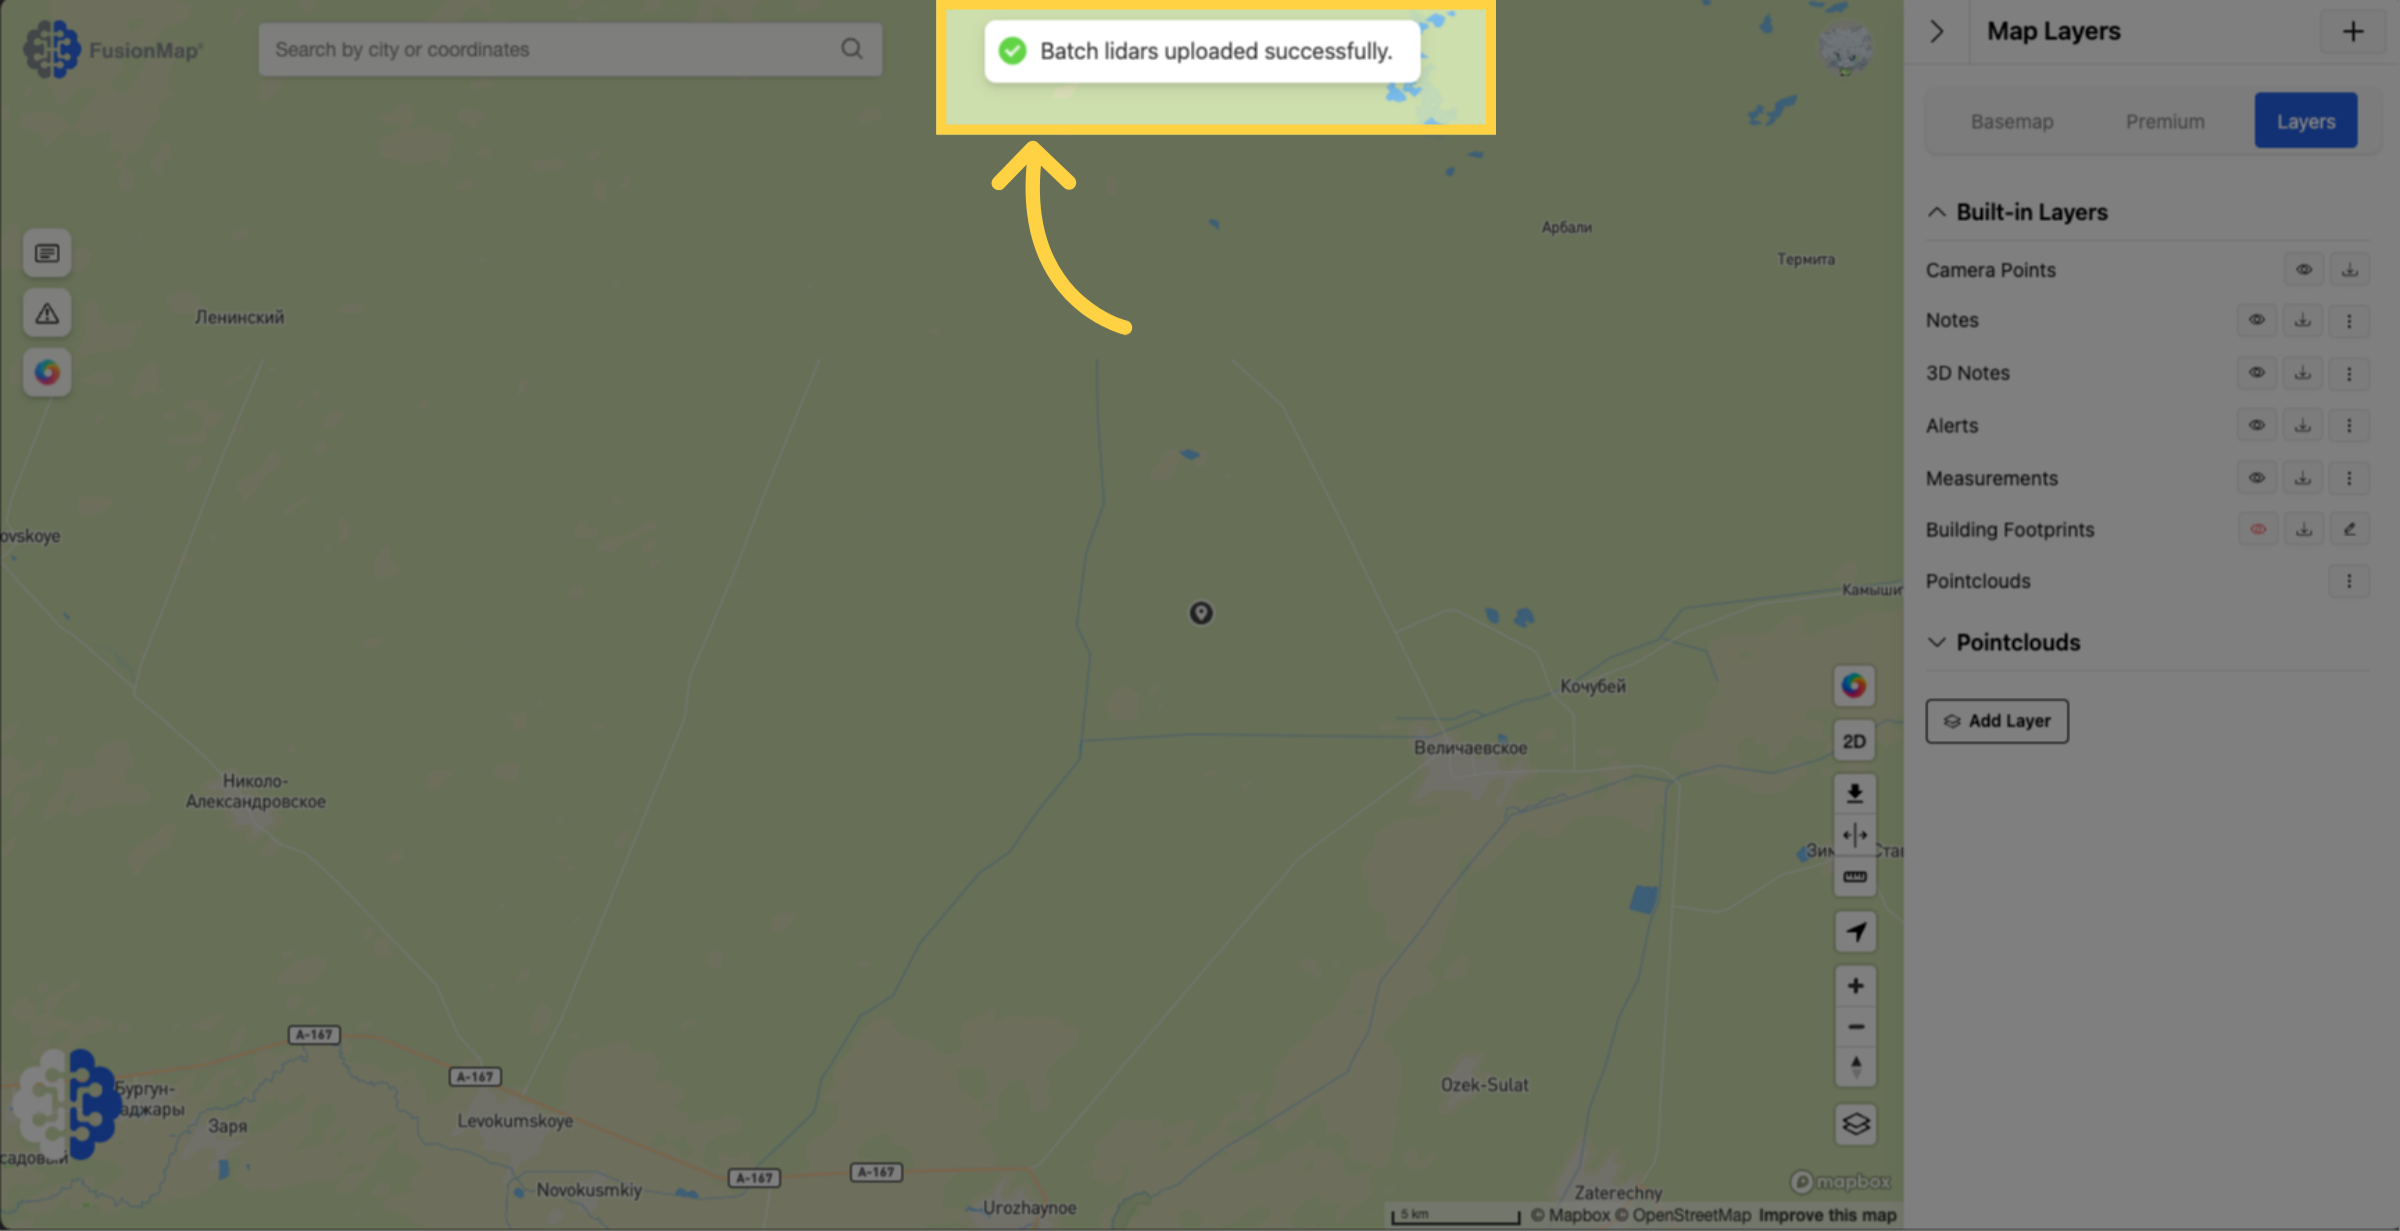
27. Click "Start Batch"
28. Once your upload is done, this message will pop up
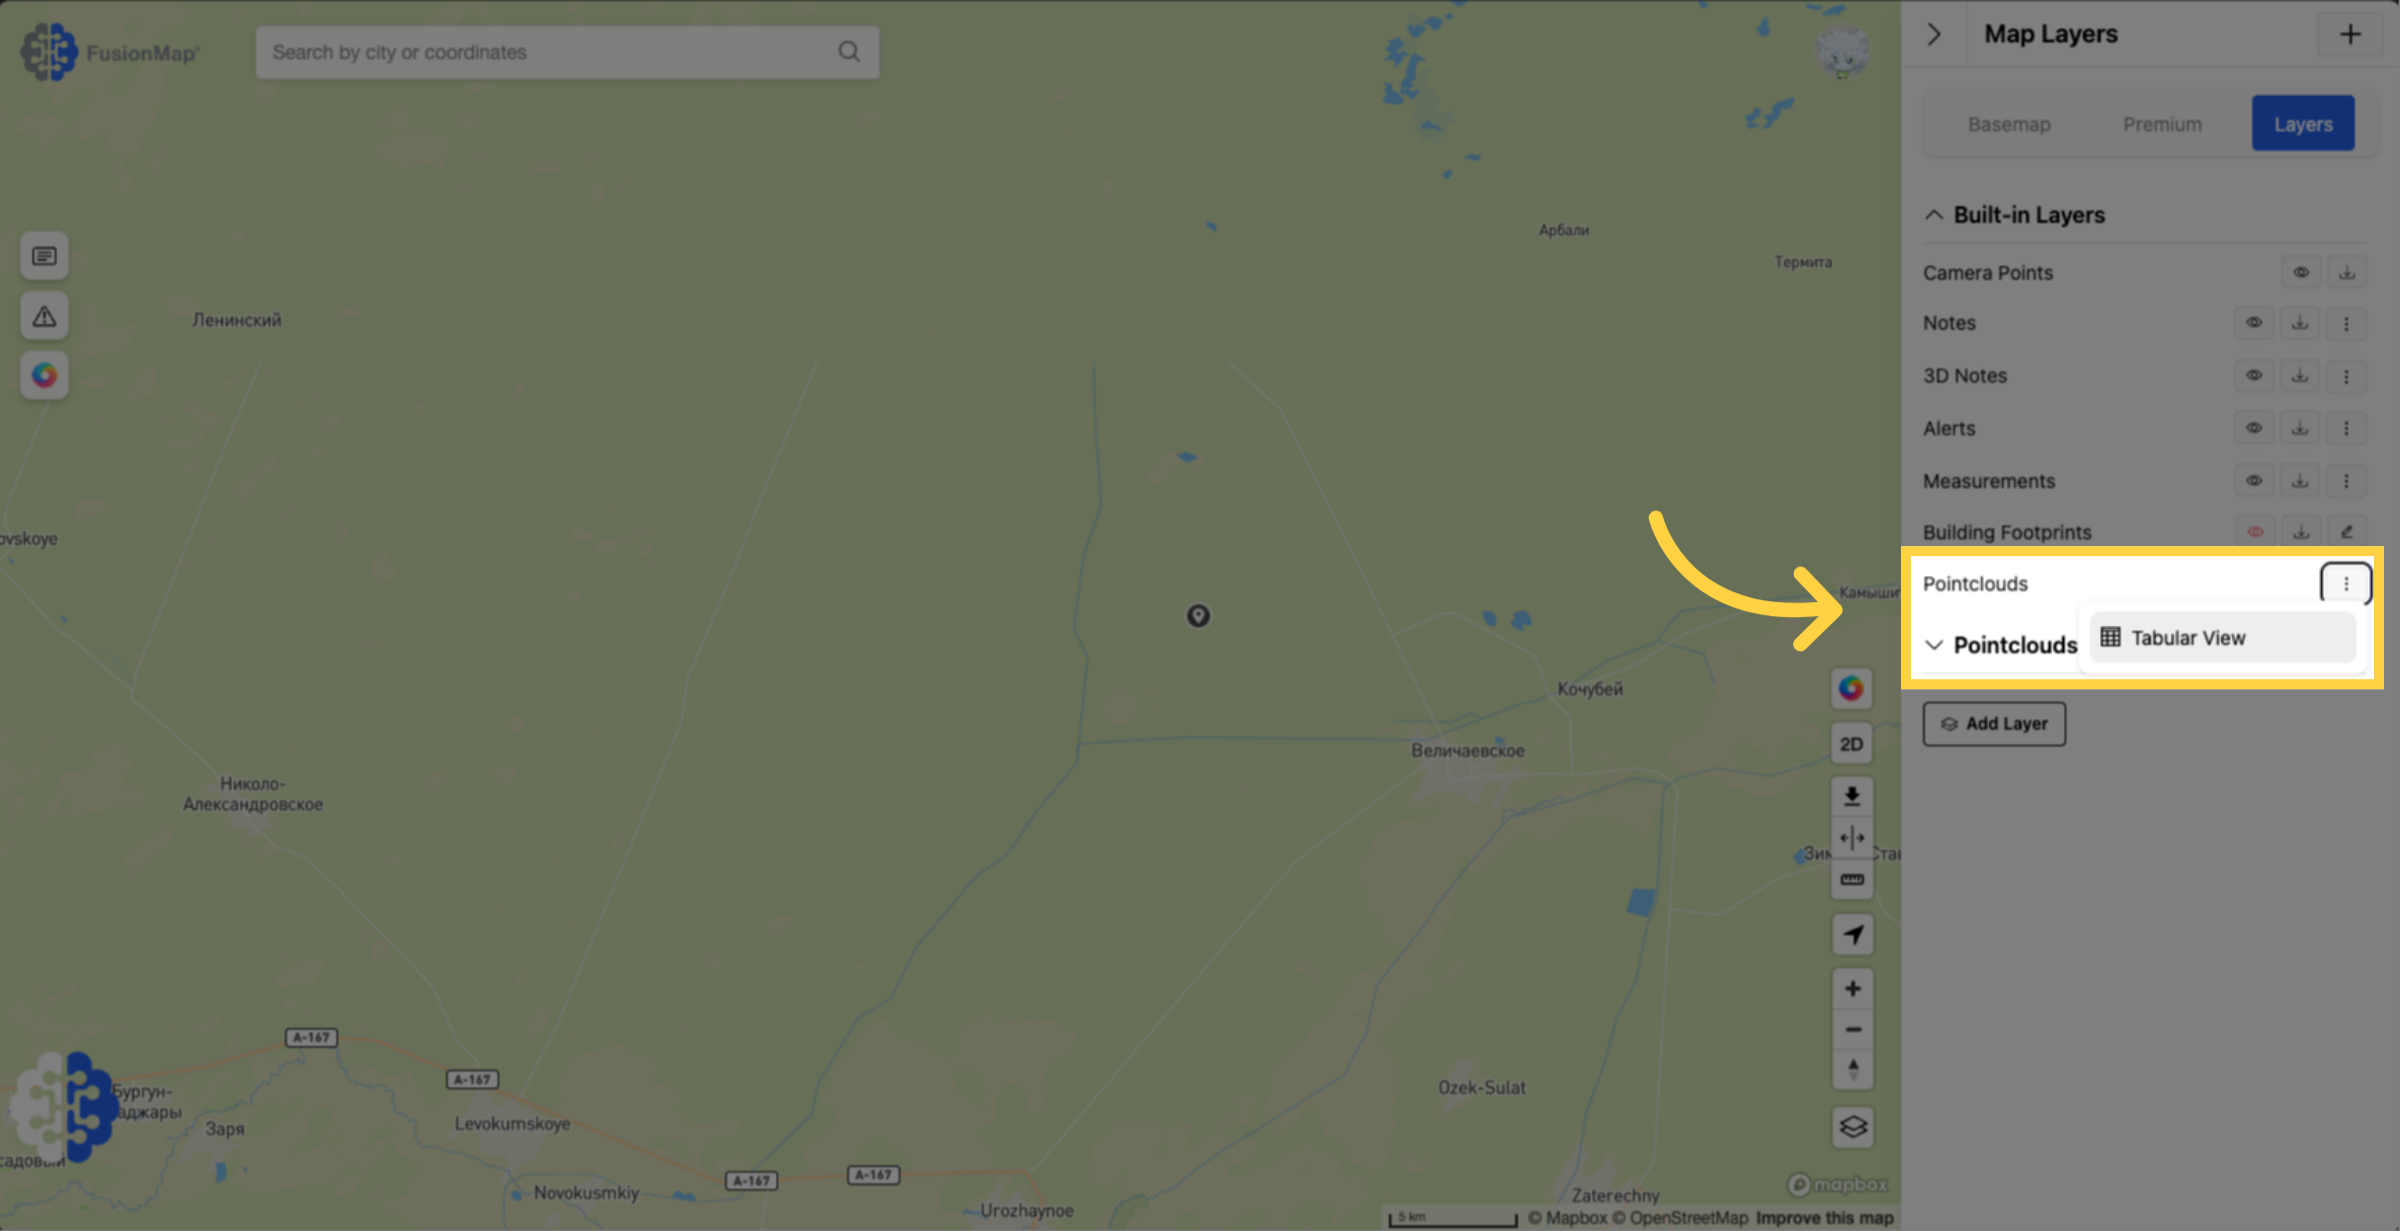
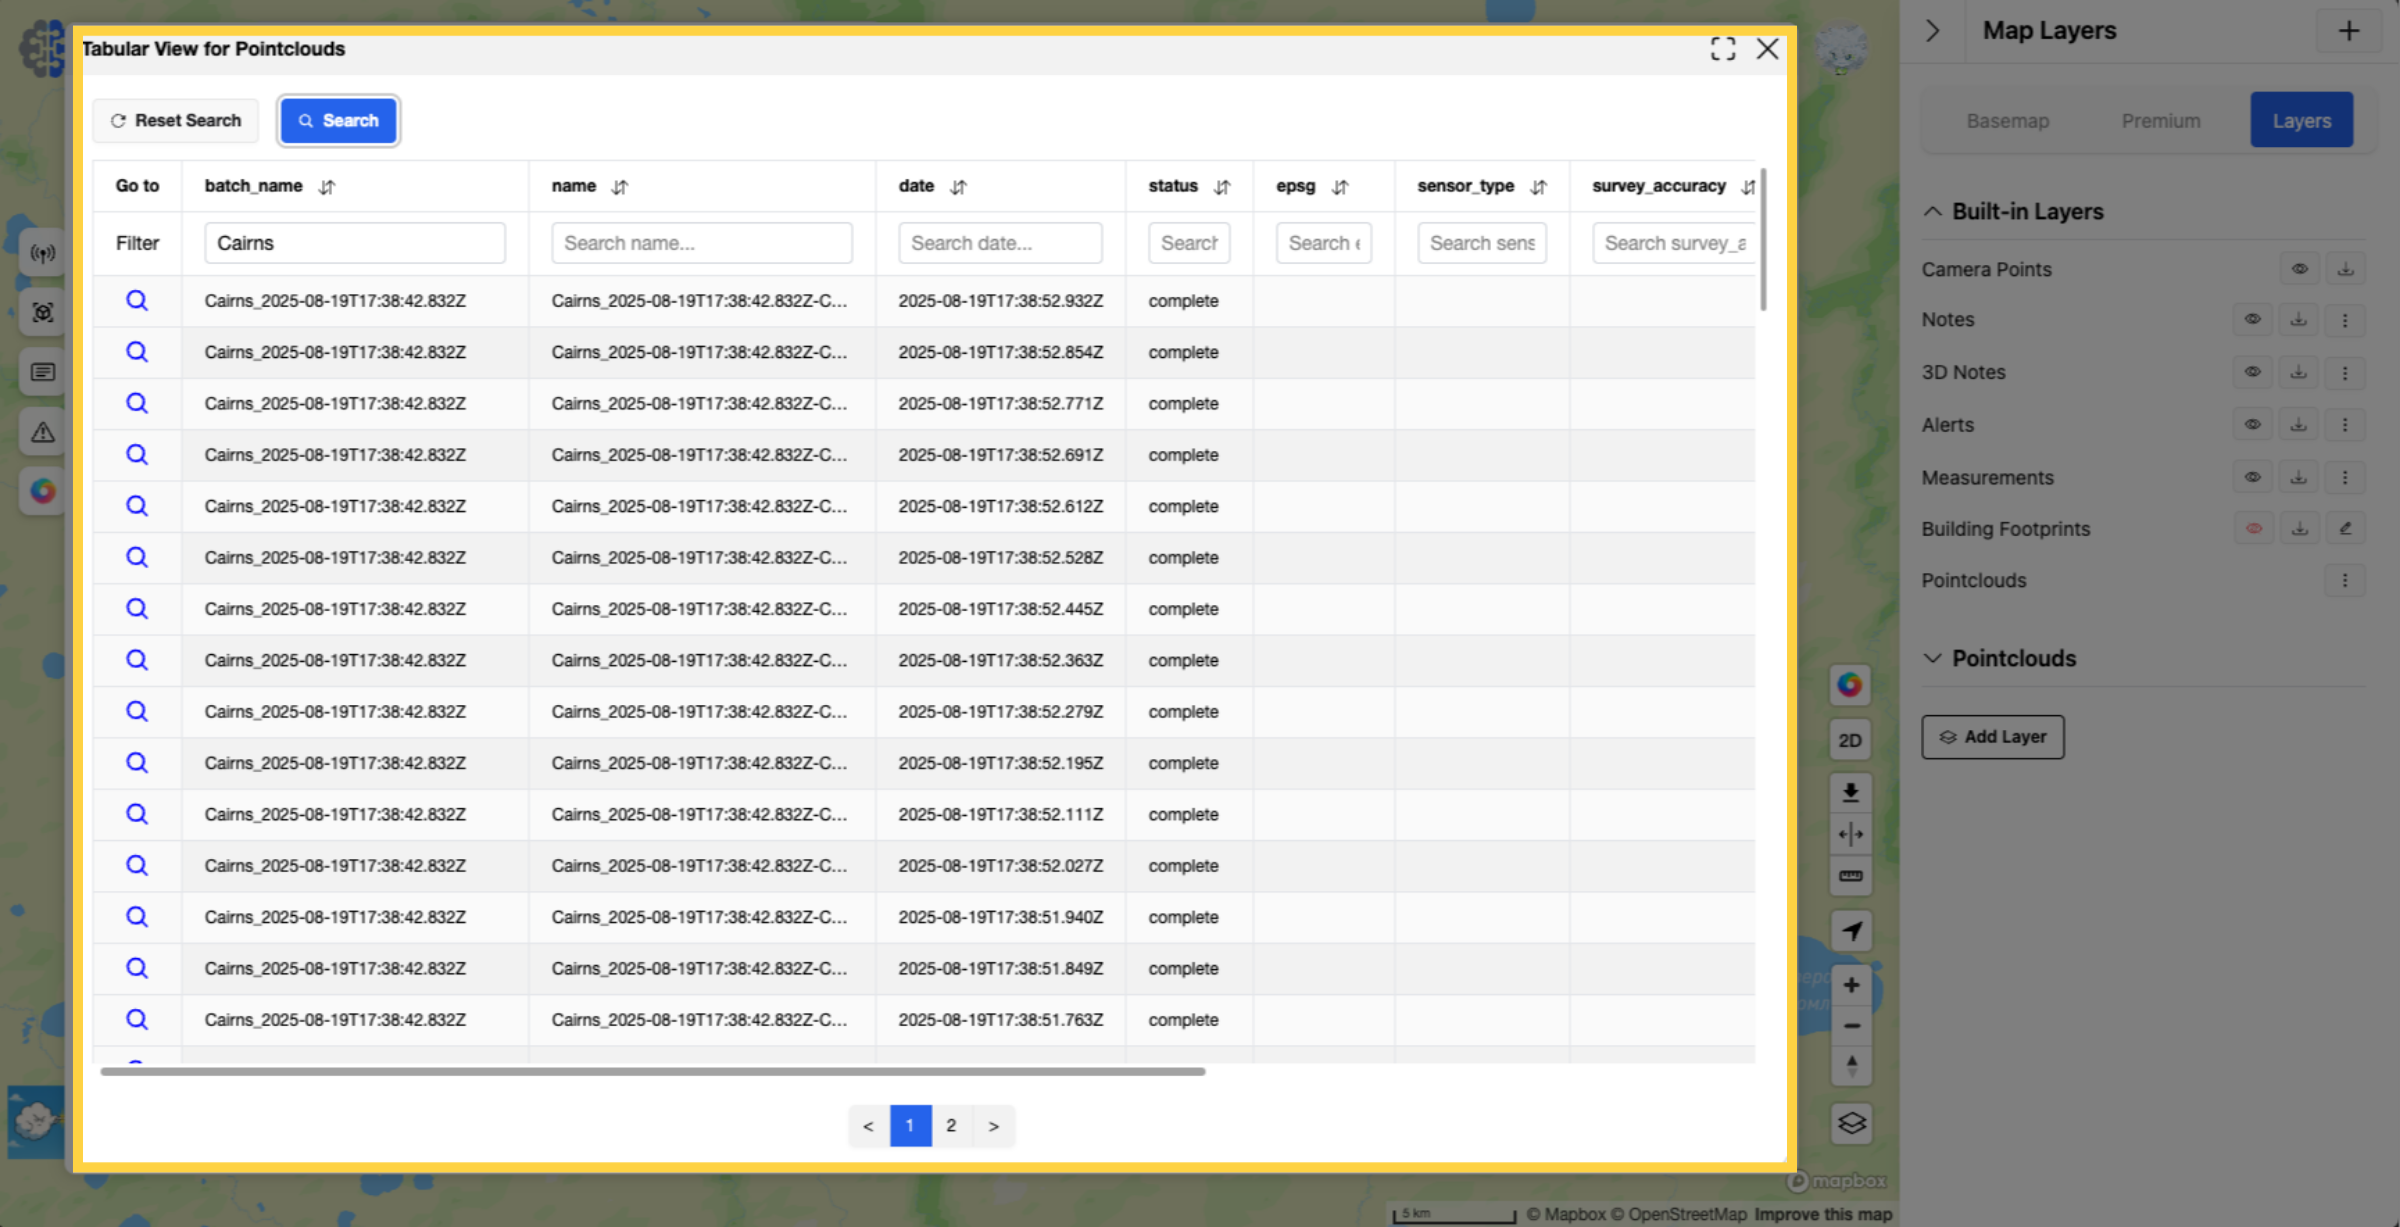
29. Your pointclouds should also show up under "Built-in Layers"

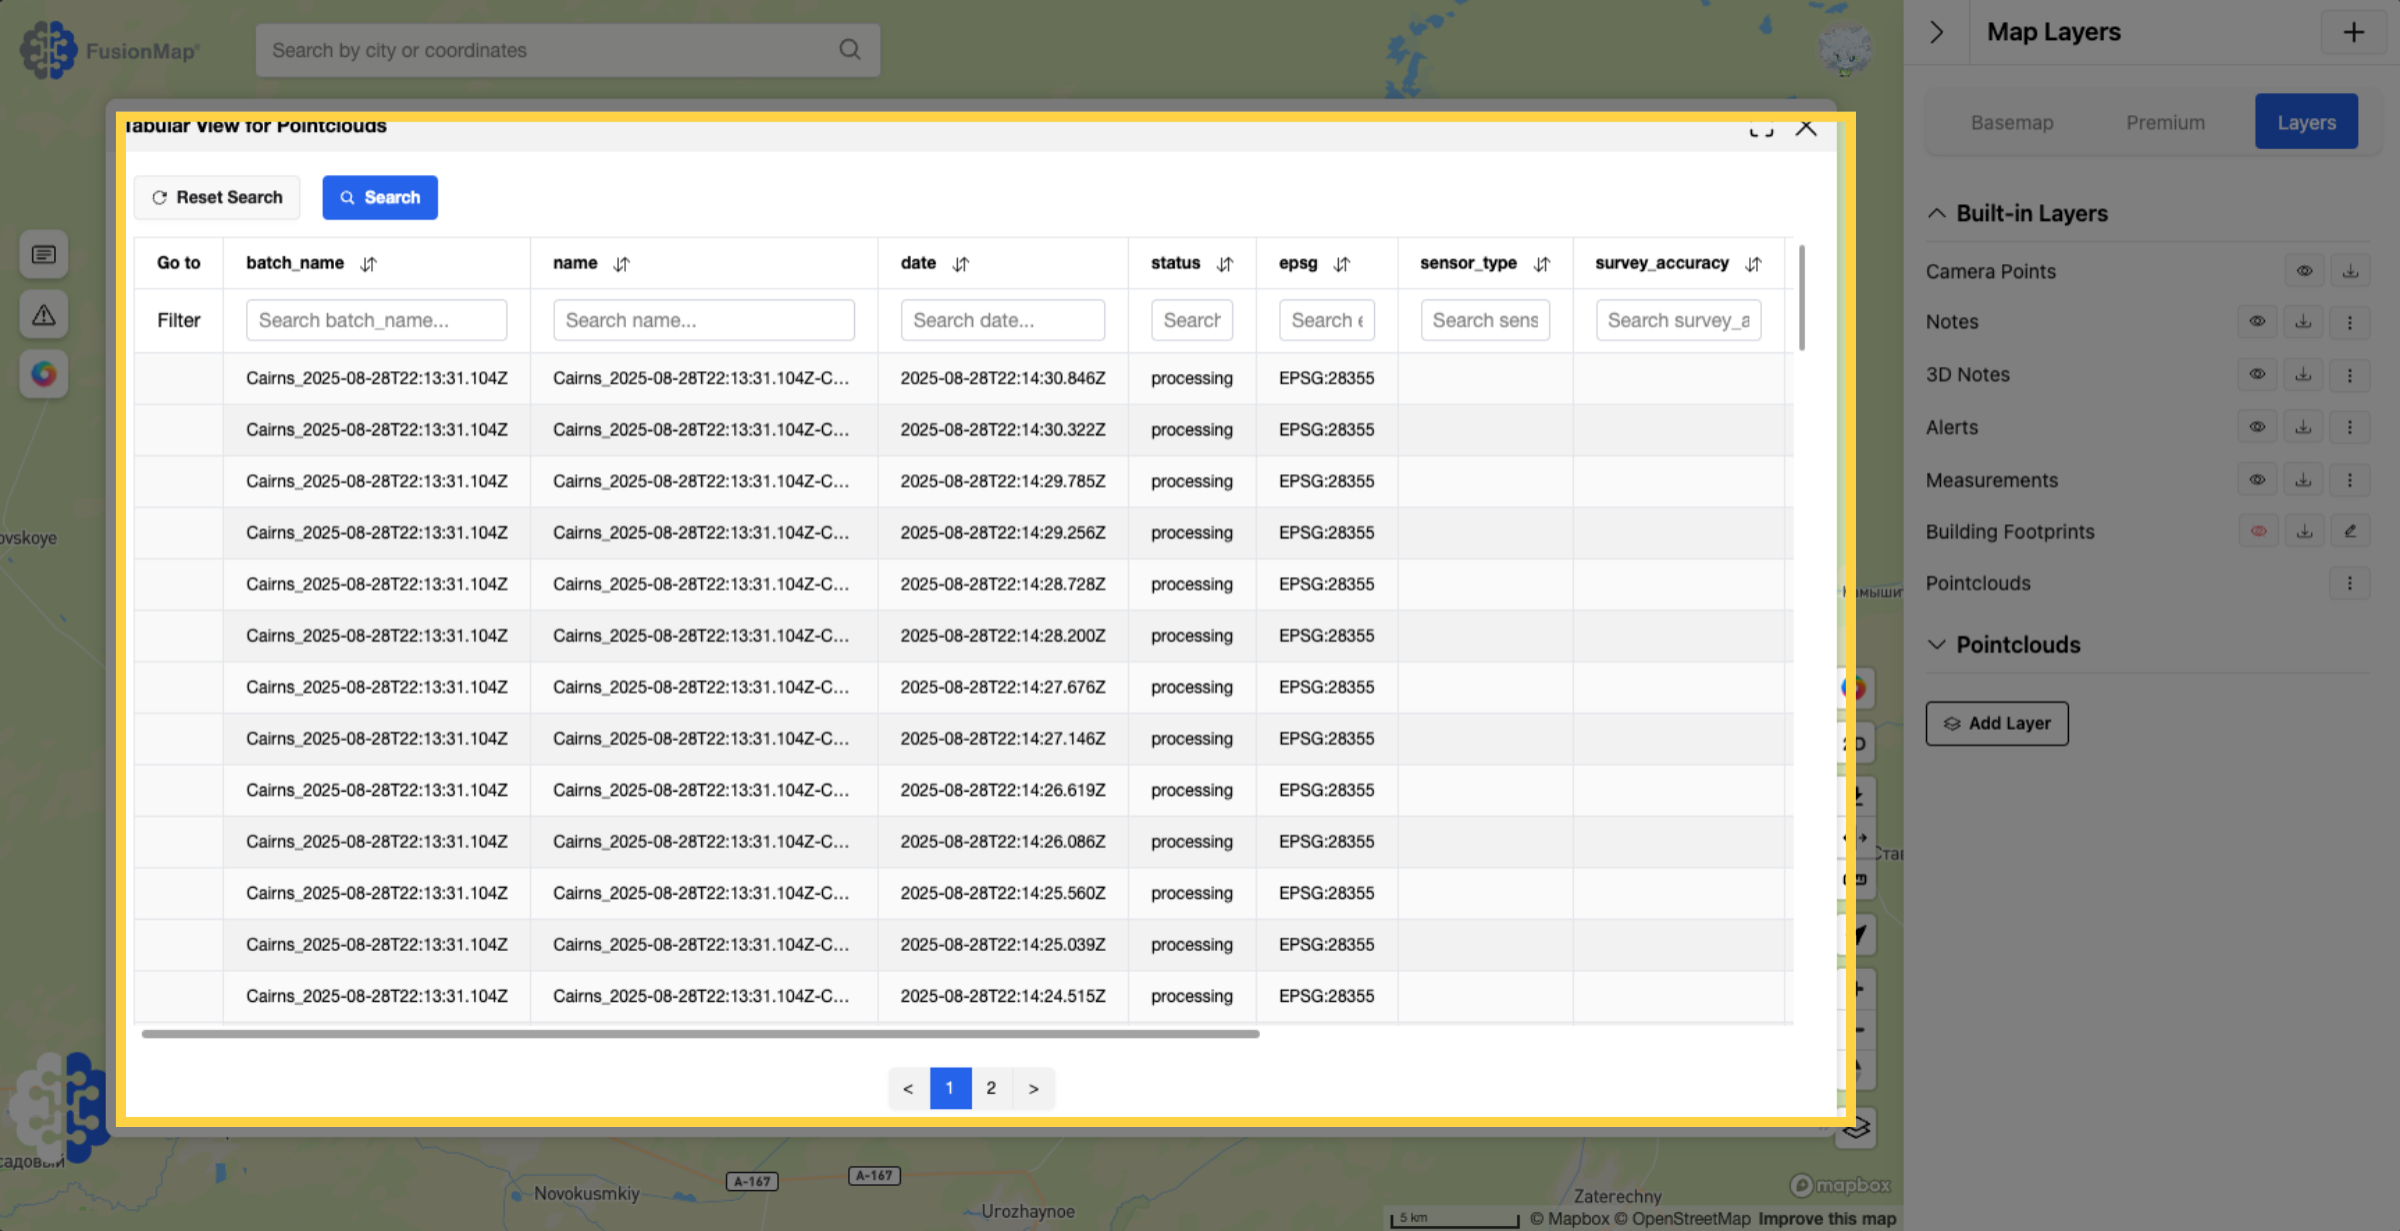
30. Click the three dots next to poinclouds and click "Tabular View"
31. Your pointclouds are now processing
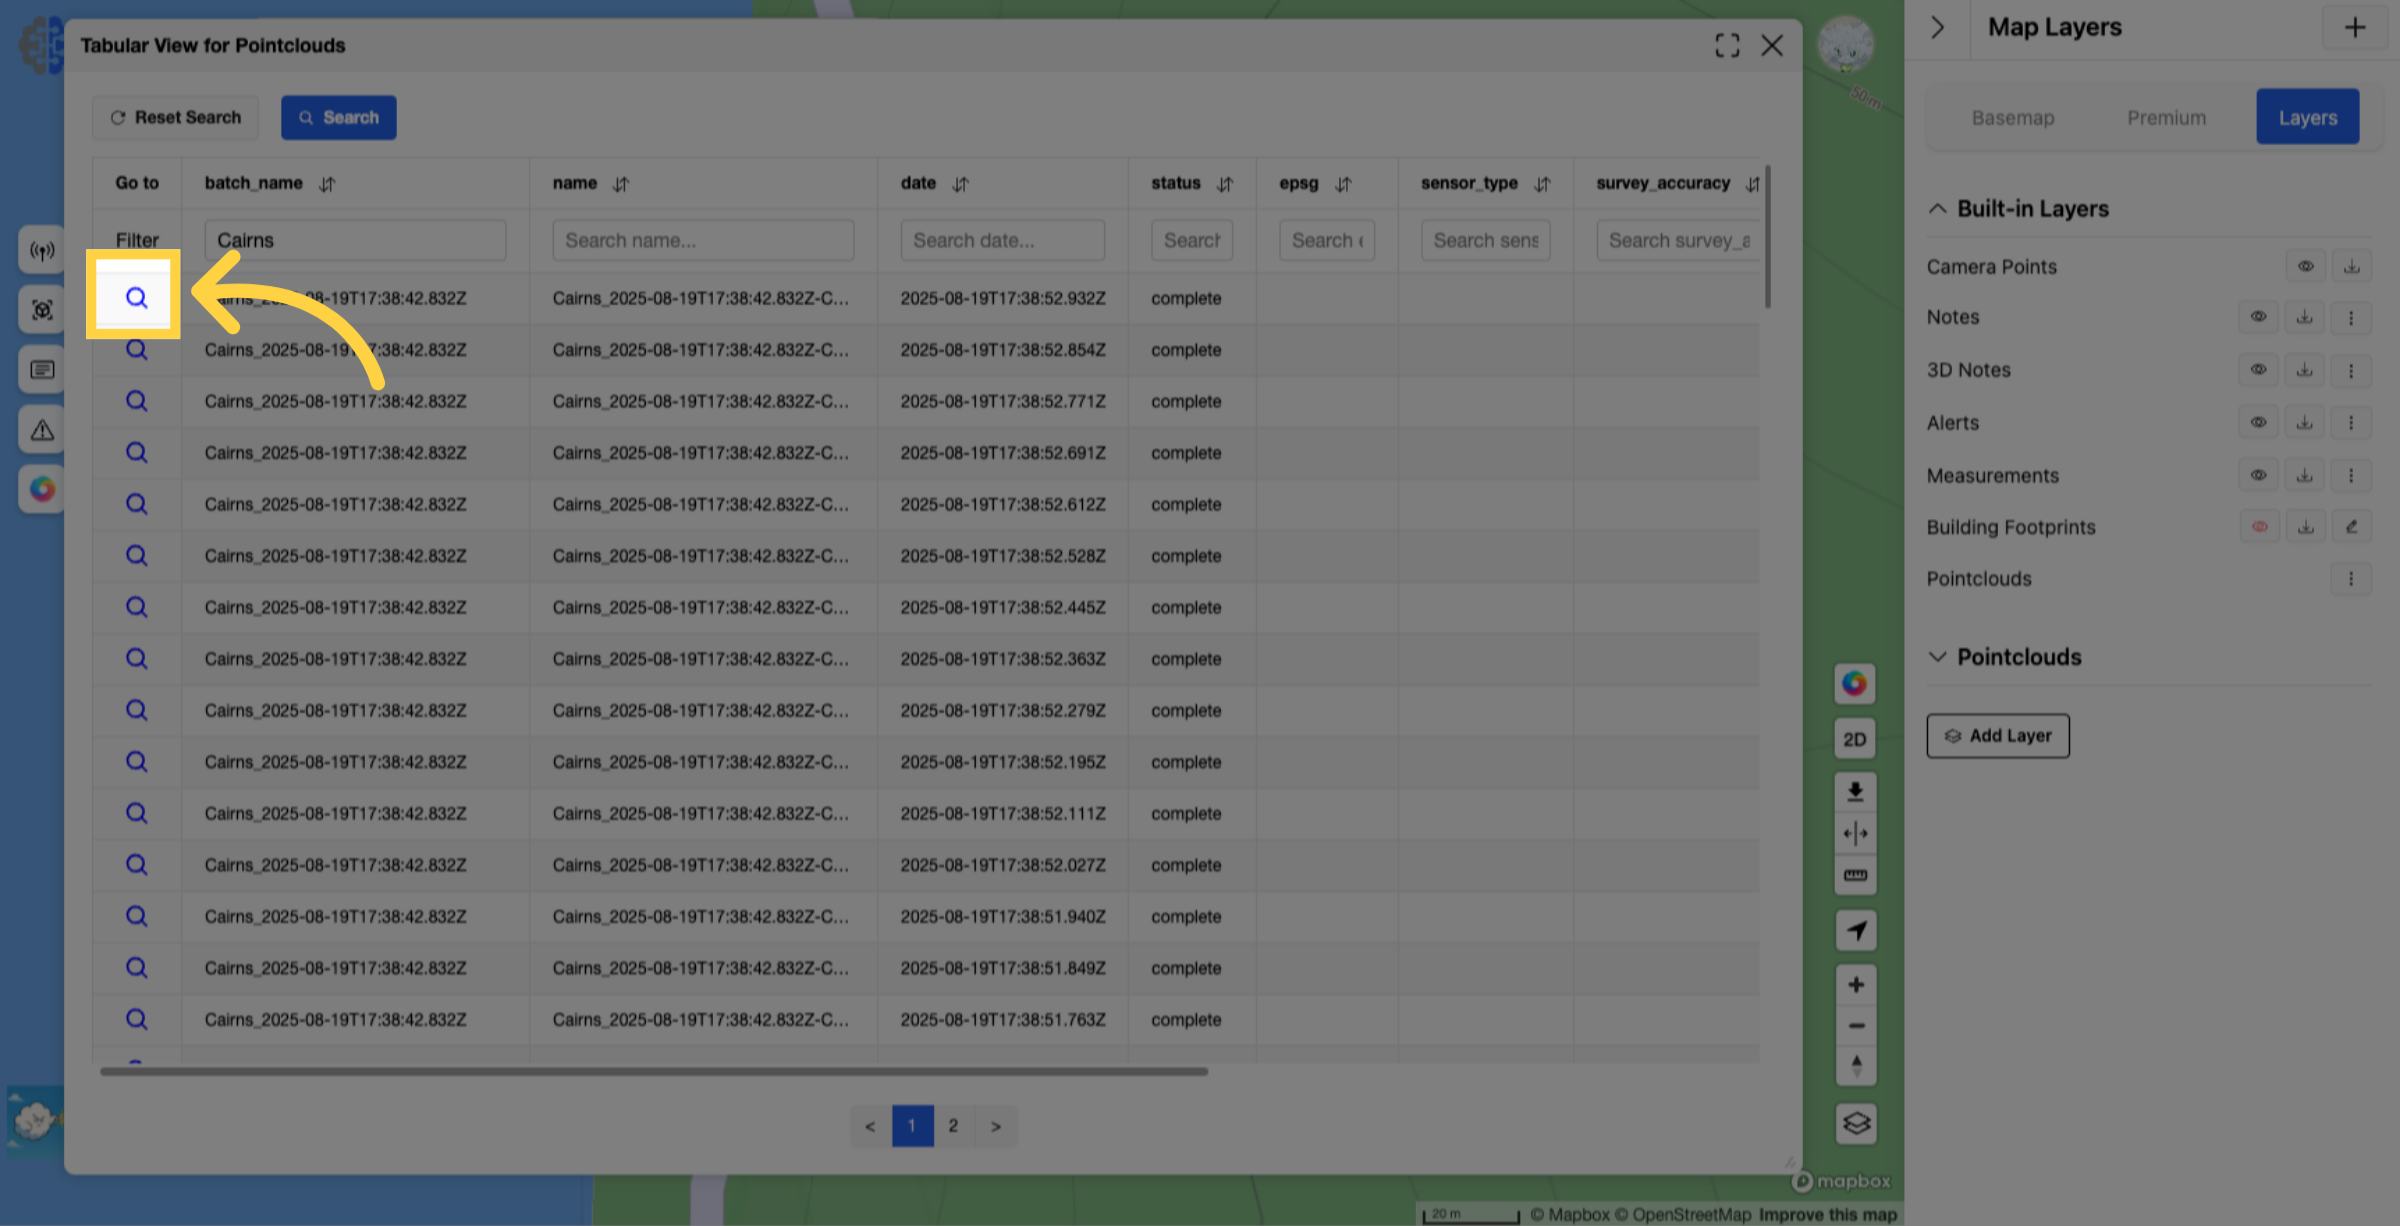
32. This is what it looks like once completed
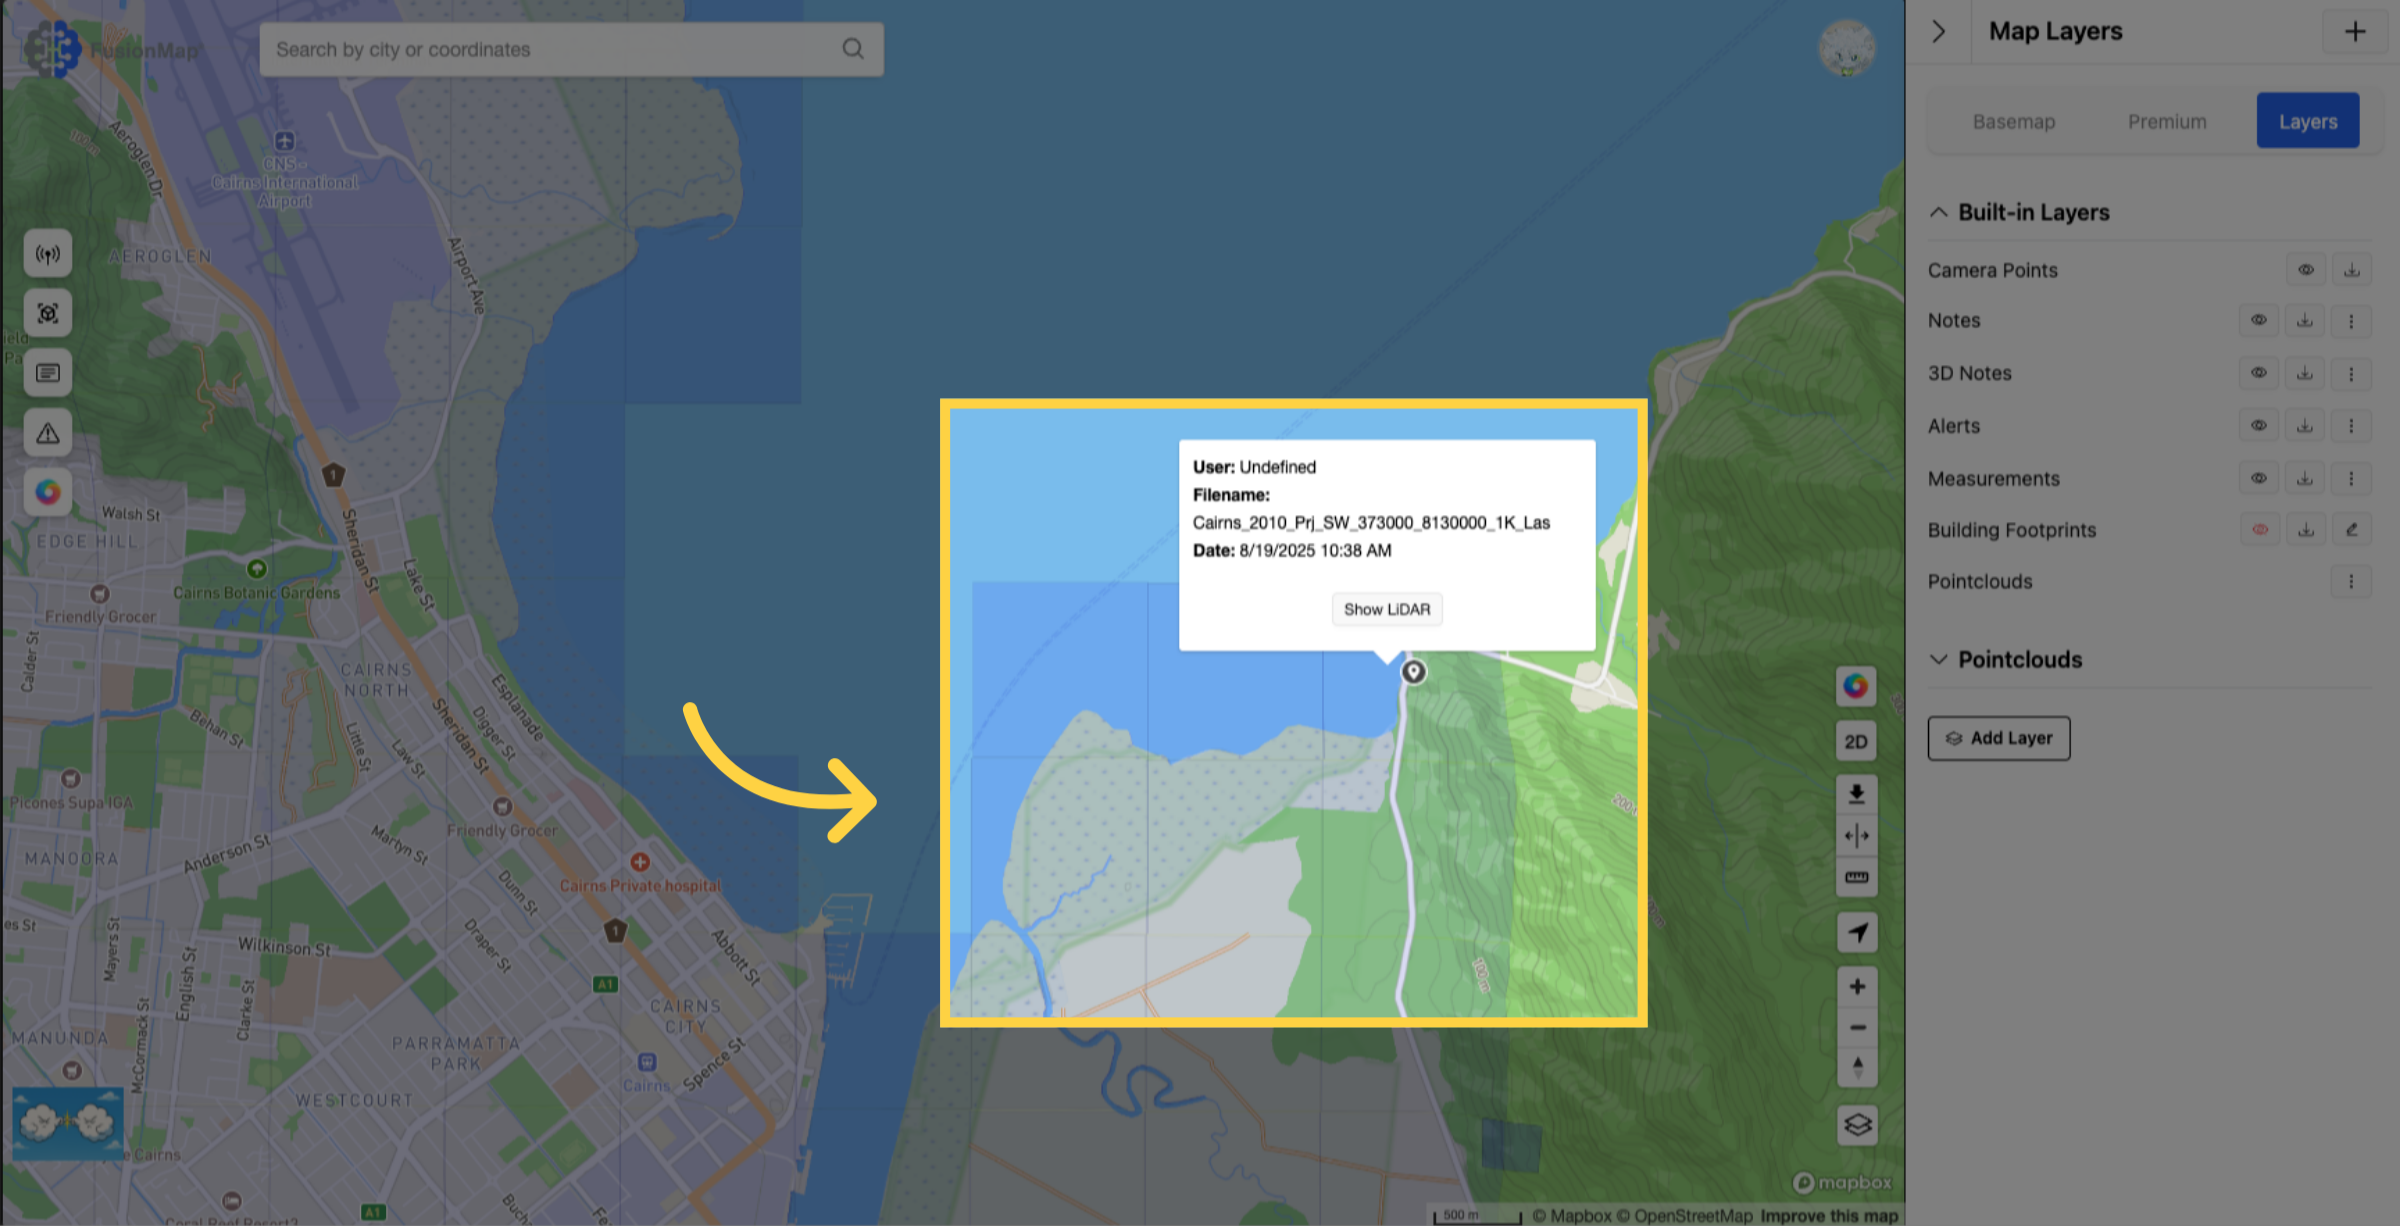
33. Click the "Go to" button to zoom to any pointcloud on the map
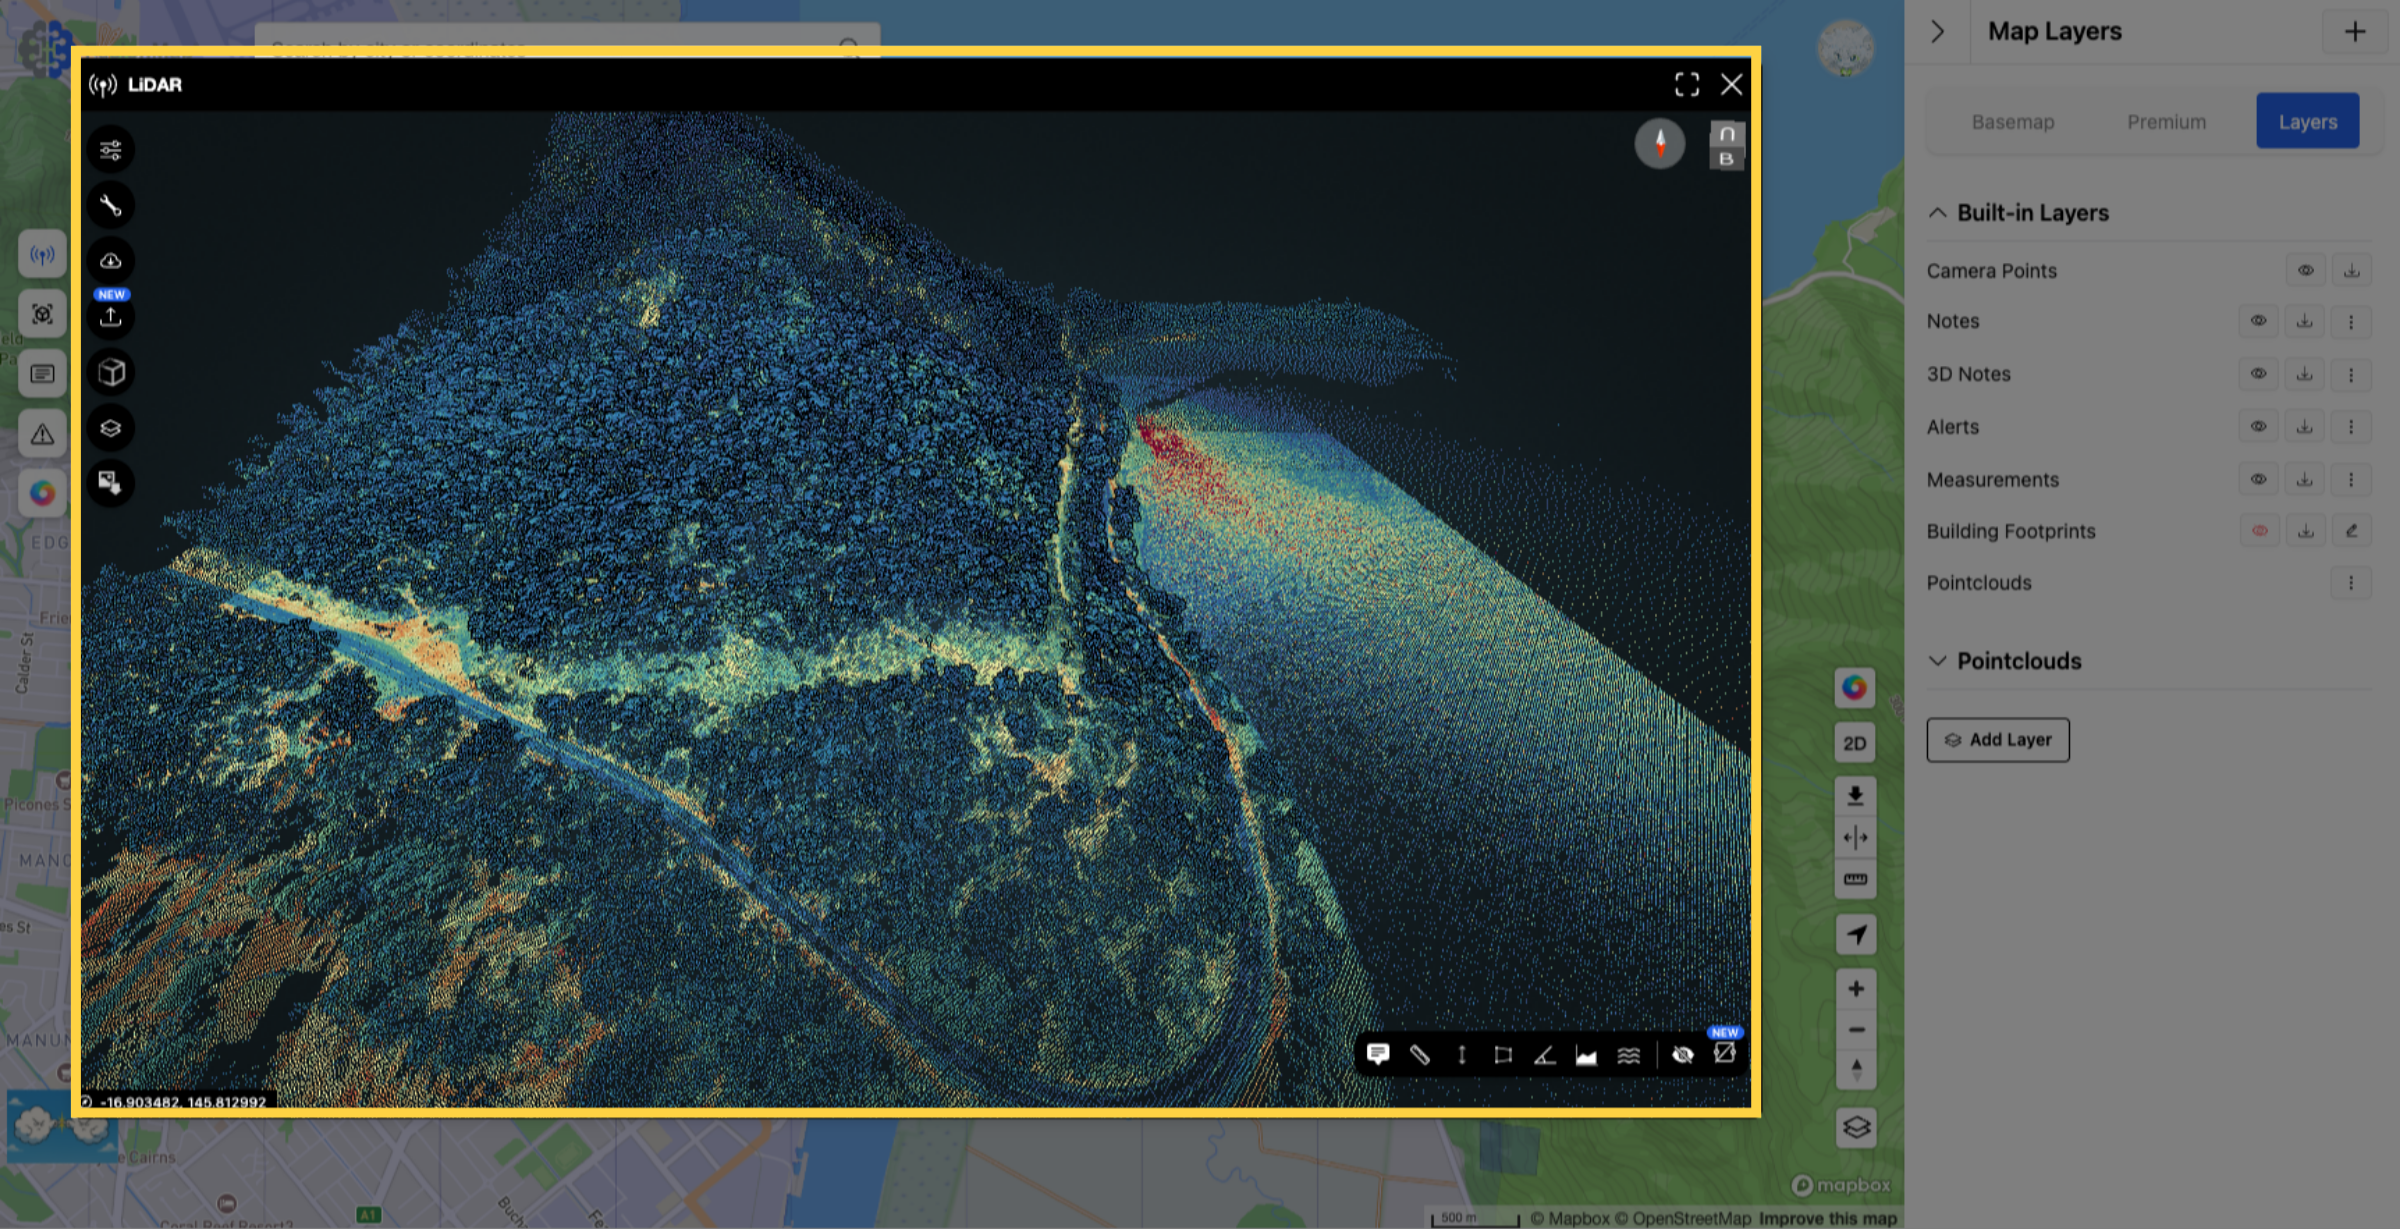
34. Click anywhere in the loaded LiDAR and click "Show LiDAR"
35. Your pointcloud will now open in the FusionMap LiDAR view
This guide walked you through uploading a batch of Pointcloud data, from adding a new layer and selecting the data format to naming your batch and securely connecting via FusionCloud BETA for a smooth upload process.